The Optical Tube
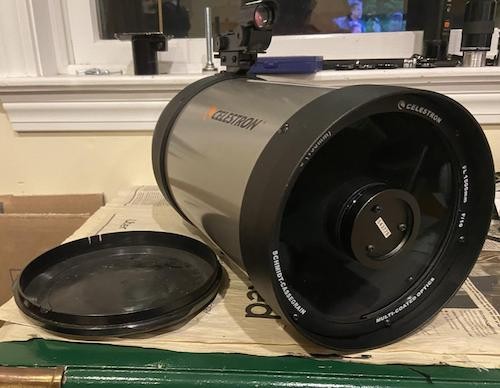
The Evolution 6 optical tube is the Celestron C6, which is a 6” (150mm) f/10 Schmidt-Cassegrain (SCT) type of telescope with a focal length of approximately 1500 mm.
The C6, released as recently as 2006, is the latest and second-smallest in Celestron’s standard SCT model lineup. The original Celestron 5, 8, 11, and 14 were released in the 1970s, with the C9.25 following in the 1990s.
When compared with the smaller Celestron C5, I very much like that the C6 offers me much more light-gathering capability and resolution. The C5, which I’ve also used, has a larger central obstruction, lacks HyperStar capability, and is only negligibly smaller in physical size.
Like all Schmidt-Cassegrains, I adjust the focus by turning a knob that’s shown in the below picture, which moves the primary mirror back and forth. What I particularly noticed is that the C6 doesn’t really suffer from mirror flop (slight movement of mirror over time during long astrophotography sessions) like larger Schmidt-Cassegrains on account of its small size.

We attach accessories with the use of threaded adapters to the back, which can accept standard 1.25” or 2” ports or a camera T-ring for astrophotography.
Even if I use a 2″ eyepiece or an f/6.3 reducer (both cause slight vignetting), I’m limited to about a 1 degree field of view with the Evolution 6, which is about what I get with the included 40mm 1.25″ Plossl eyepiece. This is not the widest field of view a 6” aperture telescope has provided me, but I’d still say that it’s enough for most viewing purposes.
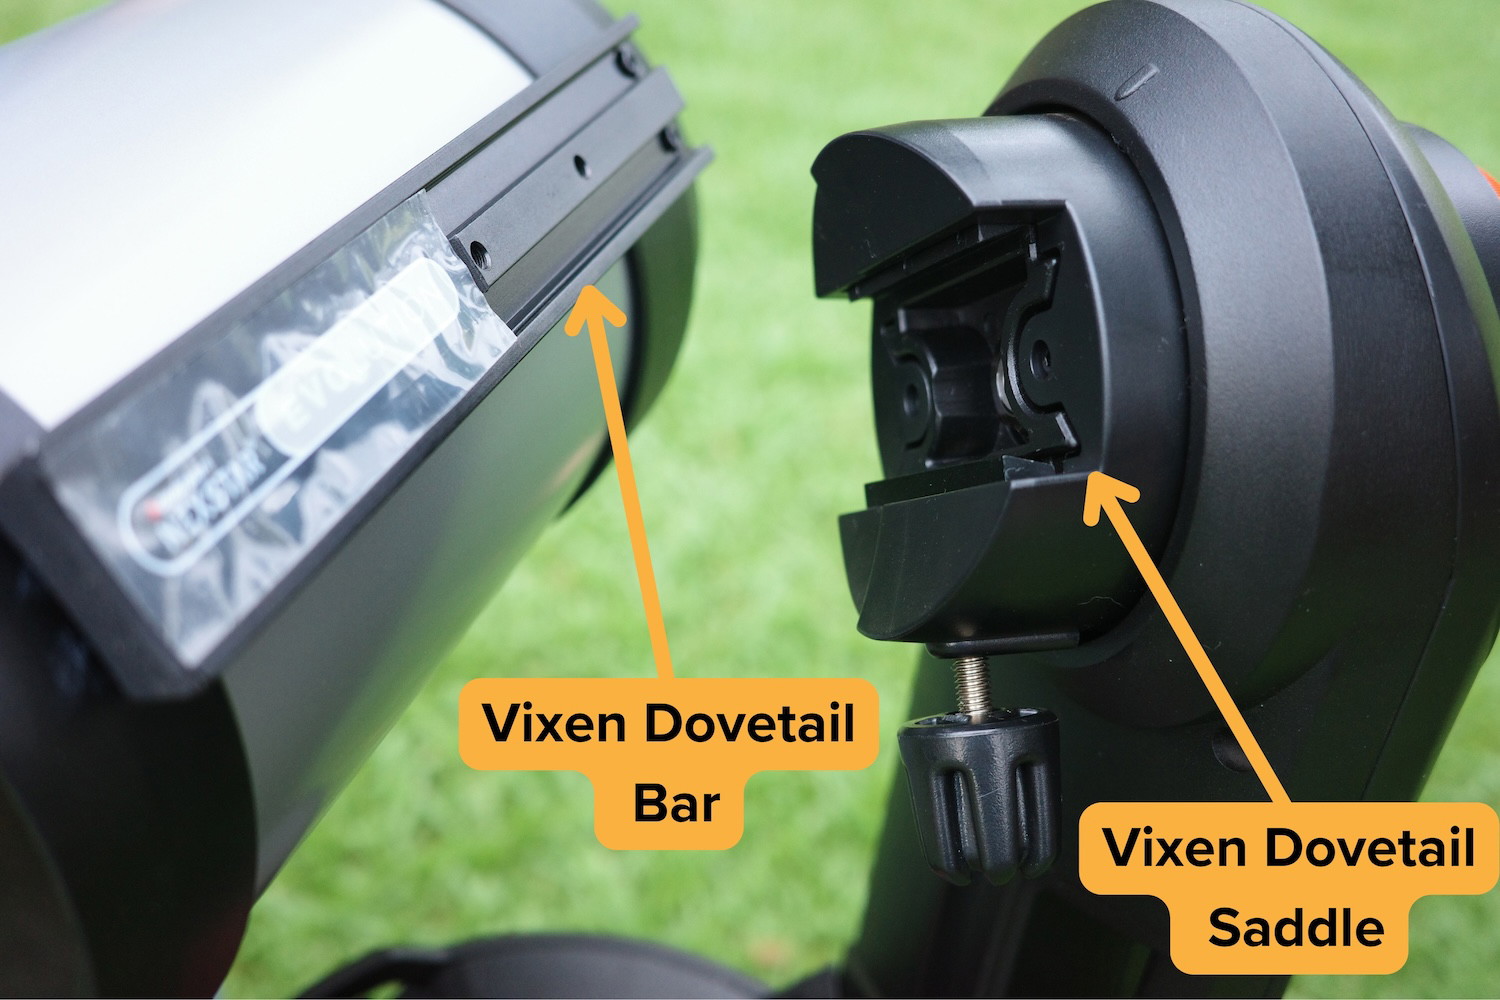
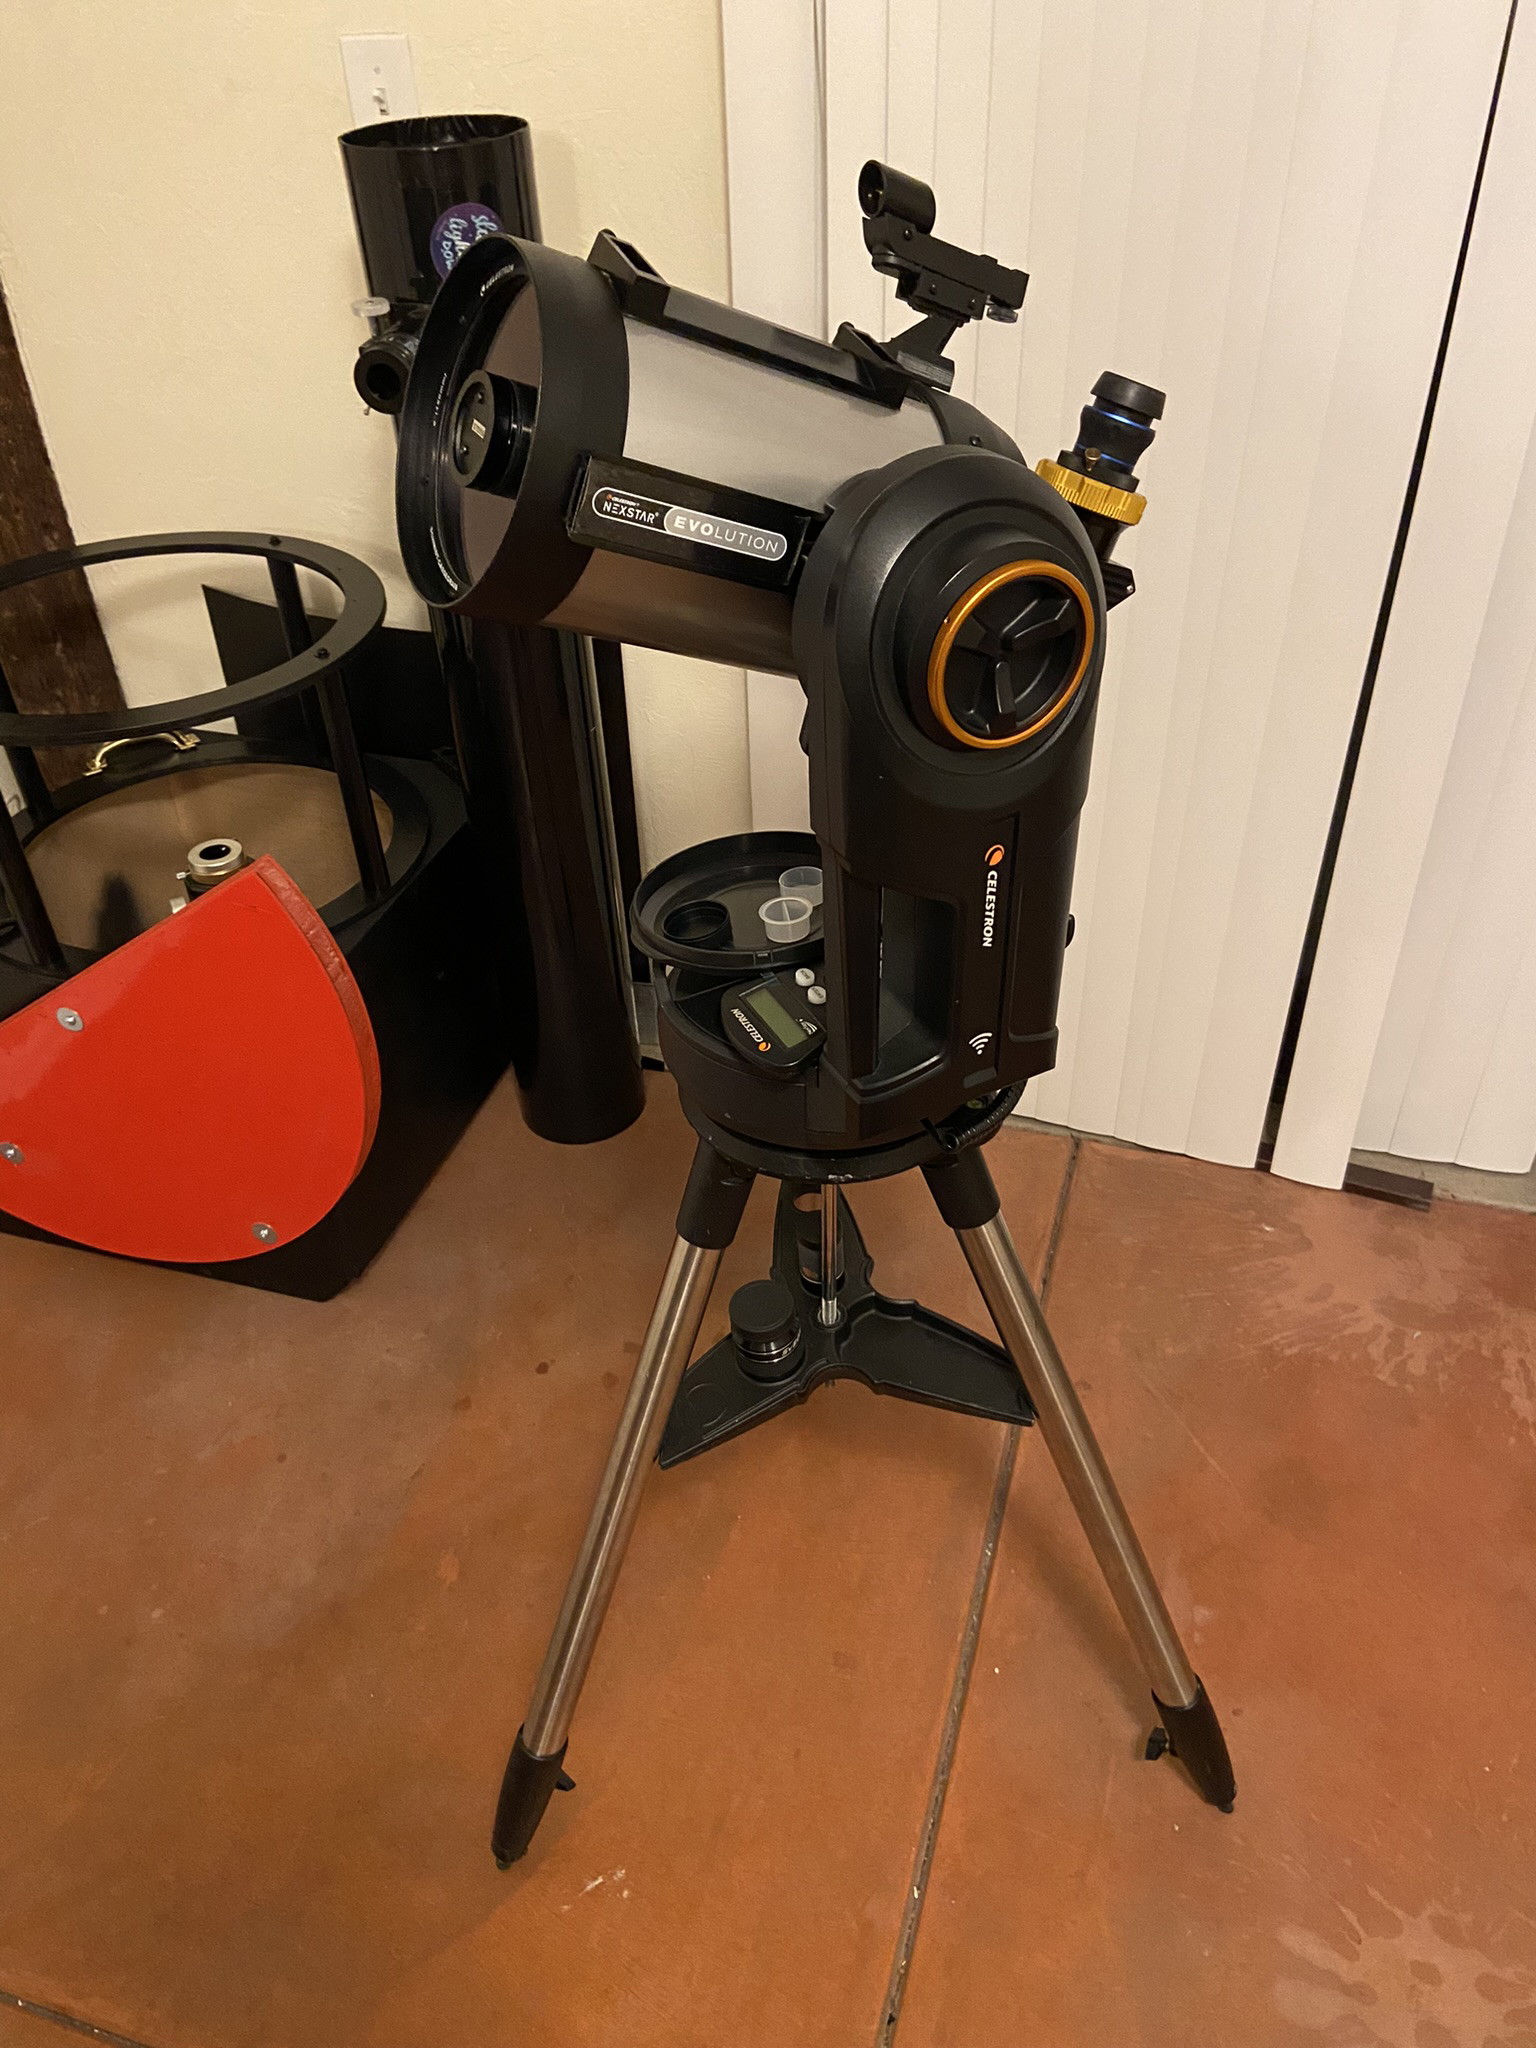
The C6 optical tube attaches to the Evolution mount via a standard Vixen-style dovetail bar secured to the side of the tube, as shown in the above picture. This means I can also put the C6 on a variety of other manual or electronically-driven mounts if I so desire.
Optics Collimation Requirements
I have to collimate the C6 from time to time by adjusting the secondary mirror. Contrary to popular opinion, collimating an SCT is not a particularly difficult or worrisome process, and you definitely do not need to send the scope back to the retailer or manufacturer to have them do it for you.
We just need to adjust the three small screws on the secondary mirror housing while pointed at a bright star or artificial point source until everything appears concentric.
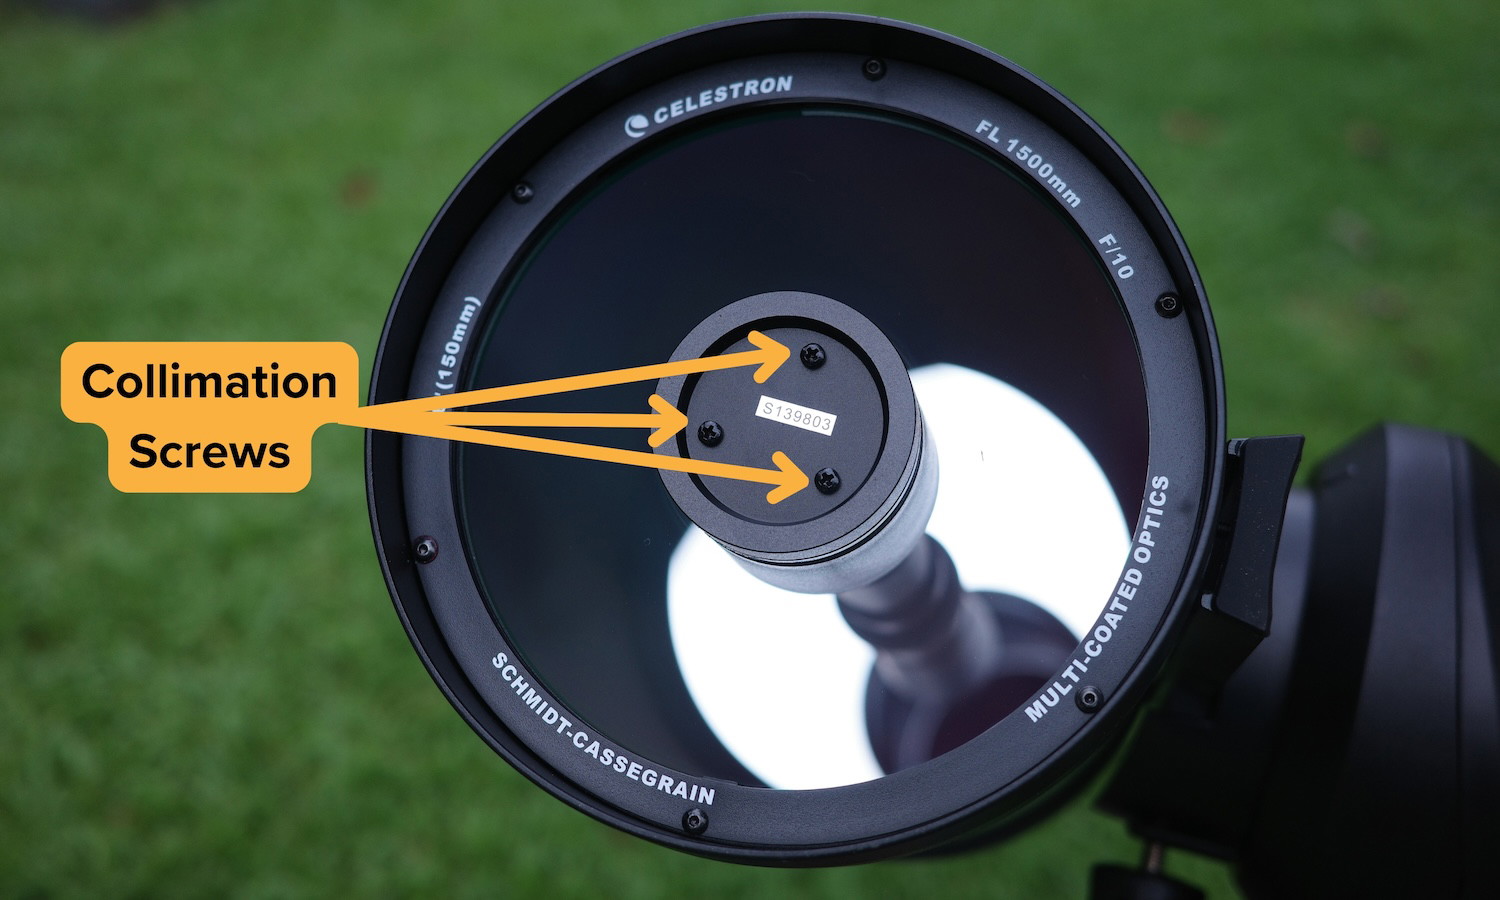
The aftermarket thumbscrews, also known as “Bob’s Knobs,” that I’ve seen some people recommend to make collimation simpler are unnecessary and actually make the scope hold collimation more poorly, necessitating more frequent adjustments to keep the scope aligned.
Accessories
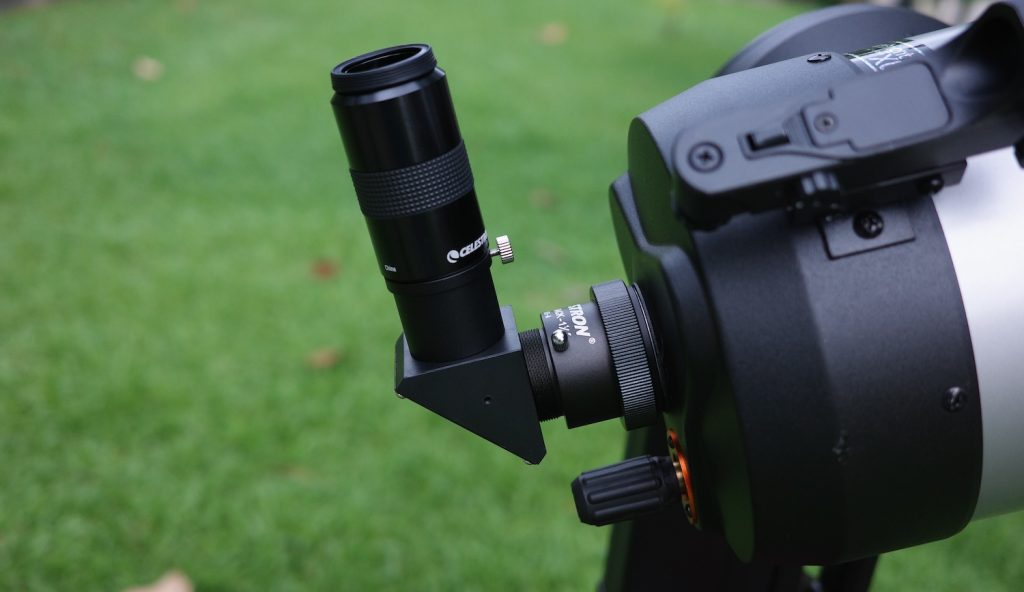
The NexStar Evolution 6 includes two 1.25” barreled Plossl eyepieces: a 40mm unit providing 38x and a 13mm ocular providing 115x. The eyepieces are fairly good quality and are enough to get you started, though you’ll almost certainly want more.
Attaching a 2” diagonal to the Evolution 6 is technically possible. But I wouldn’t advise it due to the balance problems a 2” diagonal and eyepieces induce to the telescope setup, as well as the fact that the views vignette with the Evolution 6 due to the C6 optical tube’s small baffle size.
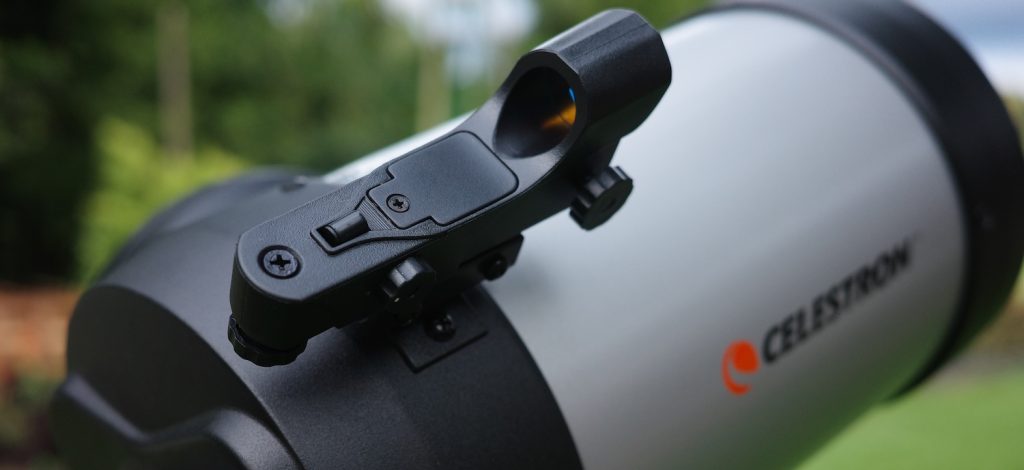
For a finder, the Evolution 6 includes a simple red dot unit, which is really all I need to line the telescope up with a few bright stars and let the GoTo system take over.
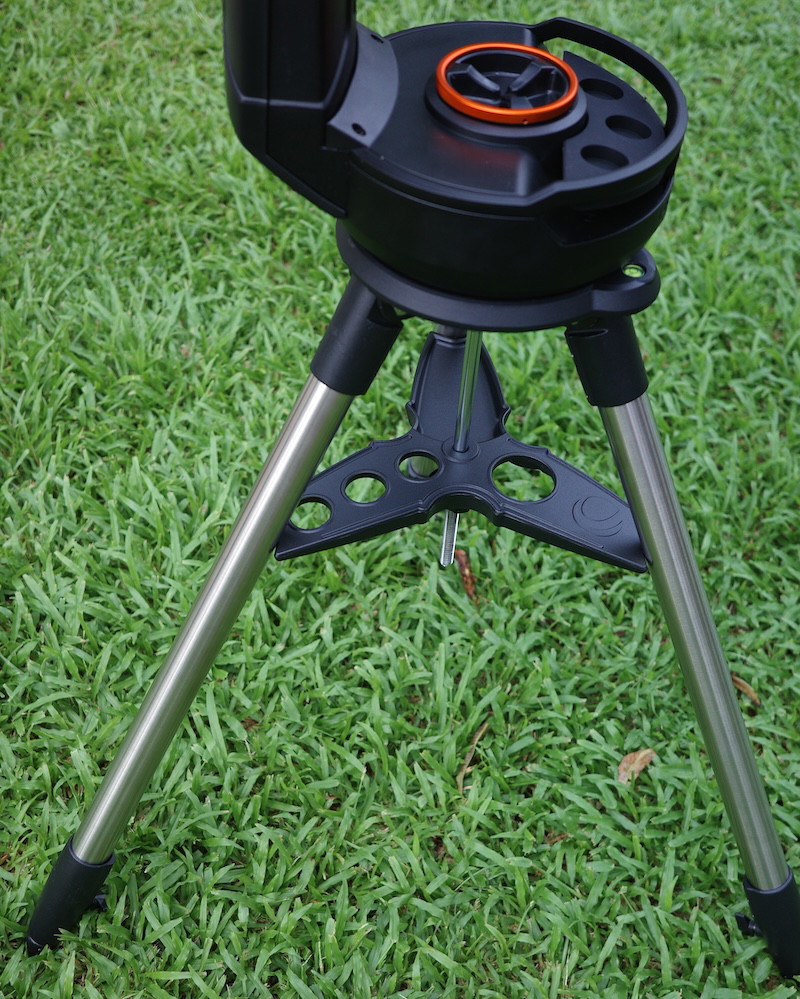
As shown in the picture above, the Evolution mount has two supplied accessory trays—one between the tripod legs and one on the mount head below the scope. In most cases, I believe you’d be better off keeping your stuff in a proper case with a small side table to rest your extra gear on. I’ve learned that leaving exposed gear on the tripod or mount head is a recipe for disaster, or at the very least, for everything to get dew all over it quickly.
Mount
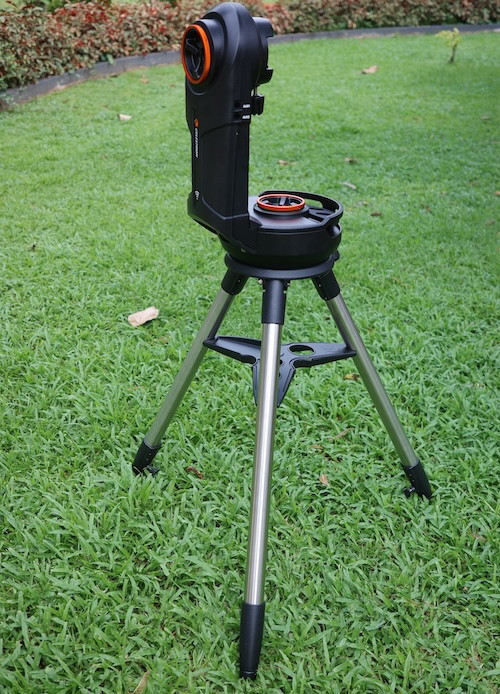
The NexStar Evolution mount, at first glance, is a relatively simple affair—just an altazimuth fork arm with left-right, up-down pointing capability and computer-driven motors like the other Celestron NexStar telescopes. However, there’s actually quite a bit more going on than that, though how many of Evolution’s features are actually useful to most hobbyists is debatable.
Using the Mount Manually
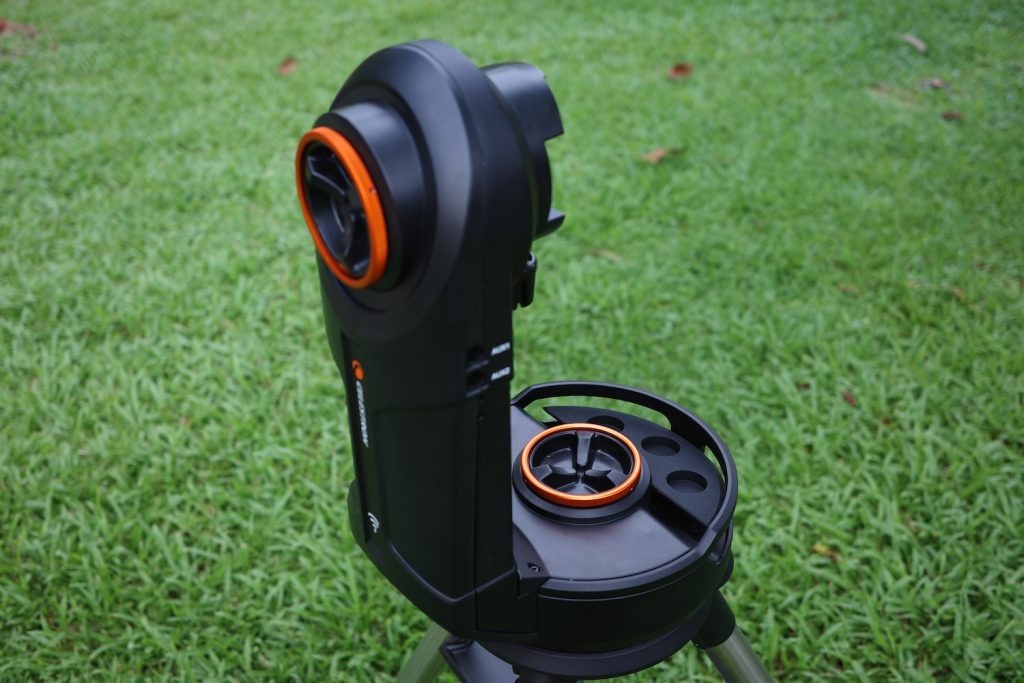
For starters, the Evolution mount has clutches on both the altitude and azimuth axes, so the telescope can be pointed manually at times. But without any slow-motion adjustments, I felt the manual movement of the mount to be too jerky and inaccurate to actually let me use the telescope well without powering it on.
Also, I have to keep the clutches locked when operating the telescope’s motors. Using the telescope manually with the mount powered on ruins the alignment of the mount to the night sky and thus all the slewing/tracking accuracy.
The Mount’s Battery
Next is the built-in battery. The Evolution mount has a built-in lithium battery, specifically a LiFePO4 unit. This means I don’t have to deal with a separate power supply, charging it, connecting it to the Evolution, and worrying about the cord wrapping around the scope and/or unplugging itself.
The charge lasts around 12 hours or so at best with a new battery. This is a problem if I’m planning on going for long observation sessions without access to reliable electricity to recharge the mount with. Running the mount’s WiFi also drains the battery faster.
LiFePO₄ batteries are very safe, hold a charge well, and last longer than a typical lead-acid battery pack or regular lithium-ion unit. But they don’t last forever. The supplied units in the Evolution mounts are not exactly the highest-quality units around and are only rated for 1000–2000 charge cycles, which might sound like a lot but is still finite. Eventually, these batteries will fail. Some users with scopes around 5 years old are already reporting problems, and replacements cost $125 if you’ve had the scope for over 2 years or bought it used.
It’s questionable whether the scopes will be serviceable forever, and the scope basically requires the battery to run. External power can run the mount forever, but it has to go through the battery in order to do so. So you’re going to have a bricked mount eventually, at which point you’ll have no choice but to put the optical tube on something else.
Capability of the Mount for Astrophotography
The Evolution mount is advertised as being more useful for astrophotography than the cheaper alt-azimuth-mounted instruments from Celestron. In practice, it really isn’t going to compete with an equatorial mount for deep-sky astrophotography, even if I put the Evolution mount on an equatorial wedge to track properly for long exposures. I found the scope to be pretty adequate for planets and Moon, though.
However, the high-quality worm gears in the Evolution do make for a more elegant experience when using the scope, as motions at high power are less jerky and the scope sounds like a high-tech device straight off the Starship Enterprise as opposed to a dying garbage truck as it moves around the sky. The gears also last longer than cheaper mounts, though this is somewhat obviated by the limited battery lifetime outlined above.
The Inclusion of Both WiFi and a Hand Controller
Unlike many mounts, which are supplied with a calculator-like hand controller or simply a built-in WiFi network, the NexStar Evolution comes with both a hand controller and a built-in WiFi network. Thus, you can run the scope either off your smart device with the free SkyPortal app—or preferably SkySafari—or just with the controller.
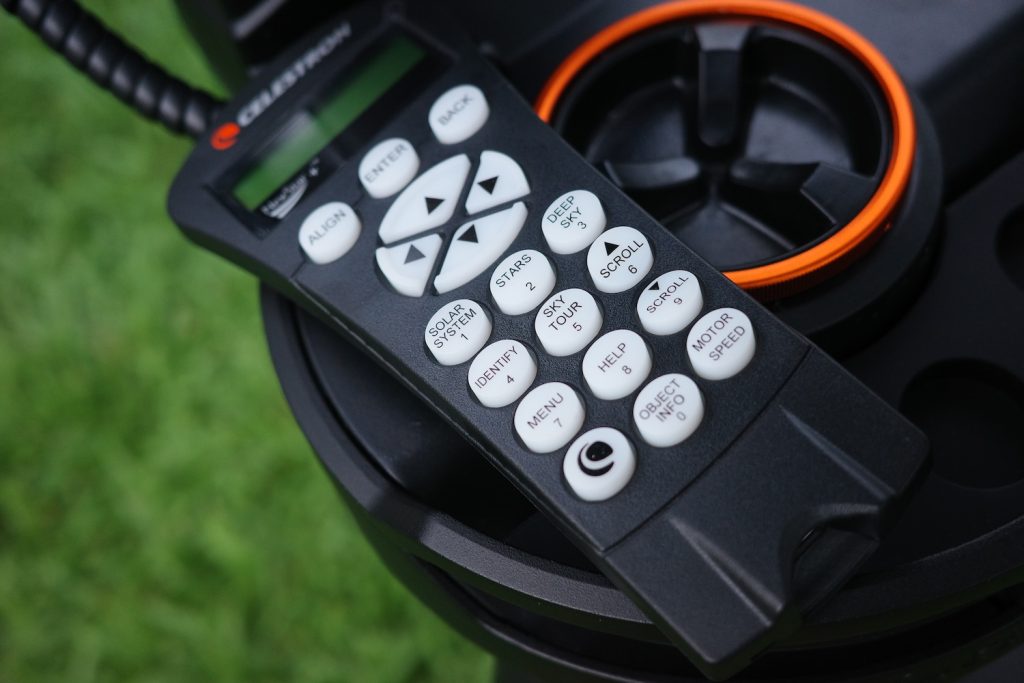
Even if you mainly control the scope with your phone or tablet, you probably want to keep the hand controller around, as it provides information on things like battery charge that is not available in apps.
To actually use the mount, all I need to do is get the scope pointed at two reference stars, confirm them, and then it’ll automatically track and slew to whatever I want. I can select objects in the hand controller’s database, search for them in the app, or just tap on my screen to select and point at something.
Switching the Telescope on Evolution Mount
Lastly, the Evolution mount can accept any telescope with a Vixen-style dovetail thanks to its universal dovetail saddle, though you should make sure whatever you put on it can both balance properly and achieve clearance above the base of the mount, which limits you mostly to short, small instruments such as other catadioptric optical tubes.
Should I buy a used Celestron NexStar Evolution 6”?
If you can find one in good condition with a reliable battery and electronics, there isn’t really anything wrong with buying a used Celestron NexStar Evolution 6”. But these scopes depreciate in value more over time due to battery degradation and should be priced accordingly. Some of the oldest units are getting close to a decade old now.
As with any telescope, make sure the coatings on the telescope’s mirrors and corrector plate are in good condition; scratches on the corrector are acceptable, but cracks are not. Bugs and debris inside the telescope can be cleaned, but they are a hassle. Make sure the focuser moves smoothly, and, of course, do your best to check that everything works well with the mount if possible.
Alternative Recommendations
The NexStar Evolution 6” is certainly a nice telescope, but there are some other options you might want to look over, regardless of whether you are a beginner, looking to upgrade, or looking for a convenient and portable package.
The main reason we have mixed feelings about the Evolution 6” is largely due to the fact that, for all its bells and whistles, at the end of the day, you are really just getting an overly-equipped 6” telescope. Other 6” computerized telescopes exist at lower prices.
There are better options than a 6” computerized telescope, including larger computerized instruments at this price, and it’s questionable if a 6” telescope is able to really show you enough to benefit from a GoTo mount in the first place.
- The Celestron NexStar 6SE quite literally duplicates the Evolution 6” in form and function. You can purchase a WiFi dongle for it for under $150, stick on a cheap lithium-ion battery for power, and get some nicer eyepieces while you’re at it. There is no difference in the views, setup, operation, or portability compared to the Evolution 6”. In fact, the 6SE is a bit lighter.
- A 6”, 8” or 10” Dobsonian will offer superior views to the Evolution 6”, doesn’t have any components to fail, doesn’t need power, and is easier to set up. A 12” manual or computer-aided Dobsonian is also an option, albeit bulky and awkward to deal with. Truss-tube, collapsible, and GoTo units are also available for a higher price.
- If you’re interested in astrophotography, something like the Advanced VX 6” Newtonian from Celestron or an a la carte setup built up from a variety of parts from different manufacturers is a better choice.
- If you’re dead set on the Evolution line, we’d recommend at least spending a bit more on the 8” Evolution model, which doesn’t have a lower-cost equivalent in Celestron’s other lines (the 8SE is wobbly and undermounted).
Aftermarket Accessory Recommendations
The NexStar Evolution 6” costs a lot of money, and as such, it wouldn’t be wholly inappropriate to spend a lot of money on accessories. But with a focal ratio of f/10, cheap eyepieces will do just fine, and you’re limited to 1.25” oculars anyway.
A 9mm “gold-line” will provide 167x with the Evolution 6”, which is a pretty good magnification for viewing the Moon, planets, and small deep-sky objects such as globular star clusters or planetary nebulae, along with double stars. You can also get a 6mm goldline, which will provide 250x—about the most you ever want to use. Using a power greater than 250x to 300x will merely give you a fuzzy, hard-to-focus, and dim image with no appreciable gain in detail compared to lower powers. On nights of poor seeing, even 200x might be too much magnification to get a consistently sharp image.
Something in the 18–25mm range to fill the gap between the stock 13mm and 40mm eyepieces is also a good idea for medium power. The Agena 18mm Starguider is our favorite pick in this category, providing 83x with the Evolution 6”.
The last optical accessory we recommend picking up is a UHC, or ultra-high-contrast nebula filter. By selectively permitting light from very specific wavelengths, UHC filters blacken the sky background and enhance the contrast of certain nebulae, which can help reduce the effects of light pollution and provide a slightly better view even under pristine skies. It won’t help with other deep-sky objects, however, so you should always try to observe under dark skies for the best possible views.
Additionally, a dew shield for the Evolution 6” is de facto necessary if you plan on observing for any significant length of time and also shields the scope from bugs, stray light, and curious hands; the former means you’ll actually get superior contrast at the eyepiece with the dew shield versus without it under most circumstances.
What can you see with the Celestron NexStar Evolution 6?
The NexStar Evolution 6” can show you a lot, both within the solar system and of faint deep-sky objects, and its GoTo system means it takes less time to locate the latter for viewing.
You’ll have no trouble seeing the phases of Mercury and Venus with the Evolution 6”, though little else is visible on either of the interior planets. The Moon shows details just a few miles across under good seeing conditions, and you can locate thousands upon thousands of mountains, ridges, valleys, rilles, and, of course, craters. Mars’ ice caps are easy to see, and when the planet is at or close to opposition for a few months out of every two years, you can easily see various dark markings covering the planet, along with dust storms if any occur.
Jupiter’s cloud belts are easy to see with the Evolution 6”, along with the Great (but not necessarily red) Spot and its 4 largest moons: Io, Europa, Ganymede, and Callisto, which each appear as tiny disks and can be seen transiting across the giant planet, casting black shadows behind them pretty much every other day that the planet itself is visible.
Saturn’s rings are easy to see with the Evolution 6” at low power; pop in a high-power eyepiece, and the Cassini Division within them can be spotted too, along with a few cloud belts on Saturn itself and a handful of its moons. Uranus and Neptune are bluish star-like points on all but the best nights, with Uranus’ moons just out of reach due to their low brightness and Neptune’s moon Triton proving to be quite a difficult catch. Pluto is, similarly, just a bit too dim to spot with the Evolution 6”, though you’d have trouble distinguishing it from a faint star anyway.
The Evolution 6” has just enough aperture to resolve globular clusters like M13 and M15. Some globulars have different concentrations of stars than others, and some appear out-of-round, like M92. Others, like M13 and M22, have dust lanes. Don’t expect color, however, and you’ll need high magnification to resolve the stars clearly. Planetary nebulae, like globular clusters, excel even under less-than-ideal conditions, and the smallest ones may show colors. Open clusters are harder to fit in the Evolution’s narrow field of view but sparkle with dozens or hundreds of colorful stars.
Dark skies are needed for viewing galaxies and most nebulae with any telescope. Under light-polluted conditions, the Evolution 6 will be able to locate a handful of barely-visible smudges if you can see them at all. But under dark skies, the Evolution 6” can begin to show you the spiral structure in some of the brighter galaxies and can reveal clusters with dozens more.
Emission nebulae like the Orion Nebula look great with the Evolution 6”, particularly if you use an aftermarket UHC filter to enhance the view and can get out into dark skies. Many also have star clusters embedded in them.



I have it. I can suggest the following (1) make a reference line on the side of the right angle adapter and the body tube once you have the adapter perpendicular to the body tube. (2) tape down the rubber lens holder in the motor mount. (3) tape round fitted tin foil inserts into the rubber lens holders on the motor mount for convenience at night. (4) use white out to make a vertical reference line at the base of the red dot finder and an additional white spot at top center of the round reflective lens holder. This facilitates getting your line of sight correct for seeing the red dot (5) use double sided foam tape and attach a shirt button to the rotary on off switch for the red dot finder, it helps prevent overreach and mistakenly turning the front adjustment knob (6) tape off the front adjustment RDF knob (7) THE CELESTRON CASE FOR A NEXTSTAR EVOLUTION TELESCOPE DOES NOT FIT! YOU WILL BE ENCOURAGED TO DO SOME STUPID FORCE FITTING BY CELESTRON SUPPORT. IT IS WRONG FOR A $300 CASE! (8) working this computerized telescope still requires an uncommon amount of back bending because the red dot is straight through and the viewing lens are right angle. Prepare to genuflect! (9) the feet of the tripod have shrink tubing over the metal pins. You will be better off getting some rubber furniture foot cups and using them between the tripod and ground to slow down the wear on the tripod tips (10) the problem with the SkyPortal app is that it really requires you to hold your tablet or phone ( be sure it has Location capability) in one hand and use the directional arrows for alignment with the other hand while operating the scope. If you put your device on a stand or table, it is going to be in the wrong place when you try to align your second and third star (11) once aligned, if you want to change lenses and navigate with SkyPortal, you have to do one or the other, two hands are not enough! (12) nothing in the telescope is going to look as good as NASA photos (13) accessorizing your telescope is more spendy than you might think (13) apeture fever is a thing, the only cure for it is to remember the old saw “the best telescope is the one you use”. a six inch scope will get used.
These are all helpful tips, thanks for the comment