
Even with right telescopes, I’ve many times faced difficulties in observing celestial bodies due to optical aberrations or manufacturing imperfections in the telescope’s optics. Some of these were permanent flaws, while others could be fixed or compensated for.
Star testing is a widely acknowledged and straightforward method for assessing the optical quality of a telescope. I consider it crucial to test all of my telescope’s optics to ensure that I’m receiving the best and most accurate views. In this guide, I’ll elucidate the process of star testing a telescope—from selecting the right star to understanding the common aberrations you may encounter.
- What You’ll Need
- Diffraction, and the Airy Disk
- Why We Use Slightly Out-of-Focus Star Testing
- Diagnosing Abberrations From a Star Test
What You’ll Need
Unlike other methods of optical testing, star testing requires no additional tools or equipment besides our telescope and a good eyepiece. It can be done in minutes, and we can do it in the middle of a normal observing session. I’ve even found myself star testing other astronomers’ telescopes if I’m offered a look through their eyepiece. It can be done with hardly any interruption to a night of stargazing.
- A Bright Star
To star test your telescope, you need to point it at a bright star that does not move much, such as the ones near the celestial pole (i.e., Polaris in the Northern Hemisphere, or Sigma Octantis in the Southern Hemisphere). If your telescope has motorized tracking, any yellow, white, or bluish star of magnitude 3-4 or brighter will also do the job.
- Keep the Star Centered
You can technically star test on any star without tracking too, as long as you can keep the star centered. Stars near the edge of the field of view can be distorted by aberrations from your eyepiece such as coma, field curvature, e.t.c.

- Right Magnification
Once you’ve got a suitable star centered in your eyepiece, you’ll want to insert an eyepiece that produces at least 35x magnification per inch of telescope’s aperture but not more than 60x per inch (so 210x-360x magnification for a 6” aperture telescope, for example).
- No Barlow Lens
I wouldn’t recommend using a Barlow lens, as this can alter the appearance of some optical defects.
- Get Telescope Ready
Your telescope should be collimated and cooled down properly. You should also be using a high-quality eyepiece if possible.
Once this is all done, it’s time to defocus the star and get to work, but first we need to go into how star testing works and what you should expect to see.
Diffraction, and the Airy Disk
When a beam of light—say, from a star—passes through a small opening (like the aperture of your telescope), it does not continue in a straight line. Instead, the light spreads out or diffracts. This diffraction is responsible for the formation of an interesting pattern known as the Airy disk, which is surrounded by diffraction rings.
When starlight passes through your telescope, it interacts with its circular aperture, creating:
- A central bright spot (the Airy Disk)
- Concentric circles of light surrounding it (diffraction rings)
The Airy disk and its rings arise from the wave nature of light. As the light waves converge at the focal point, they interfere with each other—some waves add up (constructive interference), while others cancel out (destructive interference). This interference leads to the formation of a series of light and dark rings around the central bright spot—the Airy Disk.
Under ideal conditions with a well-made telescope, the Airy disk is approximately the size of the telescope’s resolving limit, which depends on the aperture size of the lens/mirror and the wavelength of the observed light. It is not influenced by the focal length or magnification of the telescope.
The size of the Airy disk is inversely proportional to the aperture of the telescope—larger telescopes will have smaller Airy disks, and vice versa.
How Atmospheric Conditions and Magnification Affect the Airy Disk
Small telescopes are less frequently affected by atmospheric conditions or their own thermal issues. Thus, with small refractors and catadioptrics, we’ll get “pinpoint” stars at most magnifications.
Likewise, all telescopes tend to put up “smaller” stars at lower magnifications. However, at high magnifications, stars often appear “fuzzy” when atmospheric turbulence, thermal issues, or the telescope’s own optics do not allow for the best performance.
However, our eyeball itself is also a limiting factor in our telescope’s ability to produce sharp stars.
The Airy disk of a 6” aperture telescope is a little under 1 arc second. A good human eye has a resolution of 1–2 arc minutes (1 arc minute = 60 arc seconds). So, at magnifications below ~60x, we won’t even get close to resolving the Airy disk. In most cases, 100x or more magnification is needed to even begin to notice it.
This is the reason why many optically defective telescopes still produce “sharp” views at lower magnifications when we use them. Here, the telescope is simply not the limiting factor; rather, it is that our eyes just can’t resolve the fine details. But still, bad optics results in contrast loss that impairs detail in less obvious ways.
The Effect of Optical Design on the Airy Disk
The telescope’s optical design doesn’t alter the Airy disk size, but it does influence how the light is distributed between the central visible disk and the first diffraction ring—the ring that lies just beyond the first diffraction interspace.
- A refracting telescope channels more light into the central disk and less into the first diffraction ring.
- An obstructed telescope (e.g., Newtonians, SCTs) redirects slightly less light into the central disk and more into this initial ring.
- Telescopes with the secondary mirror on a spider (i.e., Newtonians) create diffraction spikes, which are caused by light diffracting around the spider vanes. This is merely a cosmetic problem and not a defect per se.
Why We Use Slightly Out-of-Focus Star Testing
On a good night, even an optically defective telescope produce something resembling an Airy disk. Even amid turbulent air currents, aberrations such as astigmatism (producing a warped oval Airy disk and rings), pinched optics (distorting it into a triangle), and severe miscollimation are usually visible.
In an ideal situation (with no atmosphere and air currents within your telescope), I could theoretically star test while completely in focus. In perfect focus, the Airy disk is the brightest point, surrounded by a series of fainter diffraction rings.
However, at perfect focus, these faint diffraction rings, which are used to diagnose the actual figure and surface quality of an optic, are usually too faint and blurry to clearly resolve. Even if they were consistent, it would take a lot more effort. Thus, for diagnosing most optical issues with the telescope, we turn to the more common “star test” which involves putting the telescope slightly out of focus.
When we slightly de-focus our telescope, the light spreads out over a larger area, and the diffraction pattern changes, too. We’re not going very far outside of focus, just enough to make the star appear a few times “bigger” and get some diffraction rings to show up. Too far, and we’ll miss them. The rings should be round and evenly illuminated, but in practice, this isn’t always the case.
Diagnosing Abberrations From a Star Test
There are essentially two types of aberrations in the star test:
- One is the optical defect, which is inherent in the telescope and not easily removed.
- The other are defects, which are usually caused by some exterior factor or mechanical problem and can be fixed.
The Incurable Optical Problems
Spherical Aberration
The first thing we’ll notice when performing a star test in any telescope other than a refractor is that the defocused stars resemble a “donut”. This is from the shadow of the secondary mirror.
The size of the central obstruction should appear exactly the same on either side of focus. If it doesn’t, this can be indicative of spherical aberration. However, the moving-mirror focus design of many catadioptric telescopes means that the obstruction may look a little different on each side of focus even with otherwise perfect optics, albeit not by much.
The other way to look for spherical aberration (and the only option in refractors) is to examine the out of focus diffraction rings.
A telescope with spherical aberration will appear to have some of the rings appear too bright when racking the focus inward, and some appear to brighten when racking the focus outwards. The worse this is, the worse the aberration.
Spherical aberration occurs when the telescope’s optics are uniformly deviated from the ideal curvature.
- In the case of a Newtonian reflector, it means the primary mirror is either undercorrected (ellipsoidal) or overcorrected (hyperbolic).
- In other optical systems too, over- and under-correction occur. But they are often caused by issues with optical elements not “matching”, like in the case of a refractor which has more than one optical surface that can be messed up.
An undercorrected optical system has the outside rings focus (i.e., brighten) too “soon” and the inside reach focus outside the actual “focal plane” of the instrument, while an overcorrected system does the opposite.
Spherical aberration was the bane of many cheap “hobby killer” telescopes that I’ve tested. So many cheap reflectors use spherical mirrors because they are easy and cheap to test and manufacture.
A long focal length spherical primary mirror deviates so little from a parabola and so work just fine. But to keep shipping boxes small, many manufacturers ship fast focal ratio telescopes with shoddy spherical mirrors or with a “Bird Jones” type corrector inside the focuser in a vain attempt to fix the spherical aberration problem.
Spherical aberration can also be caused by a telescope not cooling down enough and having an optical surface distorted by expansion/contraction with temperature. But you’ll know if this is the case if it coincides with an obvious thermal problem, which I’ll get into shortly.
Other than repolishing and recoating the mirror or lens of a telescope, there is no actual cure for spherical aberration.
Zonal Errors
Zonal errors are imperfections in the telescope’s mirror, lens, corrector, etc. that affect only a specific “zone” or area of the optics, not the entire surface. This is usually caused by a defect during mirror/lens polishing process that creates a “divot” in one radial area of the optic, producing a “hole” or “hill” on the otherwise decent curvature. I’ve observed that zonal errors to be radially symmetrical, but not always.
When a star is defocused, zonal errors can create irregularities in the diffraction rings. Instead of smooth, concentric circles, we’ll see a brightening, darkening, or fuzziness to some of the rings.
With a non-concentric, irregular zone, we might see a distortion or lumpiness in one section of the rings, or the rings may appear brighter in one area and dimmer in another.
The most common non-concentric zonal error I’ve seen in telescopes is a defect in the Schmidt corrector plate in a Schmidt-Cassegrain or Schmidt-Newtonian telescope. These correctors are produced by pressing the thin glass plate against a “mold” while being polished. If the contact is not smooth, areas where the corrector is “dented” or springs up away from the mold can cause zonal errors.
The video below is of a star test done by myself of a Criterion Dynamax 6 Schmidt-Cassegrain, which has some of these zonal errors clearly visible. The Criterion Dynamax telescopes frequently suffered from this issue due to quality control and patent problems. Interestingly, I felt that this sample still performed surprisingly well.
Similarly to an undercorrected or overcorrected surface (i.e., spherical aberration), the only way to fix zonal errors is by repolishing the optic that has the defects.
Turned Down Edge
Turned down edge (TDE) is essentially an extreme form of zonal error in which the outer edge of the mirror or lens is over polished, creating a curvature that is too deep.
Many cheaper refractors stop down the outer edges of their objective lenses because they tend to have TDE from the factory.
I’ve personally witnessed TDE commonly affecting many amateur telescope makers as well. Many older homemade mirrors have TDE, or a worse form called rolled edge, which affects a larger area.
TDE is extremely obvious in the star test, as the edges of the outermost diffraction ring look “hairy” on one side of focus and too bright on the other.
TDE is extremely difficult to remove by repolishing as it essentially requires bringing the rest of the optical surface down to match the overpolished edge. In a finished telescope, there is little we can do besides stop down the outer edges of the mirror or lens with a piece of paper or cardboard cut into a ring. While it might seem like we’re losing aperture if we do this, the aperture affected by TDE is useless anyway, and masking it off significantly improve performance.
The Curable Mechanical Problems
Not all issues in the star test are incurable and permanent. Many are caused by thermal or mechanical factors, which are discussed below:
Astigmatism
Astigmatism can be caused by our optics but is more often due to fixable mechanical factors, so I’ve put it in this section.
If the diffraction rings appear to be oval or elongated in one direction when defocused and then flip at a 90-degree angle on the opposite side of focus, this could indicate that our telescope has astigmatism.
Astigmatism is caused when one axis reaches focus at a different point than the other, or essentially by the focal plane and/or an optic being shaped like a potato chip. Astigmatism usually only affects Newtonian reflectors.
Astigmatism in a telescope can be caused by four things:
1) A bad primary mirror, either the figure of the primary or the glass itself having a poor anneal
Astigmatism caused by the primary mirror itself being defective is easy to diagnose; simply rotate the primary mirror in its cell and have a look again. If the astigmatism moves, it’s your primary mirror.
This could be because the primary optic itself is poorly figured or that the glass itself has a bad anneal.
- A bad primary mirror will be consistently astigmatic all the time. Astigmatism due to poor figuring can be removed by repolishing.
- A bad anneal of the primary mirror’s glass will cause different amounts of astigmatism at different temperatures, as it means that the glass cools and expands/contracts differently in different areas. Bad annealing is essentially incurable without re-melting the glass and grinding a new mirror. I’ve often noticed that smaller scopes with primary mirror astigmatism tend to be caused by bad anneal.
The good news is that the majority of cases of astigmatism are not caused by anything to do with the primary mirror itself, but rather by other elements that follows.
2) Bad primary mirror support, which is easy to diagnose
Many telescopes with thin primary mirrors don’t adequately support the edge. When the telescope is pointed lower in the sky, the mirror will “fold over” and suffer from astigmatism. If your scope’s astigmatism goes away when aimed near straight up and appears worse nearer to the horizon, then you’ve got a primary mirror support issue.
Mike Lockwood’s guide on mirror support explains more; for many smaller consumer-grade scopes, even a simple improvement like properly shimming the mirror in its cell with paper or cork pads is enough to fix the issue.
3) Bad thermal management of the primary mirror
In some cases, uneven cooling of the mirror can also cause astigmatism, but like spherical aberration caused by cooldown, it is easier to notice the overarching thermal issue than the astigmatism itself.
4) A bad secondary mirror, which can easily be solved by getting a new one from a reputable optical manufacturer
The most common cause of astigmatism in telescopes, and the one that is likely to be the case if you’ve ruled out the above, is your secondary or diagonal mirror being out-of-flat.
I’ve also experienced this happening with bad star diagonals in catadioptrics and refractors. A convex or concave surface at a 45-degree angle will produce an astigmatic reflection. In most cases, it is cheaper to just replace the secondary or diagonal than to actually repolish it to be flatter.
Pinched Optics
Pinched optics refers to the physical deformation of the optics due to mechanical stress, often because the telescope’s optical components are clamped too tightly to their holders. This pinch can cause the starlight to scatter irregularly.
In a defocused diffraction pattern, pinched optics might present as an asymmetrical or skewed pattern of the diffraction rings, with one part of the pattern looking different from the rest. This asymmetry often changes or even disappears as the telescope cools down and acclimates to outside temperatures.
In many cases, an overtightened lens cell or mirror clips are to blame. Since either contacts the optic at 3 points, we’ll see a “trefoil” deformation that is unmistakable in appearance. Simply loosen your lens cell or mirror clips—not enough to allow the optic to rattle, but enough that you can rotate it in the holder with a strong nudge with two fingers. This should make the problem go away.
Miscollimation
Miscollimation in the star test is pretty obvious.
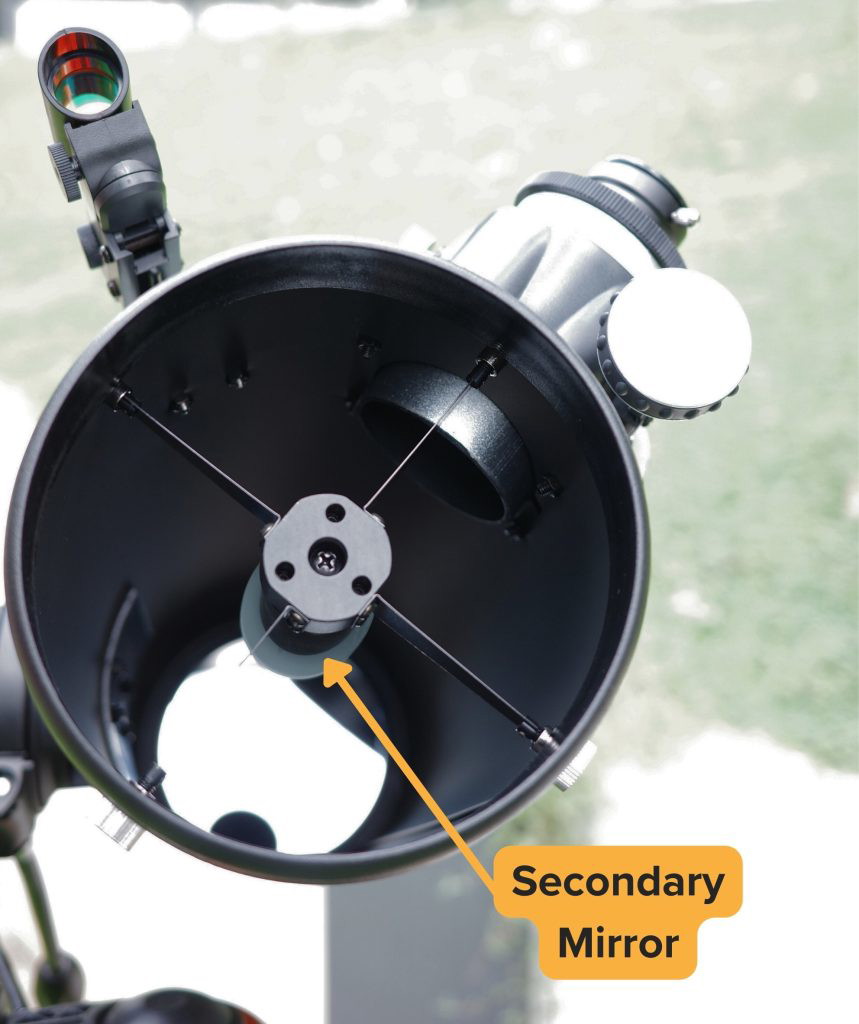
With significantly miscollimated optics, even the in-focus Airy disk will appear to have a “tail” pointing in one direction. Going slightly out of focus makes it even plainer to see. The secondary mirror will also, of course, appear out-of-center if our telescope is a reflector or catadioptric.
I’d highly recommend you to collimate your telescope before attempting to diagnose any other optical issues. You can actually use the star test to collimate extremely accurately without additional tools, too. Check out our collimation guide for more information.
Thermal Problems
To avoid misdiagnosing thermal effects as optical defects, it’s essential to give our telescope ample time to acclimate to the outdoor temperature before conducting a star test.
A general rule of thumb I follow is to allow at least half an hour of acclimatization for every inch of aperture, but larger telescopes or significant temperature differences may require longer. Fans can be used to hasten the process.
Here are some common thermal problems and what they will look like:
- Tube Currents
Air currents inside the telescope, also known as tube currents, are caused by temperature differences within the tube of the telescope, usually because the instrument has not had enough time to reach thermal equilibrium with its surroundings. These currents can distort the path of the starlight as it travels through the telescope.
Often, warm air can be trapped between the primary mirror and the end of the tube – or inside a thick corrector plate. Setting the telescope outside for long periods, wrapping it in insulation, or putting together a forced air system may be required to mitigate the worst examples.
In a star test, air currents will often manifest as a shimmering or ‘boiling’ effect, causing the diffraction rings to appear to move or ripple. The rings may look fuzzy, and their shape and brightness may fluctuate rapidly.
If the seeing conditions are otherwise good, and the stars outside of the field of view appear steady, you can attribute the issue to internal tube currents rather than atmospheric turbulence.
- Primary Mirror Cooldown
If the primary mirror of the telescope has not cooled sufficiently to match the surrounding temperature, it can also cause air turbulence immediately above the mirror surface. This issue, often referred to as the boundary layer, is especially common with larger mirrors, which can take longer to cool down.
The fans at the back of many telescopes may cool the glass itself, but they may not properly mitigate the boundary layer or tube currents, which can require additional sideways-mounted fans attached to the tube or mirror box. In a catadioptric telescope, insulation or a forced air system can be a requirement at larger apertures.
In a star test, an inadequately cooled primary mirror may cause similar distortions as tube currents. The diffraction rings may appear to ripple or waver and may look blurred or distorted. Additionally, the entire field of view can seem to ‘breathe’ or pulsate, which is another indication of thermal issues.
You’ll also probably see some form of spherical aberration or astigmatism, caused by the optic cooling unevenly between the shimmers.
Large lenses can have similar cooldown issues to mirrors, but their smaller sizes mean the glass itself doesn’t usually hold as much heat. Also, the cooldown is rarely more than a half hour even with fairly large refractor lens. And thankfully, in the case of refractors, tube currents are not as much of a factor since the optic is at the front of the tube and warm air will rise off of it and outwards, as opposed to a primary mirror in Newtonian/catadioptric where air has to rise all the way out of the tube. The boundary layer is also usually not a problem with refractors.
Ironically, dew shields or heaters are often needed with refractors and catadioptrics (especially Schmidt-Cassegrains) since the front lens will radiate heat away so quickly and attract condensation from the air, though with catadioptrics, the innards may still struggle to cool down properly.
- Bad Seeing
Finally, we come to seeing, which can often mask the effects of bad thermals in your telescope. Seeing is a form of bad thermals too – just affecting your entire local area, not just the telescope.
“Atmospheric seeing” refers to the distortion or blurring of astronomical observations due to the Earth’s atmospheric turbulence. Even though we often think of our atmosphere as clear and calm, it’s actually filled with constantly moving air masses of different temperatures and densities. When starlight passes through these turbulent layers, it can become scattered and distorted, affecting the clarity of astronomical observations.
Bad atmospheric seeing can be caused by several factors, including high-altitude jet streams, local wind patterns, heat radiating from nearby structures and appliances, and even (in some cases) a warm body near the telescope. The effects can be particularly pronounced when viewing objects that are low on the horizon, as their light has to pass through more of Earth’s atmosphere. This is one of the main reasons telescopes are often placed high atop mountains or in space.
In a star test, bad atmospheric conditions can significantly distort the diffraction pattern.
The Airy disk and diffraction rings may appear to boil, shimmer, ripple, or rapidly fluctuate in brightness and shape. This effect can resemble that of tube currents within the telescope, but there’s a key difference: bad seeing affects the entire sky, not just the field of view through your telescope. If you see that stars with your naked eye or through another instrument are also twinkling rapidly, that’s a good indication that you’re dealing with bad seeing conditions.
It’s worth noting that even a perfectly manufactured and aligned telescope can’t overcome the effects of bad seeing.
When faced with poor atmospheric conditions, the best course of action is usually to wait for better seeing or try observing objects that are higher in the sky, where the effects of the atmosphere are less pronounced.
High-magnification views are more impacted by seeing conditions, so dropping to lower magnifications can also sometimes help.
Good seeing is often hard to come by, and even in locales where good seeing is common, it’s likely that the seeing and other local sky conditions will at least somewhat influence what you choose to observe.