
I am going to overview the parts of the telescope system so you have a better understanding as you read other articles on telescopes and astronomy. Because this is a general guide, I will touch on things that may not apply to your telescope. You might want to note the pieces that match your telescope.
Optical Tube
This is the part that most people think of as the telescope. This is actually the light-gathering part of the telescope.
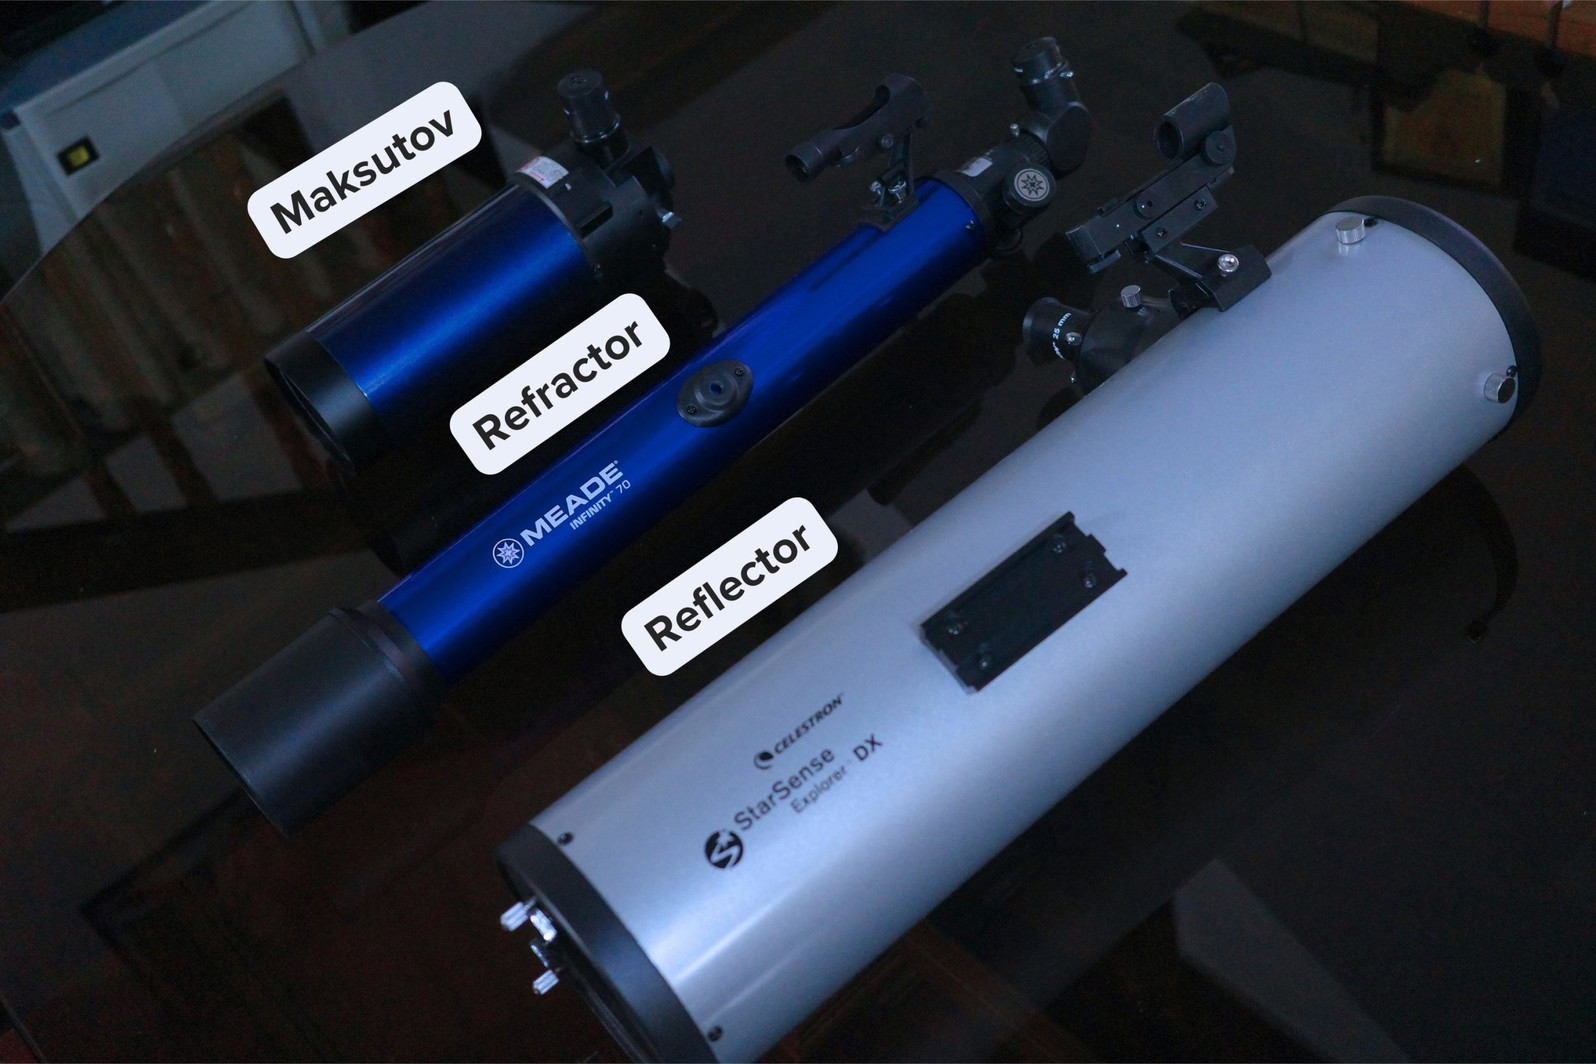
In the case of refractor-type telescopes, the optical tube has a lens in the front. In the case of reflector telescopes, there is a mirror in the back, as in the picture below. The purpose of lens/mirror is to collect light.
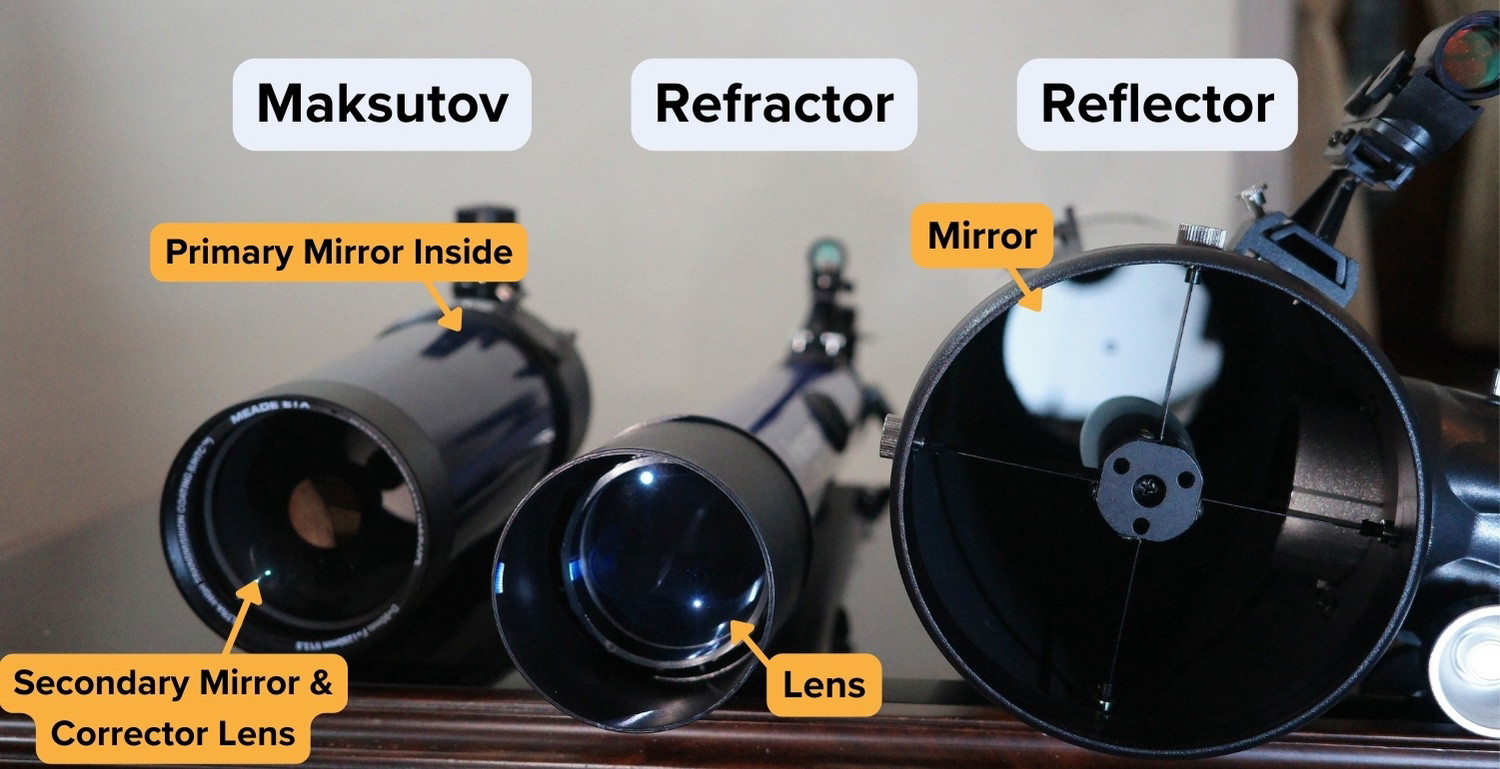
Some optical tubes have both lenses and mirrors, which are called catadioptric telescopes. The most common catadioptrics are the Schmidt-Cassegrain telescope (SCT) and the Maksutov-Cassegrain telescope (MCT or Mak).
If there is any distinction about how they are used, I will call them out as we go along. I just wanted you to know the names and that not all optical tubes are the same. Below are the specifications that matter when we talk about an optical tube’s mirror/lens:

The aperture is the diameter of the front lens or rear mirror of an optical tube. This is the measure of the light-gathering ability of the telescope and is the key specification for judging the telescope’s ability to show us dim and distant planets and deep-sky objects. The more light we gather, the more detail we can see, or the dimmer the object that we can see.
This is usually measured in millimeters, which we abbreviate as mm. Or it can be expressed in inches. One inch equals 25.4 mm, so you can do the conversion if you wish. A 102-mm-aperture telescope would also be called a 4-inch telescope.
What you need to know about aperture is that there are many things you can see with a 70-mm telescope. You can see more and more detail with a 200-mm telescope. Over time, you will gain experience as to what objects are good for viewing with your telescope.
This is the length of the optical path within the optical tube, usually measured in millimeters. You can find this value in the telescope’s specifications. We can use this focal length to calculate the magnification produced when we use a specific eyepiece:
Power or Magnification = Focal length of telescope / Focal length of eyepiece
Aperture in mm / focal length in mm
It tells you about the physical size of the scope. A low-focal-ratio optical tube will be shorter than a high-focal-ratio optical tube with the same aperture and the same optical tube design.
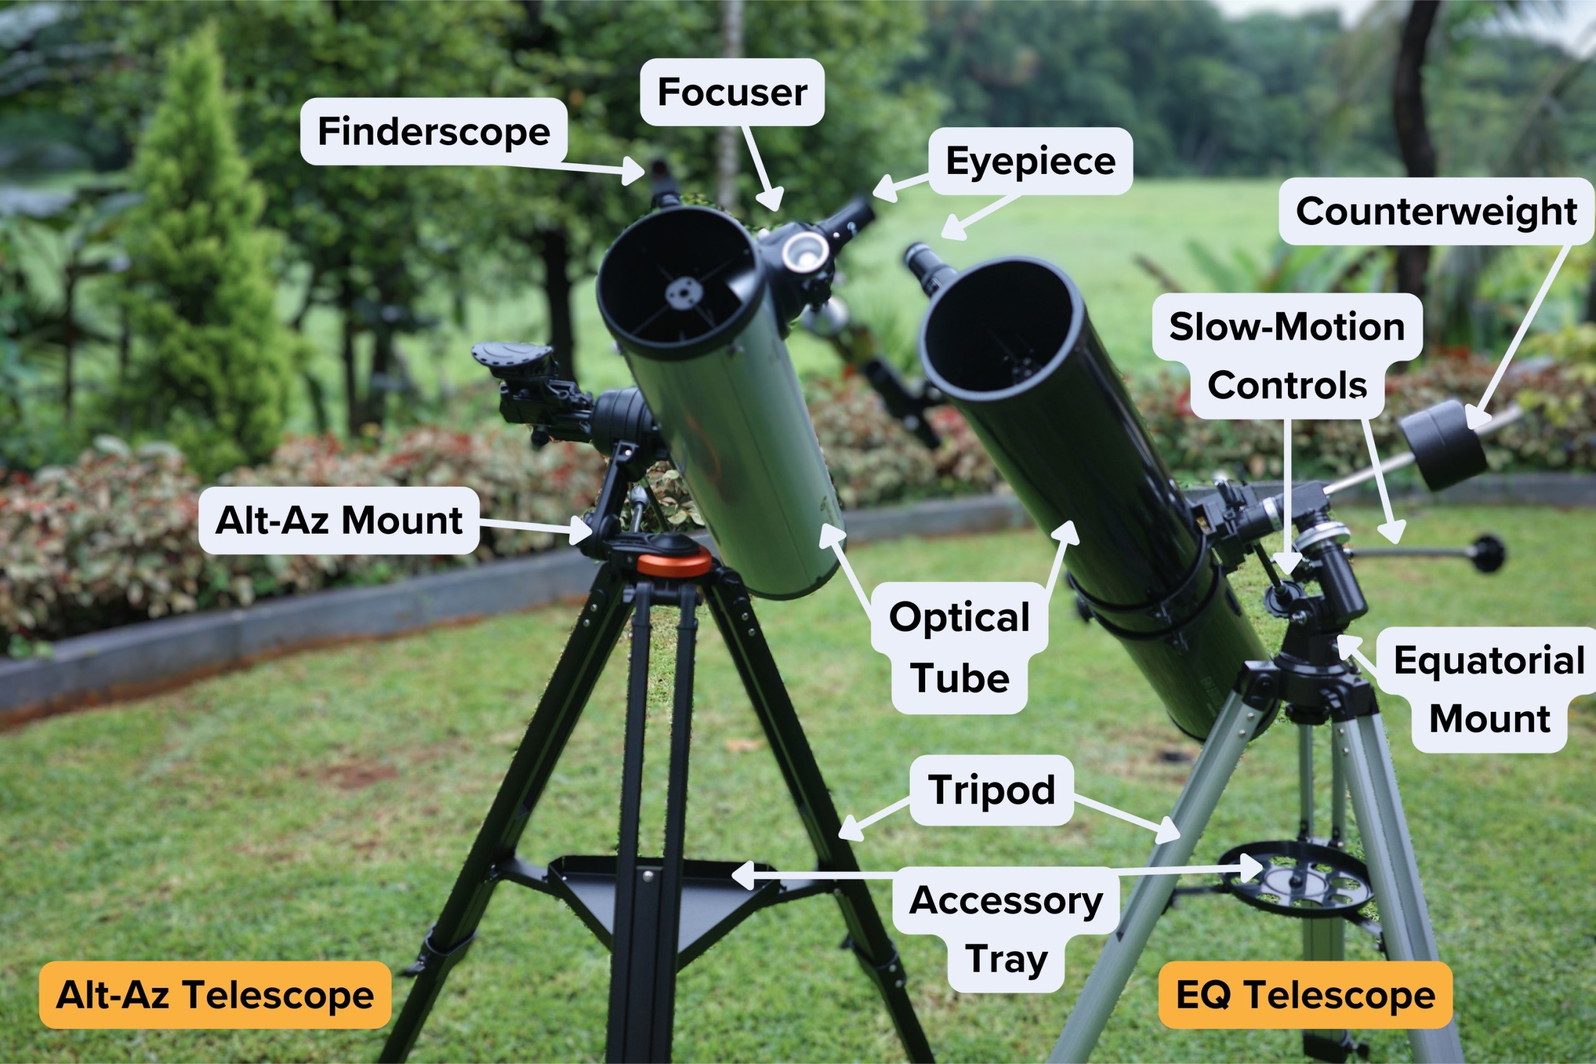
The Mount
This is what holds the optical tube, so that we can point it and track objects as they move through the sky. The mount is a critical part of the telescope system. If the mount is wobbly, the image will shake every time we try to focus or even when there is a breeze. If the mount is wobbly, it may be difficult to track your target as you move the optical tube to account for the rotation of the earth. A good optical tube on a poor mount provides a frustrating experience.
There are several types:

The most specialized mount is the equatorial mount, which was specifically developed for astronomy. This type of mount was developed in Germany, so it is often referred to as the German equatorial mount (GEM). GEM mounts usually stand on a tripod, as seen in the above image, or a permanent post called a pier.
An equatorial mount requires a special alignment process called polar alignment, which involves aligning the mount with Polaris, the North Star. I usually recommend this video as an introduction to how to align an equatorial mount.
Once the mount is polar aligned, you can use the RA/DEC coordinates—a coordinate system similar to latitude and longitude, but for celestial objects—provided on star charts to locate targets in the sky.

The more general and familiar mount is the altitude/azimuth or AltAz mount. These work like camera tripods. You move the tube up and down or left and right to aim the optical tube or to track an object. These are extremely easy to use and highly intuitive. These are based on the degrees around the circle or compass and the degrees above the horizon, with 90 degrees being straight up. Most people will immediately understand how to use an AltAz mount.
Some AltAz mounts are on tripods, and some are on a Dobsonian or Dob-style base. The Dobsonian design is a lazy Susan or turntable arrangement that sits on a table or on the floor. This is a very popular design and has a reputation for being very stable and easy to use.
Whatever the type of mount, it is offered as either manual, partially computerized (PushTo), or fully computerized (GoTo).
In simple terms, you do all the work. You point the scope, you find the targets, and you track them as they move through the sky. Whether equatorial or AltAz, this is the lowest-cost mount.
PushTo mount systems (used in the StarSense Explorer series from the brand Celestron) show us where the target is in the sky. But we must manually move the telescope to the location that the system displays, and we must also move the telescope ourselves to track it in the sky. We do most of the work except finding out where to PUSH TO.
There are sensors in the computer control system that track the position of the mount. An initial alignment procedure is done so the mount knows the date, time, and its location. After that, we put our target into the computer, usually a handset or a smartphone app, and it tells us where to point the scope to see that target.
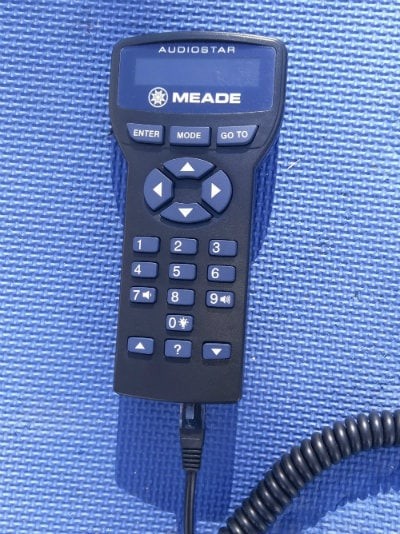
With a fully computerized or GoTo mount, once we do a simple alignment, the GoTo system knows where the telescope is on the earth. So, if we enter a target, the system can automatically move the telescope to find and track it. A GoTo mount has motors and is often controlled by a computer handset. In the newer GoTo telescope models, this is achieved with the use of smartphone apps.
Some GoTo mounts have built-in GPS systems so that they can self-align to the global positioning system, just like the GPS in your car.
Once the GoTo mount has located a target for you, as the GoTo mounts are motorized, the computer uses the motors to track the target as the Earth rotates, whereas the other mounts require you to move the optical tube yourself to track the target.
The set-up and alignment of a GoTo mount are very specific to the brand and model. Please refer to your user’s manual for the alignment procedure for your system.
Eyepiece
This is the part of the telescope system that actually provides magnification. The optical tube gathers light, and the eyepiece magnifies the image. It is common to have multiple eyepieces. Most starter packages will include one to three eyepieces, each of which provides a different level of magnification.

The higher the number on the eyepiece, the lower the magnification. So, a 25-mm eyepiece will provide less power or magnification than a 10-mm eyepiece. Over time, you may wish to add more eyepieces so that you have more magnification choices.
Eyepieces are standardized, so you don’t have to use the same brand as the telescope, and they can be shared between telescopes.
Barlow Lens
This is a device, shown in the previous photo, that can be used between the eyepiece and the focuser. If used, it multiplies the magnification of the eyepiece by a stated amount, typically 2X or 3X. The benefit of the Barlow is that it effectively gives you more magnification choices with fewer eyepieces.
Diagonal
Refractors, SCTs, and MCTs typically have diagonals. Rather than having to get down on your knees to look through the telescope as it points at the stars, the diagonal bends the light to a more convenient viewing position.
Common sizes are 1.25 inches and 2 inches, which determine the diameter of the eyepiece that the diagonal can accept.
The key thing to know is that a 90-degree diagonal, also called a star diagonal, is optimized for astronomy. Diagonals that are 45 degrees are optimized for daytime use as spotting scopes, not astronomy.
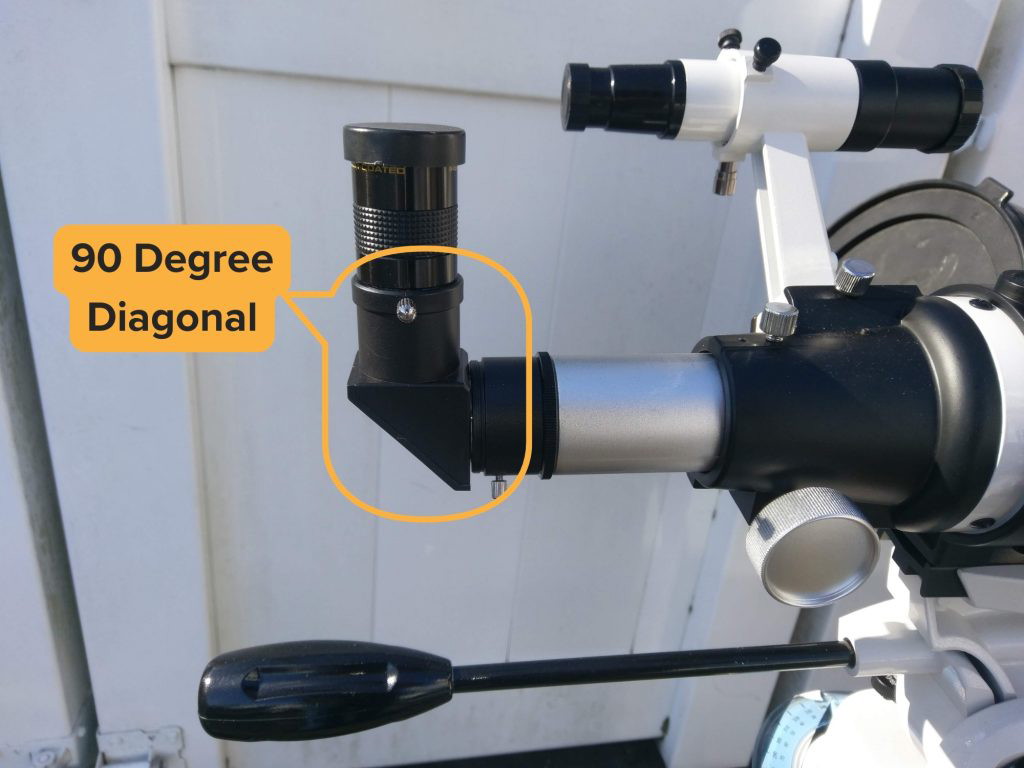
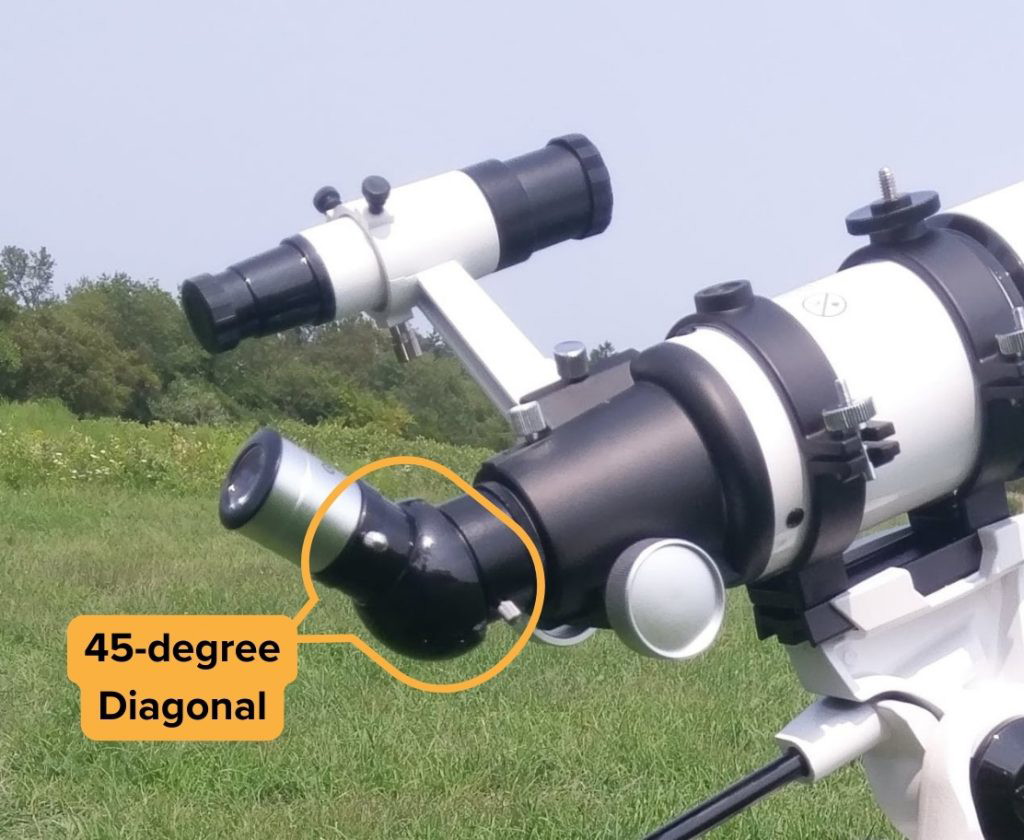
You can use either type for both, but each works best for its intended application. If a telescope comes with a 45-degree diagonal but is to be used primarily for astronomy, I often add a 90-degree diagonal for convenience and comfort at some point. In most cases, diagonals can be swapped, so you can have two, one for night use and, if you wish, one for day use.
Newtonian reflectors do not use diagonals. Note that reflectors are not well suited for daytime terrestrial use as they invert the image. That doesn’t matter for astronomy, as there is no up or down in space. However, it would be a little strange to see the boats on the lake shown upside down.
Focuser
This is a moveable device that is used to focus the image that we see on the eyepiece. This works by turning a dial which bring the image into focus.

Most beginner packages have a single-speed focuser with just one dial on a side, as in the photo above.

More expensive packages may have a dual-speed focuser where one dial is a coarse adjustment and the other one is for fine adjustment, which can be helpful in precise focusing when using high magnification. While a two-speed focuser is nice, it is not necessary.
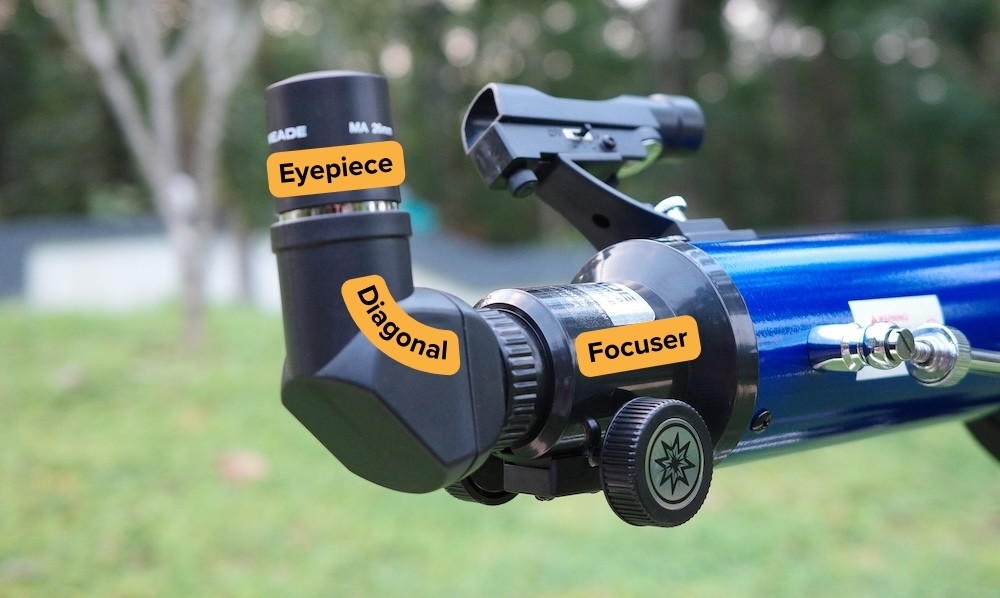
If there is a diagonal, as is the case with refractors, it is inserted into the focuser first, and the eyepiece goes in the diagonal. If not, an eyepiece is inserted directly to the focuser to achieve focus.
Finderscopes
- Red Dot Finder (Unmagnified Finder)
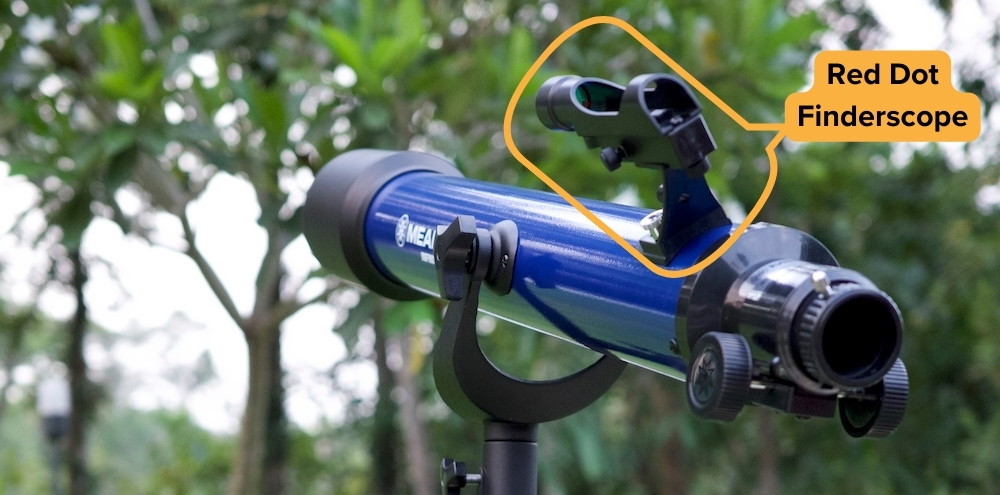
The red dot finder, or RDF, is a targeting tool, similar to a gun sight. This is also referred to as a zero-magnification finder.
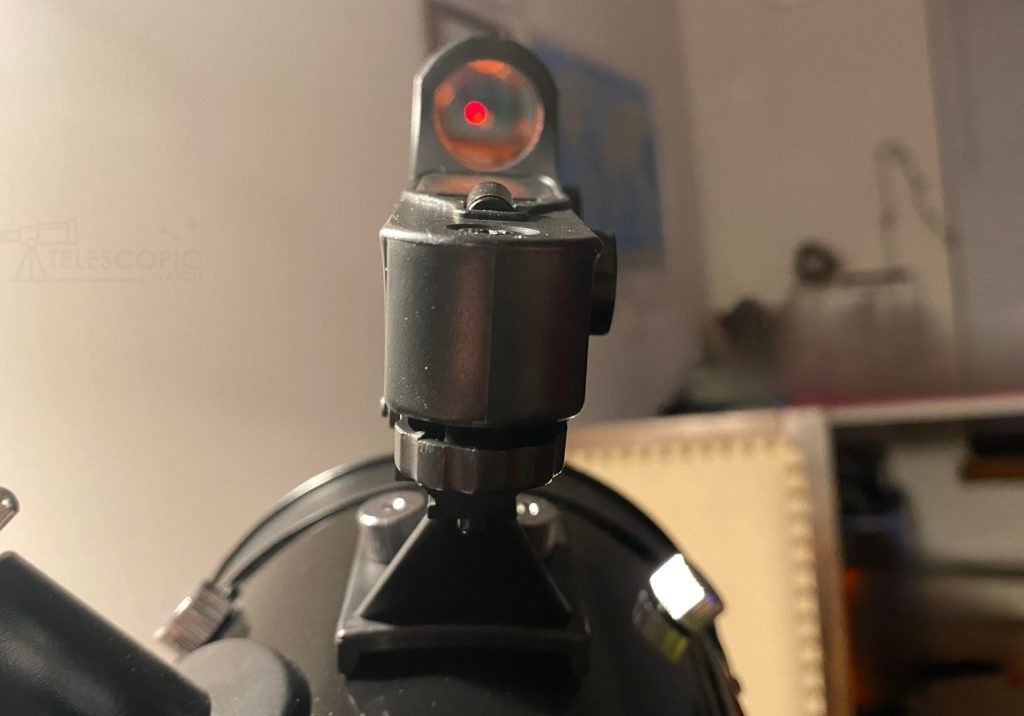
We use this to point the telescope at our target. Red dot finders are low-cost and easy to use. After a simple step known as the finderscope alignment, we can place the red dot on the target in the sky, and that target should appear in our low-power eyepiece.
RDFs use batteries, and I suggest you keep some spare batteries handy. If you forget to turn it off at the end of the session, the battery will go dead. Then, the next time you use the telescope, you will not have a finder that works.
- Magnifying Finderscope (RACI & Straight-through)
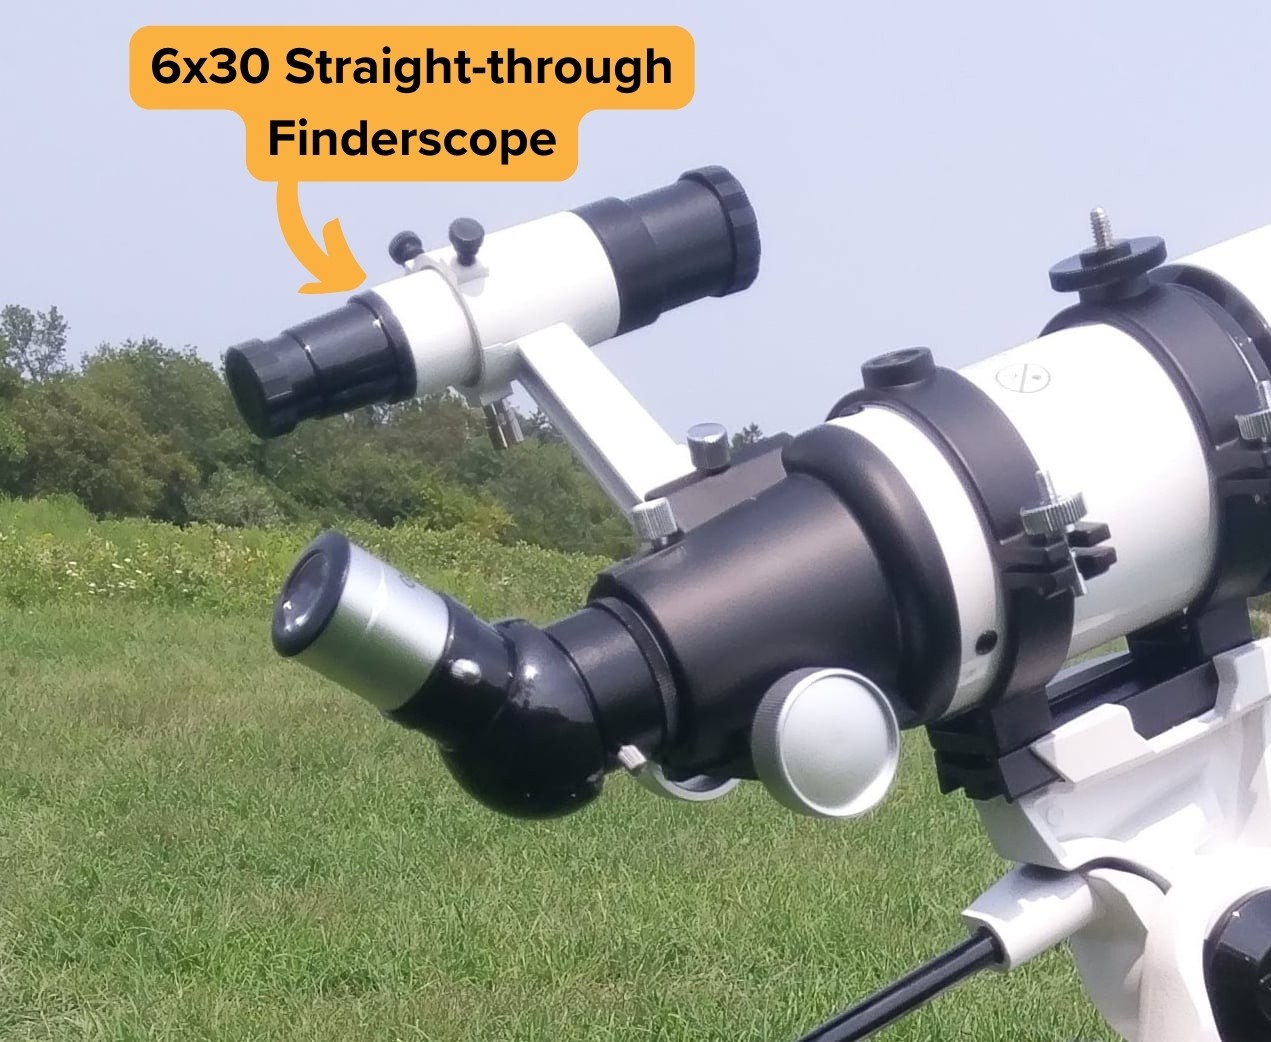
These are alternatives to the RDF as a targeting tool. This is a little refractor telescope that has low magnification and a very wide field of view. Typical sizes are 6X30 and 8X50. They are like half of a binocular.
These can be helpful when you are in a light-polluted area and don’t see a lot of stars in the sky. The finder will show more stars than you can see with your eye alone.