
In this review, I will use the Meade Autostar 497 hand control as an example, but the features discussed are common to virtually all of Meade’s Autostar and Audiostar computerized telescope control systems. Meade’s Autostar and Audiostar GoTo systems are among the simplest to operate, making them perfect for both beginners and advanced telescope users to find planets and deep-sky objects and track them as they travel through the sky.
Over the years, Meade has incorporated AutoStar and AudioStar into a variety of hand controls that have been packaged with specific Meade telescope lines. Popular versions of the handset include:
- The Autostar 494, which was standard with the Meade ETX 80 Backpack Observer.
- The Autostar 495 came with the Meade DS series.
- The Autostar 497 was introduced as an upgrade to their ETX telescope line in the late 1990s. The ETX 497 hand control could be added to an existing ETX-EC telescope system to create a fully robotic telescope. Later, the Autostar 497 hand control became a standard part of the ETX line with the ETX AT telescopes. The early versions of the 497 handsets had over 1000 objects in the database, which increased to over 30,000 objects over time.
- The Autostar II comes with the Meade LX200 series, and there are other variations of the handset for full computer control. The Autostar II handset included with the Meade LX200 series has over 140,000 objects in its database.
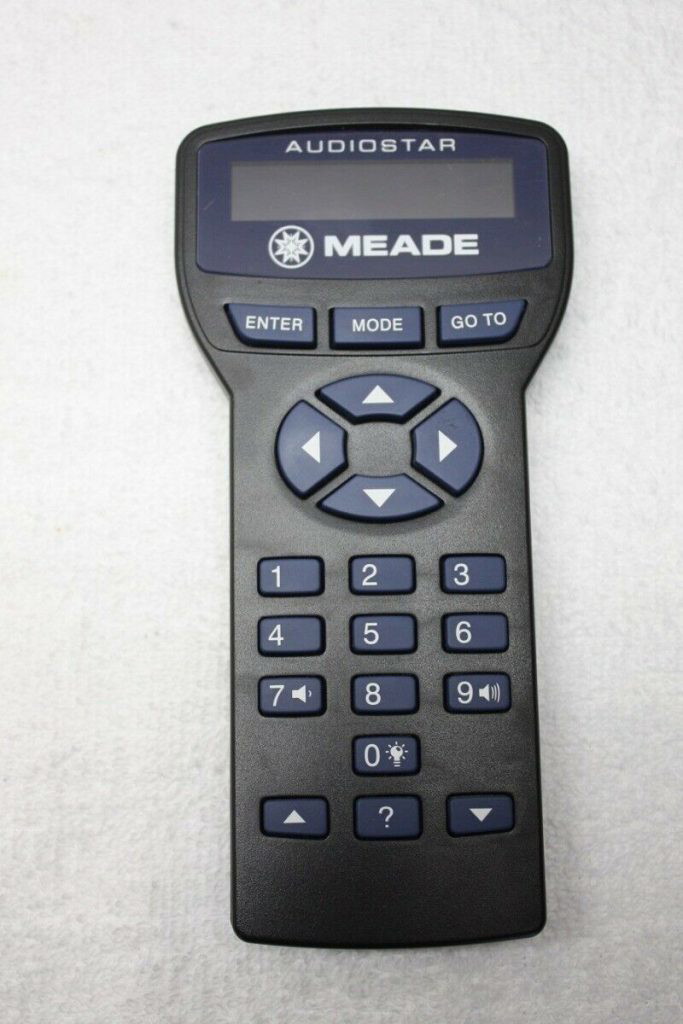
- Meade later released the Audiostar system with an updated handset featuring a built-in speaker that plays audio tracks about the planets, deep space objects, and stars being observed. The Audiostar handsets have over 30,000 celestial objects in their database.
The good thing about the Autostar and Audiostar systems is that they all operate in a very similar fashion. So if you have experience with one, you can operate them all with very little adjustment. One clear exception is that Audiostar is the only one with sound capabilities on the hand controller.
I have owned the ETX 60, ETX 80 AT, ETX 80 Observer, and ETX 125 EC with the optional Autostar 497 controller. When I had the opportunity to operate the Meade LX200 14” at the Custer Observatory, it was just like using one of the ETX scopes.
These robotic telescope systems, offered by Meade, Celestron, and others, came to be known generally as “GoTo” systems, reflecting the GoTo button on the handset. This is a term still used today to refer to motor-driven, computer-operated telescopes. Once the telescope is put through a basic alignment sequence, so it knows where it is on planet Earth, it can find anything in the sky that is contained in its database.
Operational Overview
I will go over the capability of the Autostar and Audiostar systems using the Meade 497 handset as an example, but as stated earlier, they all operate in basically the same way.
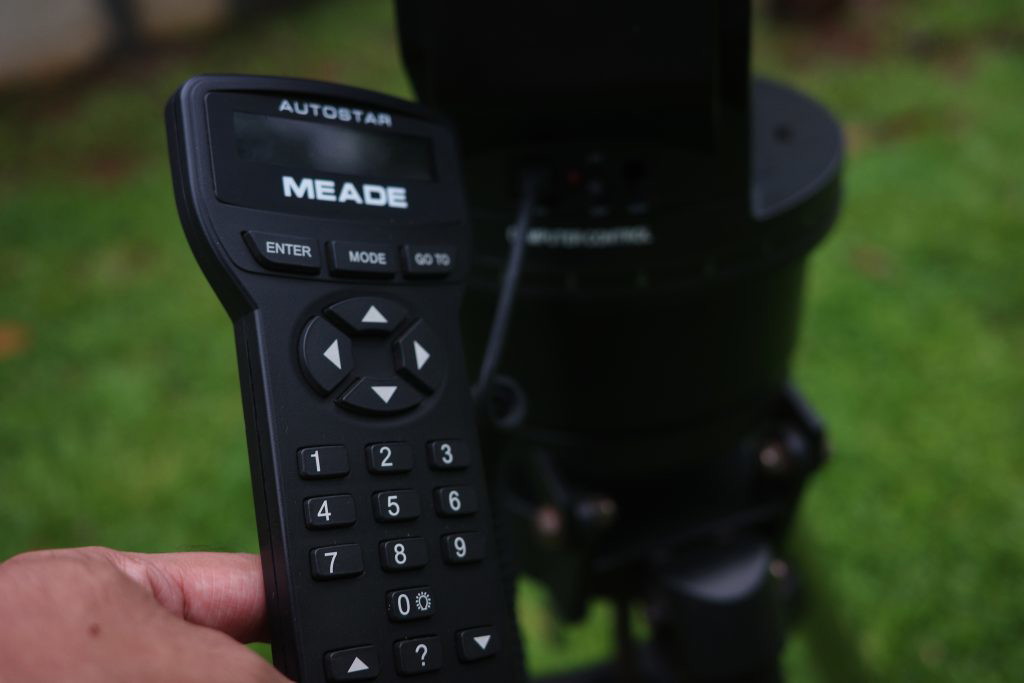
As seen in the earlier picture, the handset consists of a 2-line screen. Next are three command keys: Enter, Mode, and GoTo. Next, you have four direction arrow keys that allow you to move the scope manually. This is followed by a 10-keypad, which is used to enter target names or numbers and can also be used to set the slew speed, or how fast the telescope moves when you hit the direction keys.
Next are the up and down keys for negotiating menus. And last, but not least, is the key that brings up the help system.
The handset is plugged into a port on the telescope. The computer contained in the handset gives commands to the drive motors in the telescope mount, and that is how the telescope moves.
The software operation is organized into functional groups that are accessed by menus. There are no commands to memorize. You just select from the menus.
- Set-up: This is where you enter the date, time, and location. Here is where you identify what model telescope you have, whether daylight savings is active, and other details. This information is generally entered once with most models and then retained.
- Alignment: This is where you choose the type of alignment you want to do. There are several options. I will review the EASY option later, as this is likely to be the most often used.
- Object: Here is where you select whether you want to view solar system objects, constellations, deep sky objects, stars, satellites, or objects you have stored in the handset. You can also enter user objects—things that are custom to you.
- Guided Tour: If you don’t know what to look for that night, Autostar will take you to a series of targets, so you don’t even have to tell it what you want it to see. Just select Guided Tour and it will take you through a series of showcase targets that are in the sky tonight. There is also a glossary of terms. If you are confused by a term, look it up here.
- Utilities: This menu will let you set a timer, alarms, brightness, and similar features. It also has an eyepiece calculator, which allows you to enter the focal length of the eyepiece you want to use, and it will tell you the magnification it will provide.
Alignment of The Controller
In the case of Autostar or Audiostar, the quality of the alignment you do will determine how accurately the telescope can find the targets you want to see.
EASY alignment is so simple:
- You place the optical tube level and facing North. This is called the home position. This gives the telescope an approximate starting point to determine exactly where it is and where everything in the sky should be.
- Power the telescope, and the handset will remind you to go to the home position.
- Now you select “Easy Alignment.” The Autostar handset now picks a bright star and slews the telescope toward that bright star. It might not hit it exactly, but that is OK. Your job is to use the arrow keys to get that star centered in the eyepiece. Once you do that, you hit “Enter”.
- The Autostar handset now picks a second bright star and swings the telescope to where it thinks that star should be. Again, usually, it won’t get it exactly right. You use the arrow keys to center that bright star in the eyepiece and hit enter.
- The telescope is now aligned. From this point on, you enter what you want to see on the handset, and Autostar will turn the telescope to find it. Usually, it will be accurate enough to get the star, planet, nebula, globular cluster, galaxy, or whatever it is you entered into the handset into the field of view of your low-power eyepiece.
- Once found, use the arrow keys to make the minor adjustments needed to get that target perfectly centered in the field of view. At this point, the Autostar or Audiostar system will track that target as it moves through the sky.
As a matter of personal experience, just a few minutes ago, I set my ETX scope on Jupiter, went into the house to get a drink, and when I came back outside, Jupiter was still in the eyepiece. If this were a manual scope, Jupiter would have moved out of the field of view, and I would have to go find it again.
Navigating Light Polluted Skies
The Autostar system can point you at any targets in your sky, even if there are no stars due to light pollution. So, in my opinion, the more light pollution you face, the more valuable the Autostar system can be.
Electronically Enhanced Astronomy
This emerging area of astronomy, abbreviated as EAA, uses a video camera to replace the eyepiece. The camera sends the signal to a computer that captures the information. Over time, it accumulates light through a process called stacking. The result is similar to, but not exactly like, long-exposure astrophotography. With the Autostar system’s ability to track an object, you can use this EAA approach to enter the world of astroimaging.
How do I update the handset? I have a 494 handset that’s not been updated in probably at least a decade. I am happy to upgrade to the 497, if it isn’t possible. Do I need to purchase the 505 wiring adapter to go from my computer to the handset? Sorry for all the questions, but I’m very novice at the automated systems. Thanks.
Michael,
Thanks for visiting Telescopicwatch.
If your current controller is working fine, there is no real need to upgrade it. The one I use on my ETX 125 has not been updated in over 10 years and it works just fine. However, if you want to pursue this I suggest you refer to your owner’s manual and contact Meade support at https://www.meade.com/support/ . They will know the specifics of your handset and can provide detailed instructions. We are not really equipped to provide product support here.
Is auto star compatible with Meade ds60 digital
I make no gurantee as I have never used a DS60 Digital scope. However, looking at the documentation I have for the Autostar 497 controller I find this comment.
DS-telescopes (e.g., DS-60, DS-70, etc.): (a) Refer to the manual
included with each of these models for instructions on the basic
operation of the telescope. (b) If you purchased a DS-model which
includes the #492 Dual-Motor Electronic Control System, then
interchange the Electronic Controller (EC) of the #492 System with
the Autostar Computer Controller and follow the instructions in this
manual. The Autostar handbox plugs into the same “HBX” connector
on the telescope as the EC handbox. (c) If your DS-model did not
originally include the #492 System, and you are now adding the
complete #493 Autostar Computer Control System (including motors
on both axes) to your telescope, then read the enclosed manual
(“Meade #493 Autostar Computer Control System”) first, before
reading this manual.
Ed,
Thanks for sharing this information in an understandable way. I have been out of amateur astronomy (working in aviation for 35 years) and am now getting back into it. I have restored my old 4 inch f/15 refractor on an Edmund German equatorial mount with 1 inch shafts. I purchased a 4 5/8″ Byers gear and worm and fabricated an aluminum mount bracket which I attached to the R.A. shaft with an AC sychronous motor and drive corrector (and basic slip clutch that I designed). The declination shaft only has the original manual Edmund hand control.
If I purchase another Byers gear/worm set-up (I know where one is for sale) and install it on the dec. shaft would the Meade Autostar system drive the telescope in GOTO fashion?
Thanks
Sorry, but I have no idea if that would work.
One of the lesser known, but potentially invaluable, features of the AutoStar/AudioStar controllers is the “Telescope Status Display”. This feature is
brought up by pressing the Mode Key for 3-5 seconds during almost any operation. It then displays a variety of important information like where the HC thinks the scope is pointing (in RA/Dec and Alt/Az coordinates) as well as the date, time and location information, etc. You can actually watch the coordinates change as the slews. To leave the Telescope Status Display, you simply press the Mode key again to return to where you were without nay disruptions.
I found this to be extremely helpful when troubleshooting a decimation drive problem on a Meade scope. It is also handy and quick way to verify the key setup parameters without having to go thru the Setup process again.
the Telescope Status Display and the Easy Align functions are why I tend to prefer Meade Autostar over Celestron NextStar controllers.
Getting a “Proc. Trap 2” error on my controller. Where can I find information on how to fix this error?
I learned a lot from your site, thank you. I recently bought a star navigator telescope 90mm with the Autostar-controlled tripod and 2 optical lenses. Initially it had no power with 8 new rechargeable batteries. I diligently scraped the contacts and put back the batteries. I also changed the 2032 battery where I scraped some white corrosions beside it. To my delight, it worked and asked me date, time and place. I wonder if a brought the Autostar controller to default older firmware when I removed the 2032 battery. The display on initialization say (c)07 43E. What does this mean?
Good luck with your scope. As for your error, I am afraid this is not a product support site. I would suggest you contact Meade.
I am not sure if you will get a response as Meade’s parent, Optronic Technologies, Inc., better known as the parent company of Orion Telescopes & Binoculars and Meade Instruments, has shut down its offices and storefront in Watsonville, California. I don’t know what kind of support is still available.
However, your first source for help is a search. For example, search on Meade Autostar error code y (c)07 43E and see what you find. This will often bring you the answer you need.
In my experience, rechargeable batteries do not work well in most Goto telescopes. If you are using NiMh rechargeables, their voltage is typically 1.25 volts when fully charged. Normal alkaline batteries are 1.5V. You will get errors due to the low voltage. Most of my problems with the Autostar system were traced back to low battery voltage. I used to use standard alkaline batteries, but now I use Lithium batteries exclusively. They last a LOT longer and I have had no problems since making the switch.
Hi, the display of “(c)07… 43E” is no error that just means “copyright 2007, firmware version 43E”.
Also, taking the 2032 battery out of the scope does not affect the firmware stored in the 497 hand controller.
I have a help question. I’m having trouble viewing objects through the eye piece. I can find the object ,such as the moon, but not through the telescope. I’m using a 25mm eye piece. I’m a first time user.
I am sorry but I don’t know how to help you. You say you can find the target but not through the telescope. This is not really a help line/discussion forum. I would suggest you post your question on one of the forums, such as http://www.cloudynights.com where people can give you more attention. I am a member there.
Hello. I live in Mexico, several years ago I bought my first telescope, a starnavigator 102 with audiostar. I have seen/tested telescopes with goto celestron and newer ones like the seestar. But there is something that cannot be discussed, the audiostar function is invaluable, it makes watching much more entertaining. The best thing is that it comes in Spanish!
Pondering, as a rank newbie, a Meade ‘DS 2000 with a 494 controller with extra lenses for $150 Canadian. Can a person learn on such a telescope? Is it a reasonable telescope for looking at the moon and planets? Are the optics fairly good.( Told you I am a newbie! ) Can one use this with a modern version of Windows?
Thank you!
Quincy Collins, Nova Scotia
Quincy,
Any telescope can be used to explore the sky. I have scopes that cost under $100 that allow me to explore the sky. I also have scopes that are over $1000 that give me better views.
A poor quality scope will limit your detail and likely your enjoyment of the experience. The image may not be as sharp as a better scope, but assuming there are no physical defects, they should work.
A good scope will enhance that experience by giving you better views along with better mechanical elements. But just like anything you buy, to a large extent, you get what you pay for.
My observation is that even the low cost optical tubes are at least serviceable. What really limits these packages is the poor quality eyepieces that are included. Very low cost packages often include Ramsden or Huygens eyepieces. They can present an image but often is is only sharp in the very center and the field of view can be quite limited. Even a Kellner type is an upgrade from these and a Plossl is a huge leap. So, if you have an entry level scope and the images are not what you expect, see if you can borrow some better eyepieces to see if they will improve the view. Usually they will.
The DS2000 is an entry level computerized scope. It has not been available new for many years, but if it has been cared for, the optics are adequate to get you started. I assume that you either have one that is old or you are considering buying one. It would not be my first choice, but it may be all you can afford. And, they eyepieces may be the limiting factor.
When looking at a used GoTo scope, the biggest question is usually whether the GoTo system still works and if it has been treated well. Gears can be stripped, for example.
The optics and focuser are the other points of consideration. Are they clean? Can you focus properly? Does the mount hold the scope steady? This is no different than buying a used car. You can get a real gem or you can get a dog.
I started with $25 10X50 binoculars and got totally hooked on astronomy. My first telescope, a Meade ETX 80, would be in a similar class to the one you are asking about. They are entry level, but the ETX 80 got me started with telescopes and I still use it from time to time even though I have much better, much more expensive scopes.
Good luck with whatever you choose to use. The key to success is you more than the equipment, but having good equipment always makes it easier to succeed.
Hello Ed
I pulled out my Meade ETX-80 out of storage and found out that my hand controller’s screen lights up but no info is shown. I’ve replaced the cmos and the six AA bateries with no change in the screen. Can I bypass the hand held controller and use a laptop with a USB to RS232 4P4C Cable (Amazon) to control my telescope? I have no problem manually sighting objects in the sky but would like to automate it if possible.
Fred, I suppose this might be possible but I have never tried it. Hopefully you have found help from another source.
I was gifted a Meade 102mm and I can seem to get it to work. I have replaced all of the batteries in it. I don’t have an aux cord for it. When I turn it on the red light shows but when I plug the Audiostar in the red light goes out and the controller doesn’t work.
Will it operate without the controller?
The Optical tube will work just fine. You can put in an eyepiece and view through the scope. The key is how to point the scope. If the mount has clutches that release its movement from the motorized mount, then you can release them and turn the scope by hand. I have done this many times with my ETX 80. A computerized mount is not really intended to work this way, but it will work. Note that some Celestron mount don’t have these clutches so you can’t disengage the drive system from the mount. Pushing the scope around manually, without using the controller can damage the gears.
Got to your manual and see if it makes reference to clutches. If it does, release them and you should be able to move the optical tube, the telescope, by hand.
Hmm, I wonder if you can mount these on a Celestron Wedge?
I doubt it and would not recommend trying it. The Meade controllers are specific to Meade mounts.