
A planisphere is an inexpensive star chart device that helps us learn the sky, identify the brighter stars, star patterns, deep sky objects, and more. I like that it’s simple to use once we get the hang of it.
I keep mine in the car so I can grab a few observing minutes with just my eyes or the binoculars that I always keep in the car. I also often keep it nearby when using my telescope, picking out targets of interest.
I have seen planispheres in 12″, 8″, and down to about 5-inch units—small enough to be carried in our pocket. Naturally, the larger ones provide more information and are more easier to read, while the smaller ones are more convenient to take with us. However, their use and operation are essentially similar.
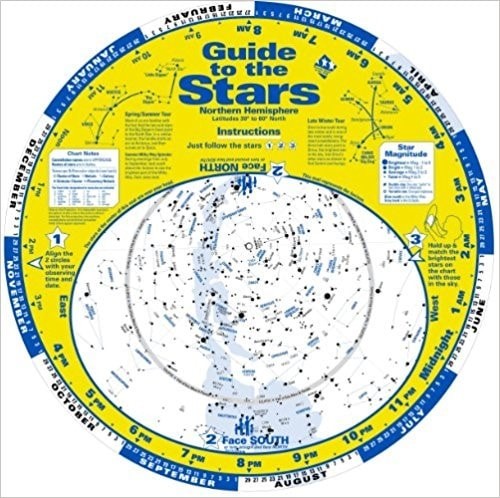
Note that a planisphere is usually specific to a particular latitude. For example, the one above is good for north latitudes of 30 to 60 degrees. If you are above or below that latitude, you would need a different planisphere, as your view of the sky would be different.
Planisphere Design: The Bottom and Top Disks
Planispheres are typically made of two circular disks that are joined at the center by a rivet. While they can be made of paper or cardboard, I always recommend one made of plastic— it’s more durable and doesn’t get damaged by dampness on a humid night or when dew starts to accumulate.
The bottom disk has the months and dates printed around its edge, which is used to set the planisphere to show us the sky as it will appear on a given night.. It also has a star chart printed on it.
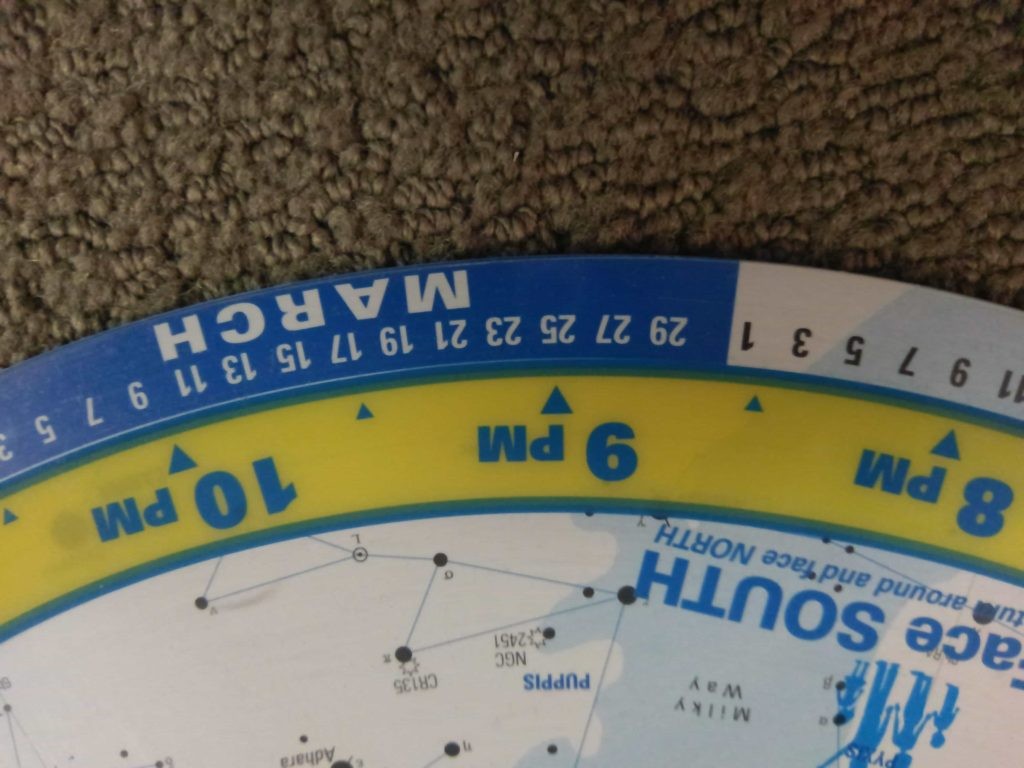
The top disk of the planisphere is a little smaller. with time-of-day markings shown around its edge. We use these time markings along with the date on the bottom disk to set the planisphere for the time you plan to observe.
The transparent window in the top disk allows us to see part of the star chart on the bottom disk. When we rotate the top disk so that today’s date and time line up, the opening will show the sky as it will appear on that date and time.
The Earth rotates at 15 degrees per hour and so the sky appears to move—even though it’s actually us doing the rotating. By adjusting the planisphere as the time processes, you can see how the sky changes over the course of an evening.
Advance the date by days and months, and you can see how the sky changes throughout the year. Stars and deep-sky objects (DSOs) come into view and leave the view as the year progresses.
Stars, Constellations & Deep‑Sky Objects in the Planisphere
The better planispheres have the stars printed in such a way that we can tell which will be the brighter stars, shown as bigger dots. Smaller dots are used for dimmer stars.
Often, the brighter stars are named next to them, while dimmer ones may not be named. Still, their presence helps identify asterisms or patterns in the sky. The Big Dipper and Orion’s Belt are two well-known asterisms, a collection of stars that is easily recognized.
If we are in a fairly light-polluted location, we may not be able to see all of the stars that are shown on the planisphere with the naked eye. If our sky is darker, we may be able to see more stars.

Most constellations are named on a planisphere. Usually, the main stars of the constellation are shown, sometimes joined by a line as in the above picture. Or the constellation may be outlined to help us visualize the area it encompasses.
Also shown on the typical planisphere are symbols for double stars and brighter deep sky objects (DSOs) such as star clusters, nebulae, galaxies, and globular clusters. There should be a key printed on the planisphere to show us what each symbol represents.
Many also have the brighter Messier objects identified on the star chart. For example, the Andromeda Galaxy is labelled as Messier 31 or M31.
The stars and these deep sky objects remain fixed in their location relative to each other for all practical purposes, which enables the planisphere to be used as a roadmap for the sky.
The Ecliptic Line For Tracking Planetary Motion
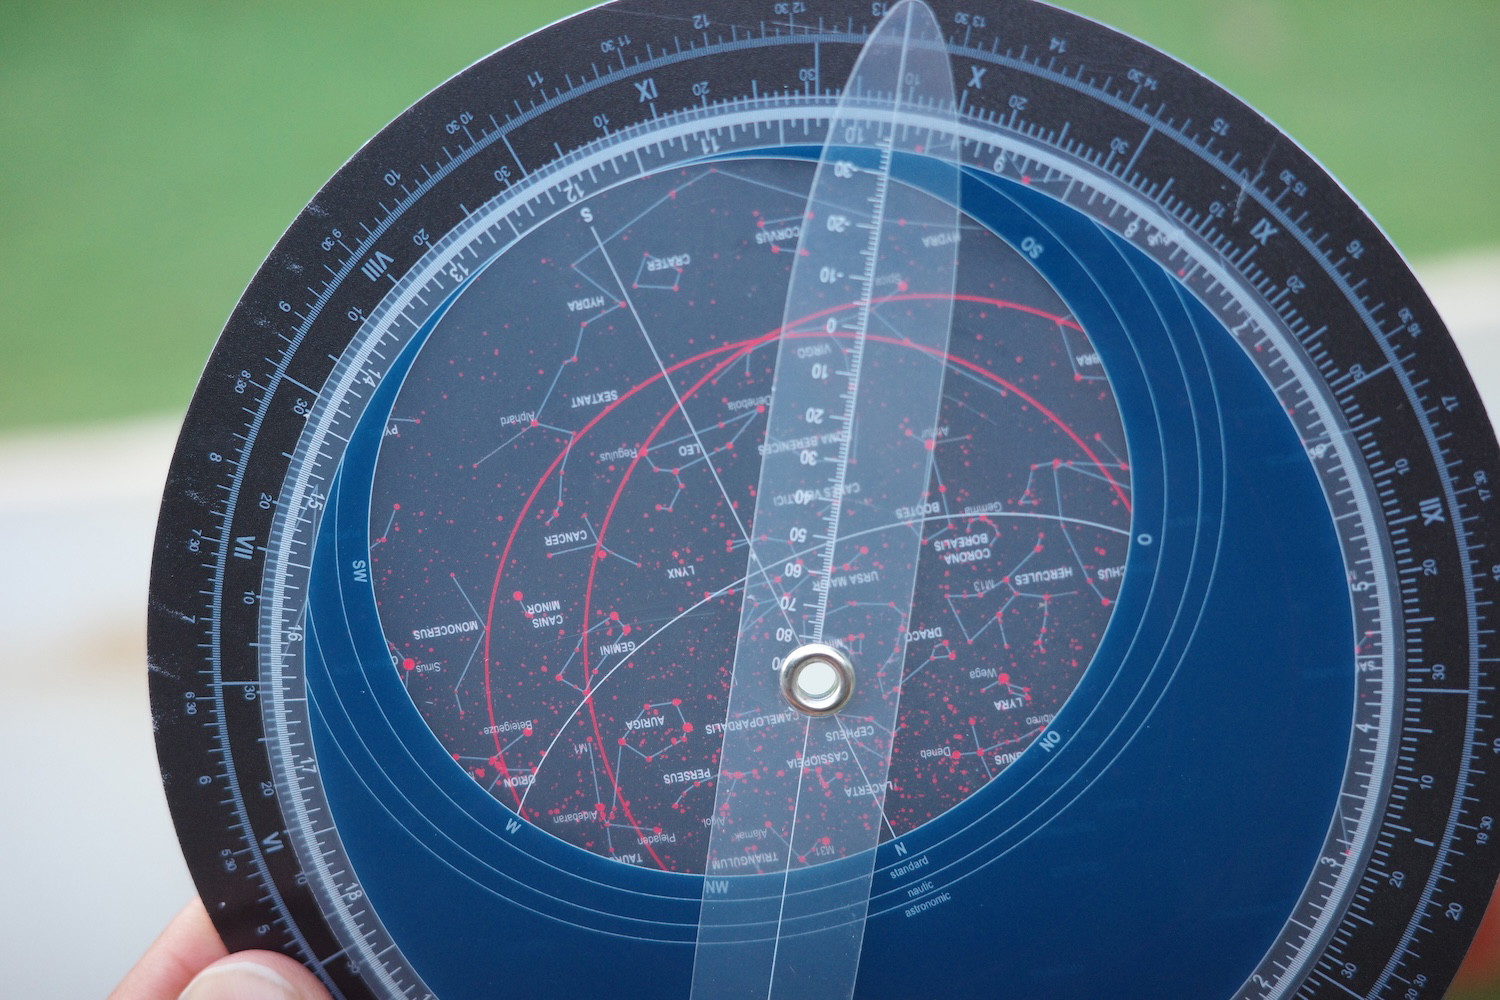
What we won’t see shown on the planisphere are the Sun, the Moon, and the planets as they move through the sky against a background of fixed stars. However, most planispheres include the ecliptic line, which is the path that the Sun, Moon, and planets travel through the sky, making it easy for you to know where to look for them when they are visible in the night sky.
To understand the ecliptic, just think of where the Sun rose this morning. Now consider the path that it traveled through the sky. Identify where the sunset was. Then picture that path and you have the ecliptic line. The Moon and planets follow a very similar line through the sky.
Because this path is predictable, spotting the visible planets—Mercury, Venus, Mars, Jupiter, and Saturn—becomes quite easy. Neptune and Uranus also travel along the ecliptic, but require some optical assistance to distinguish them from faint distant stars.
Just remember that the planets aren’t always visible in the evening sky. Sometimes the planets are in the morning sky. Sometimes, as the Earth and planets travel around the Sun, a planet may be on the other side of the Sun and, therefore, not visible to us.
The Trick to Using a Planisphere
Many people miss the key element of how to use a planisphere. It is not used flat on a table as a book. You hold it up to the sky.
Usually, there is a center rivet that joins the two disks. At that rivet, there is a marking for the North Star, Polaris. This is the only star that is fixed in the sky, as it is aligned with Earth’s axis of rotation. Everything else in the sky appears to move, but Polaris remains fixed.
If the rivet is hollow, as many are, you hold the Planisphere out at arm’s length and sight Polaris through the rivet.
The Planisphere should have an indication of how to hold it up to the sky. Likely, there will be markings to indicate which part of the disk should be up when facing north. If you face north and hold the rivet so that it aligns with Polaris, you will have a representation of the entire sky before you.
The second tricky part is that you are looking at a flat representation of the sky, but the sky is more like looking at the inside of a dome. So you have to use your imagination to help you place the various bright objects in the sky.
For example, if you set up the Planisphere for March 25 at 9 pm, as I’ve shown in the photo, the window will show the sky for March 25th at 9 pm. Now, face north and place Polaris in the rivet.
Just to the right of Polaris, you should see the Big Dipper in the constellation of Ursa Major on the planisphere. Now identify the Big Dipper in the sky. Get your orientation.
Still facing north, to your left, high in the sky, you will see the group of bright stars that form the W, or M, which is the constellation of Cassiopeia. To your right, toward the eastern horizon, you will see the bright stars Arcturus and Spica.
Now, here is the second tricky part: as you face north, behind you is the southern horizon. You realize that the top of the planisphere window is actually the southern horizon, which is behind you.
Behind you and slightly to your left, as you face north, you will see the constellation of Orion, one of the most easily recognized constellations. See where it is on the planisphere.
The key is to start to pick out those bright or easily recognized formations that will help you orient yourself and help you mentally project the flat planisphere against the celestial dome.
Of course, I don’t know what date and time you are reading this, so the exercise I just described is only for illustration purposes. But it shows you how to use your planisphere and how to position it in front of you, pointing toward Polaris. And it illustrates how, using bright marker stars or shapes, you can get yourself oriented to the sky.
You can do this facing in other directions but north, toward Polaris, is the easiest to understand and to perform. Try to find a location where you can see Polaris in order to learn how to use your planisphere.
What Else Does a Planisphere Offer?
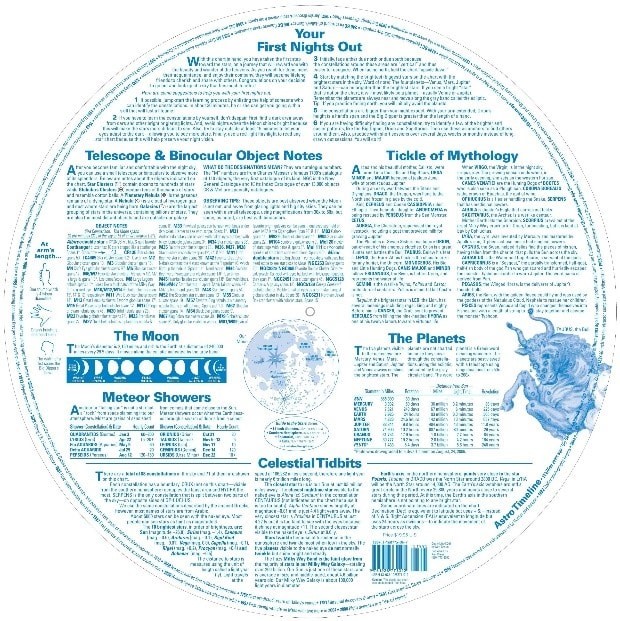
What I have described would be true for any planisphere. However, each publisher adds their own value by including all sorts of other information. The above image is the back of the Guide to the Stars planisphere. It includes:
- information on the phases of the moon
- suggestions on good targets for binoculars vs. telescopes
- information on the planets
- all sorts of other useful information
Other publishers may choose to include different information. When you take this additional information into account, the planisphere becomes a very useful observing tool to help you learn the sky and identify interesting things to see with your eyes, your binoculars, and your telescope.
Naturally, the larger the planisphere, the more room the publisher has to add these extra tidbits. So pick your planisphere size according to how and where you will use it.
I chose a 16” planisphere, which is a large one. I like all the extra information that is included. You may prefer a small one that can be carried more easily in your equipment bag.
Nicely written article. I’ve been curious about planispheres for some time and you clearly explain how best to use one. Thanks!
Glad you found it helpful. They are a great tool even in this age of computers.
Wonderful information you have provided here, have just started stargazing. Its an inspiring article to me.
A good approach is to pick one very bright star as your touchpoint and build out your knowledge from there. For me, it was the star Vega. I would start there each evening and branch out from there. During the summer I still look for Vega first.
Hi Ed, great article thanks very much.
In the picture in the article, your planisphere also has a plastic ruler with degrees. Mine has the same thing but no explanation on how to use it
Do you know what it is? Any hint on what information it can provide?
Thanks,
L
My Planisphere is the large yellow Guide to the Stars, the first one in the article. The second one, the bluish one, was inserted by the editor. I believe the zero on that scale tracks along the celestial equator which is a projection of earth’s equator into the sky. If we speak in equatorial terms, this would be the declination of the target. The hours shown around the planisphere would be the Right Ascension designation, if I am reading that planisphere correctly. These would be useful if you were using an equatorial mount for your telescope.