

Solar observation is the only area of astronomy where a mistake can result in injury or permanent bodily harm. And even if you think you’re safe by buying the right equipment, there have been numerous cases of fake eclipse glasses sold resulting in permanent eye injuries and even cases of fake ISO certification labels, meaning the ISO certification can no longer be trusted as the sole guideline to guarantee a safe solar filter or pair of eclipse glasses.
This is not to say solar observing should be avoided, however. I consider it to be no more dangerous than many outdoor activities. However, care should always be taken while observing the sun and solar eclipses.
My Safety Checklist
Unless I’m using a dedicated solar telescope or solar binoculars with a built-in filter, I always make sure of the following when using a solar filter on telescopes, spotting scopes, and binoculars:
Many older (particularly Japanese-made) refracting and reflecting telescopes come with these, as do (sadly) some cheap department-store telescopes. Being so close to the focal plane of the telescope, they are subjected to an intense, nearly focused pinpoint of light and heat, which can crack them (and in turn let the unfiltered sun into your eyes) in under a second.
I have met folks who have had permanent eye damage from using these devices, as well as those who walked away from their telescope only to come back and find the filter cracked!
Even if sunlight is not directly shining into the objective lens or mirror of the telescope, it can easily bounce off the tube walls and find its way to the eyepiece.
This seems obvious, but with the advent of low-cost collapsible-tube reflectors, people seem to be doing solar observing with them more and more. Even with a light shroud, all it takes is a slight breeze to potentially let sunlight in to hit the primary or secondary mirror and blind you.
A big dobsonian telescope is not only pointless for solar observing (daytime seeing always limits a scope above 6–8 inches); it’s also dangerous. Going blind is bad enough, but a large Dob could easily start a fire on a sunny, dry day if sunlight strikes the primary mirror, igniting its own wooden components or nearby grass. I recall a story of a man whose shroud slipped off his 25” (yes, 25”) Dobsonian during a gust of wind and the scope proceeded to ignite both its wooden upper tube assembly as well as the area around it. All that was salvageable were the mirrors and a few other parts, and there was a large scorched patch of ground next to where the scope was.
Unless the solar filter is a solid glass design, it probably uses a thin, Mylar-like safety film. I hold the filter/glasses up to the sun or a bright light and look at the ground to make sure that there are no pinholes that can compromise my safety.
Only certain types of welder’s glass absorb enough light to be used safely for solar viewing. Others let in too many harmful UV rays (or just too much light altogether), and some can even provide a too-dim image. The overall risk is not worth it. In any case, the image is an ugly green, and welder’s glass doesn’t always have good optical quality, which would result in a less-than-sharp image of the Sun anyway.
Eclipse glasses are primarily meant for viewing eclipses and should not be worn while looking through a telescope.
A telescope amplifies light and if many eclipse glasses are used with a telescope, the resulting transmission is too high to be safe. In any case, I would have to cover up a lot of the usable aperture and the image quality would be poor anyway.
Choosing A Solar Filter
If you are looking to buy a filter for your telescope or binoculars, you can get one (either glass or film) from Baader Planetarium, Celestron, Orion, Seymour Solar, Spectrum Telescope, or Thousand Oaks Optical. I recommend you read my Solar Filter Buying Guide to learn more.
Choosing a Solar Telescope
While you can obtain dedicated or semi-dedicated white-light solar telescopes, if you have at least $600 to spend, you can buy a hydrogen-alpha telescope. We recommend reading our Best Solar Telescopes guide to learn more.
The Aperture, Magnification and Eyepiece Concerns
The area of sky directly around the Sun typically has poor to mediocre seeing. So, I mostly never gain much by going above 6 to 8 inches of aperture for the telescope, besides the ability to use slightly higher magnifications without dimming the image too much.
- My Eyepiece and Magnification Targets
Since our pupil isn’t going to be dilated during the day, I use eyepieces with an exit pupil of 3–4 mm or less, which corresponds to a magnification of at least 6x–9x per inch of the telescope’s aperture. At the same time, magnifications of over 25x/inch or below a 1mm exit pupil result in a too-dim view. So I often keep my magnification somewhere in that range.
Field of view is relatively unimportant when viewing the Sun (particularly with hydrogen-alpha scopes, which are usually rather small), so I recommend getting the sharpest, highest-contrast eyepieces available for solar viewings, such as Plossl or preferably Orthoscopic eyepieces. A zoom eyepiece (provided it is sharp) is also something I consider handy for solar viewing.
- Aligning The Telescope
The first step to viewing the Sun with a telescope is to get it pointed there in the first place. Surprisingly, this process can be trickier than it sounds!
I often use the scope’s shadow to line it up with the Sun. But this can prove difficult and annoying, especially with catadioptric instruments. The best solution I found was to buy or make a dedicated pinhole-projecting solar finder like the Tele-Vue Sol-Searcher.
My Experiences With Viewing Solar Eclipses
A solar eclipse is a special, typically once-in-a-lifetime event. However, making the most of it can be tricky.
Cheaper Naked-Eye Eclipse Viewing
Many people make do with a simple pinhole projector. The next step up from a pinhole projector is eclipse glasses and handheld solar viewers, which are both basically the same thing. However, they still do not show me everything.
Pinhole Projector
- Cost essentially nothing
- Can be made or improvised almost anywhere and with anything
- The resolution is essentially zero. Even a huge sunspot group that is viewable with eclipse glasses will be invisible.
Eclipse Glass/Handheld Solar Viewer
- They’re extremely cheap and can generally be bought in bulk
- These are a cheapened, less optically smooth version of the film from a telescope solar filter put into a cardboard or plastic frame.
- Some of the more fancy handheld viewers have 2x or 3x magnification using really weak lenses, but I’ve not heard much about them
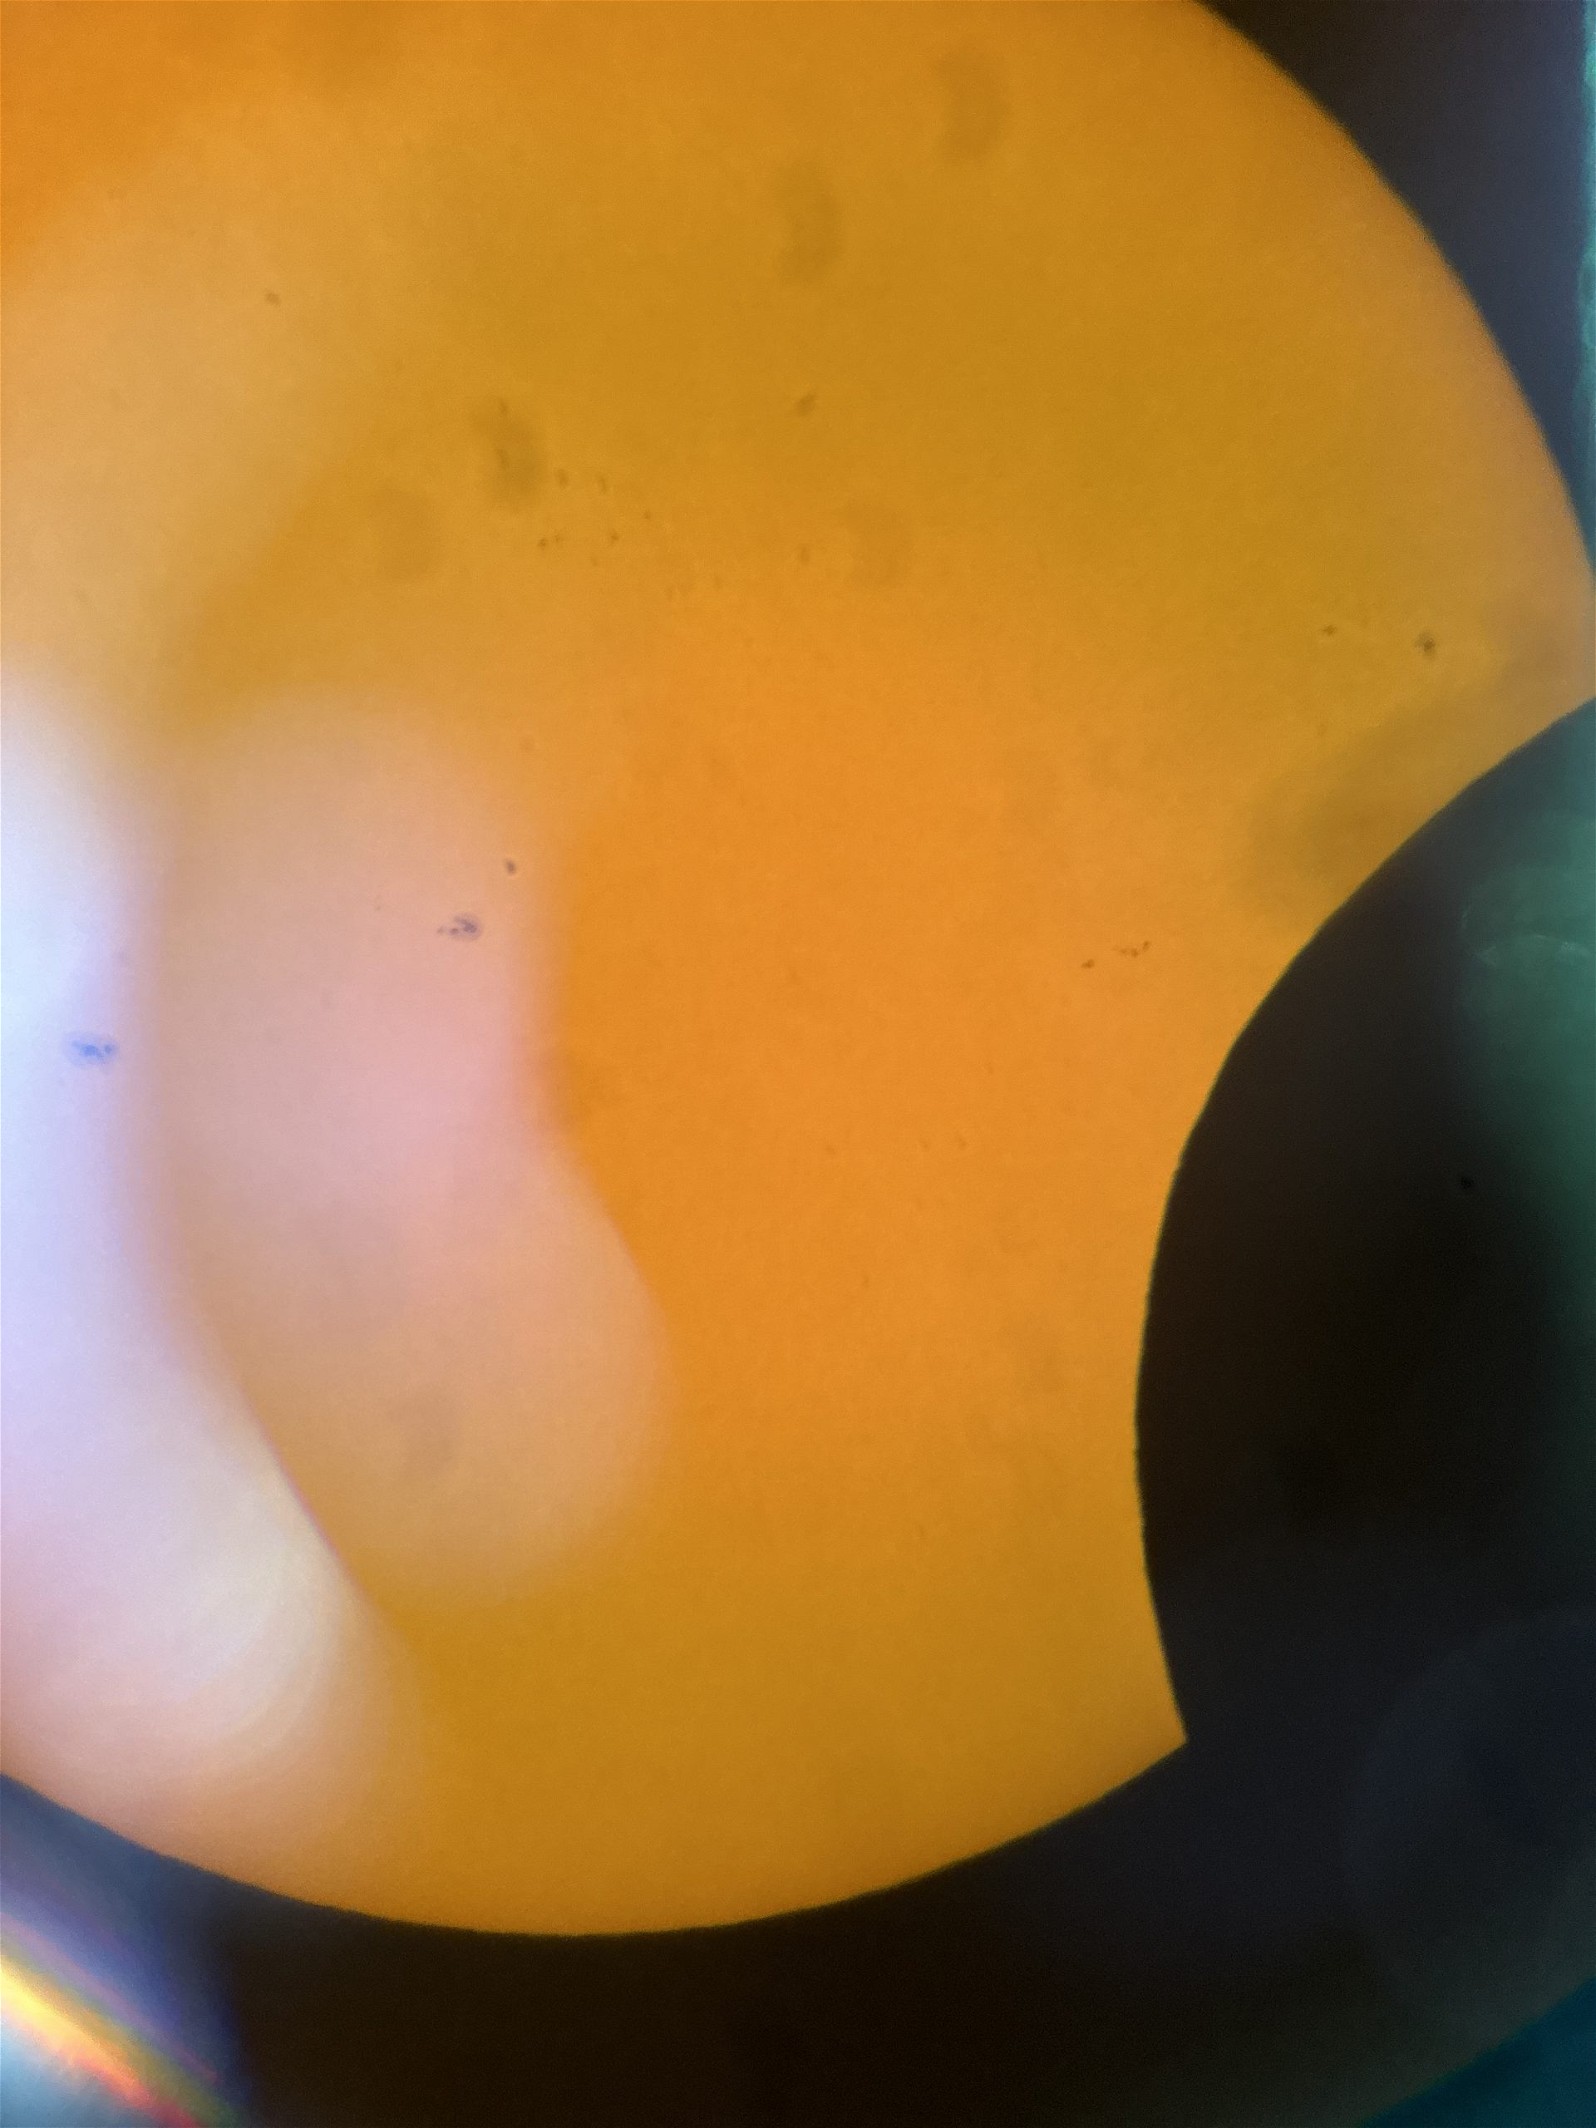
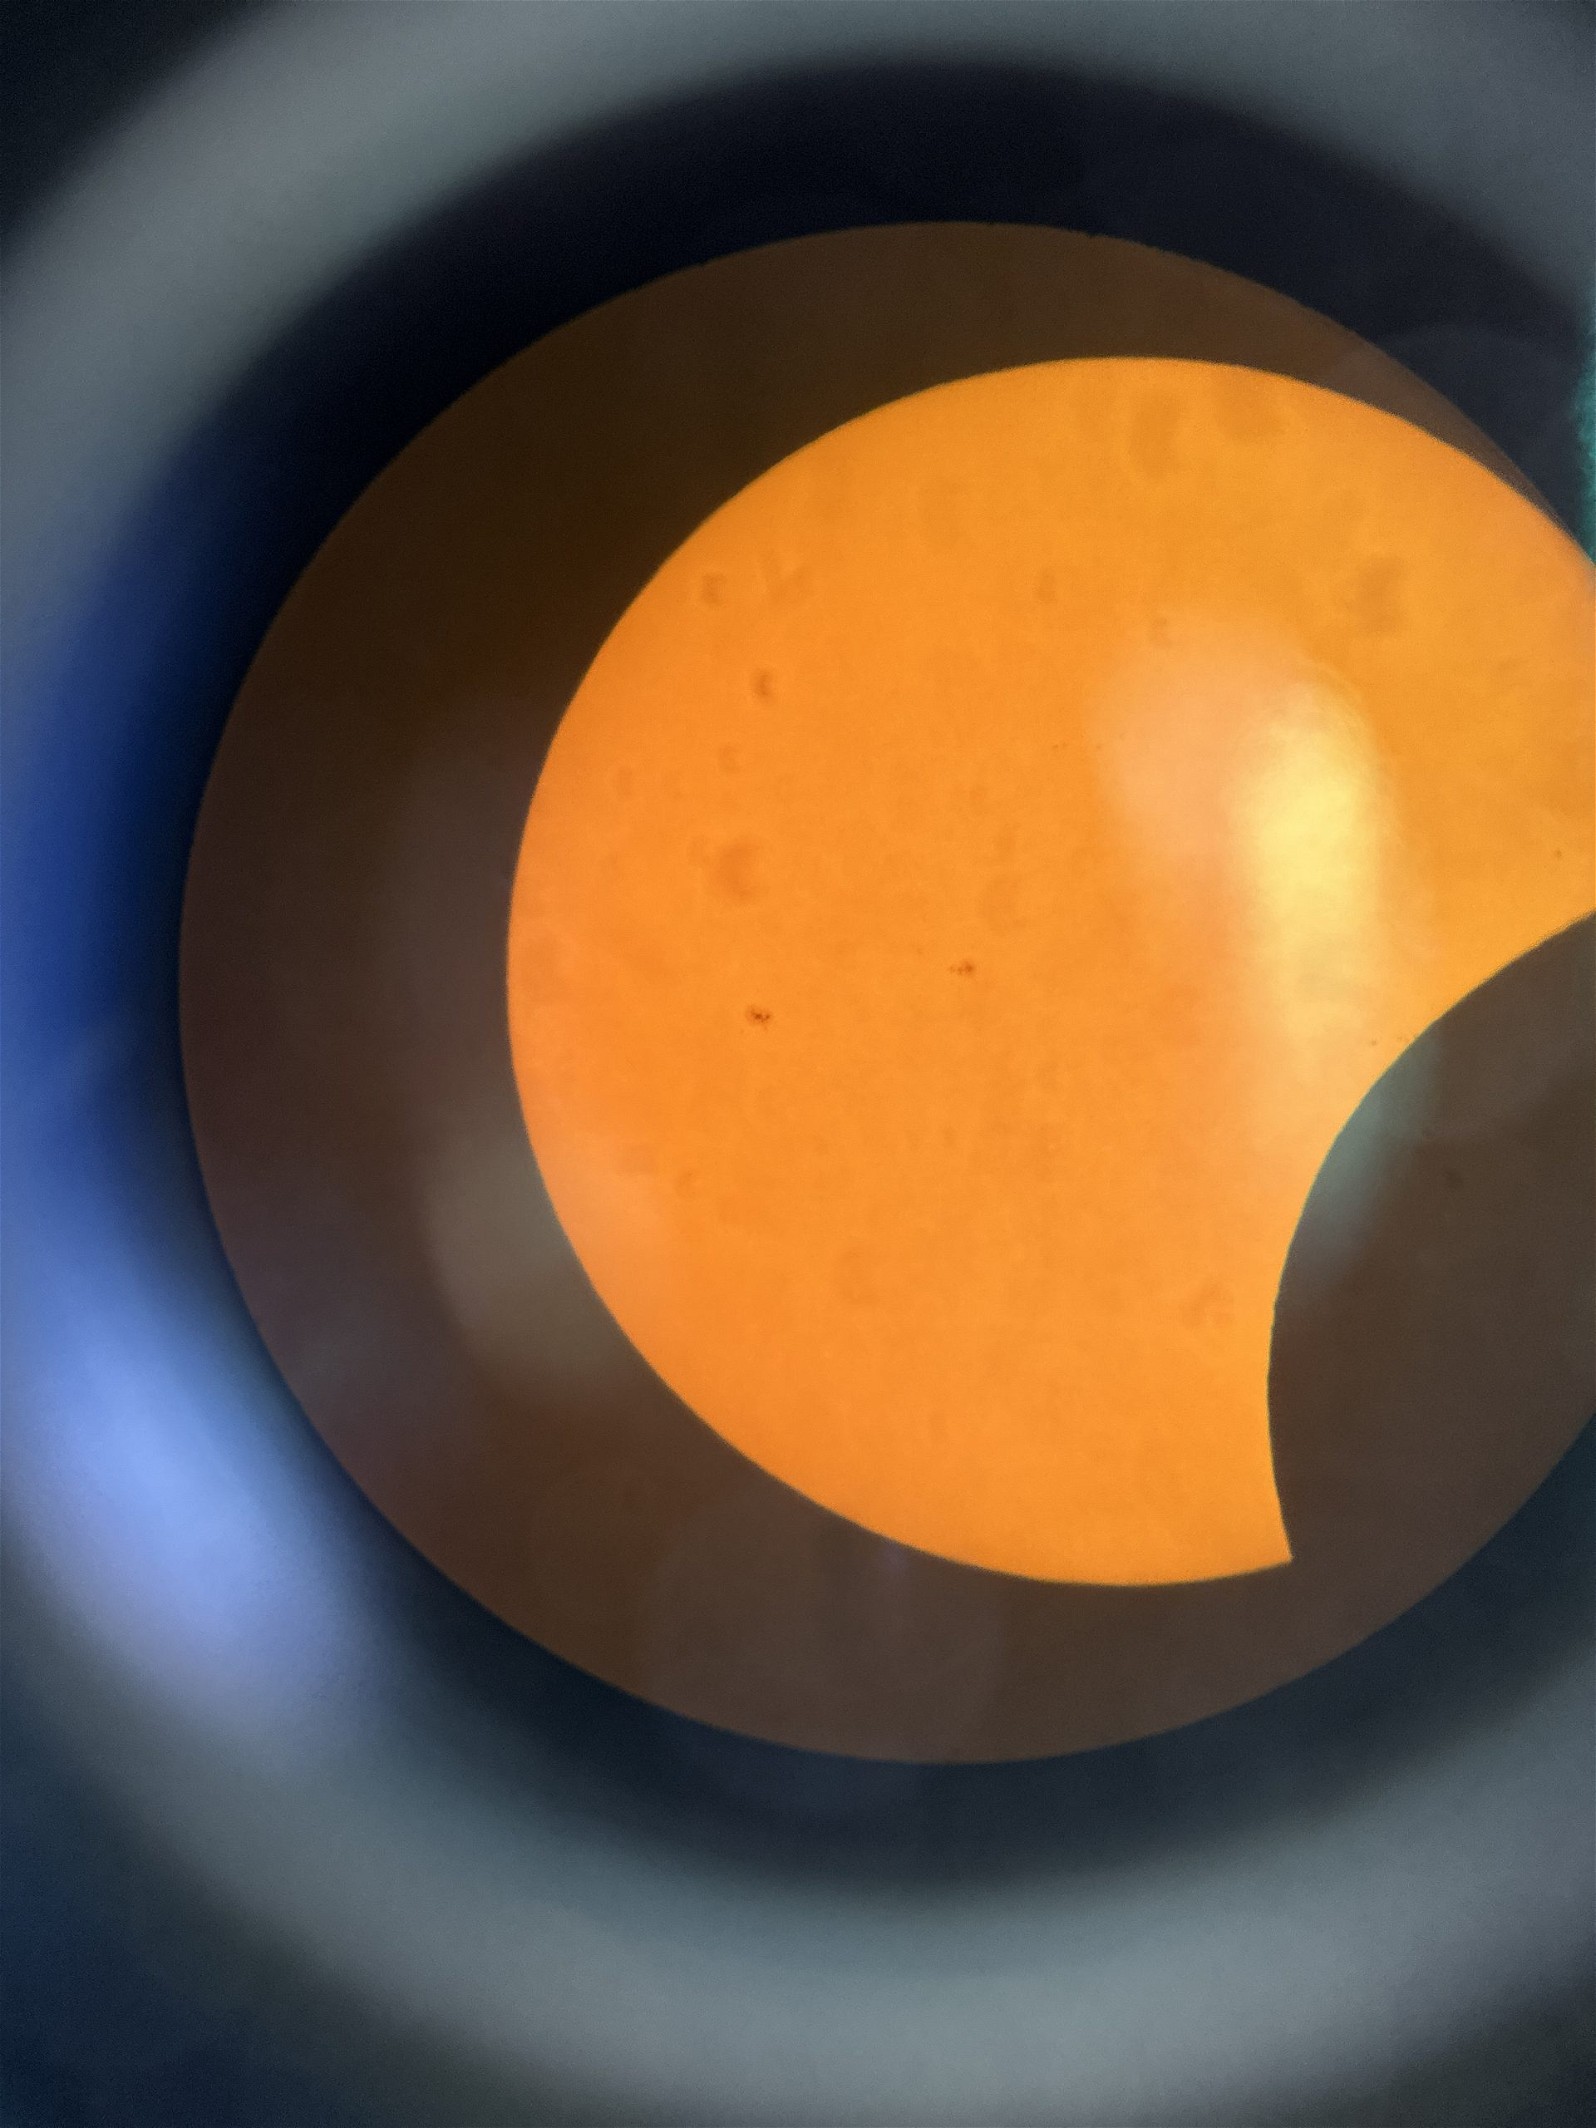
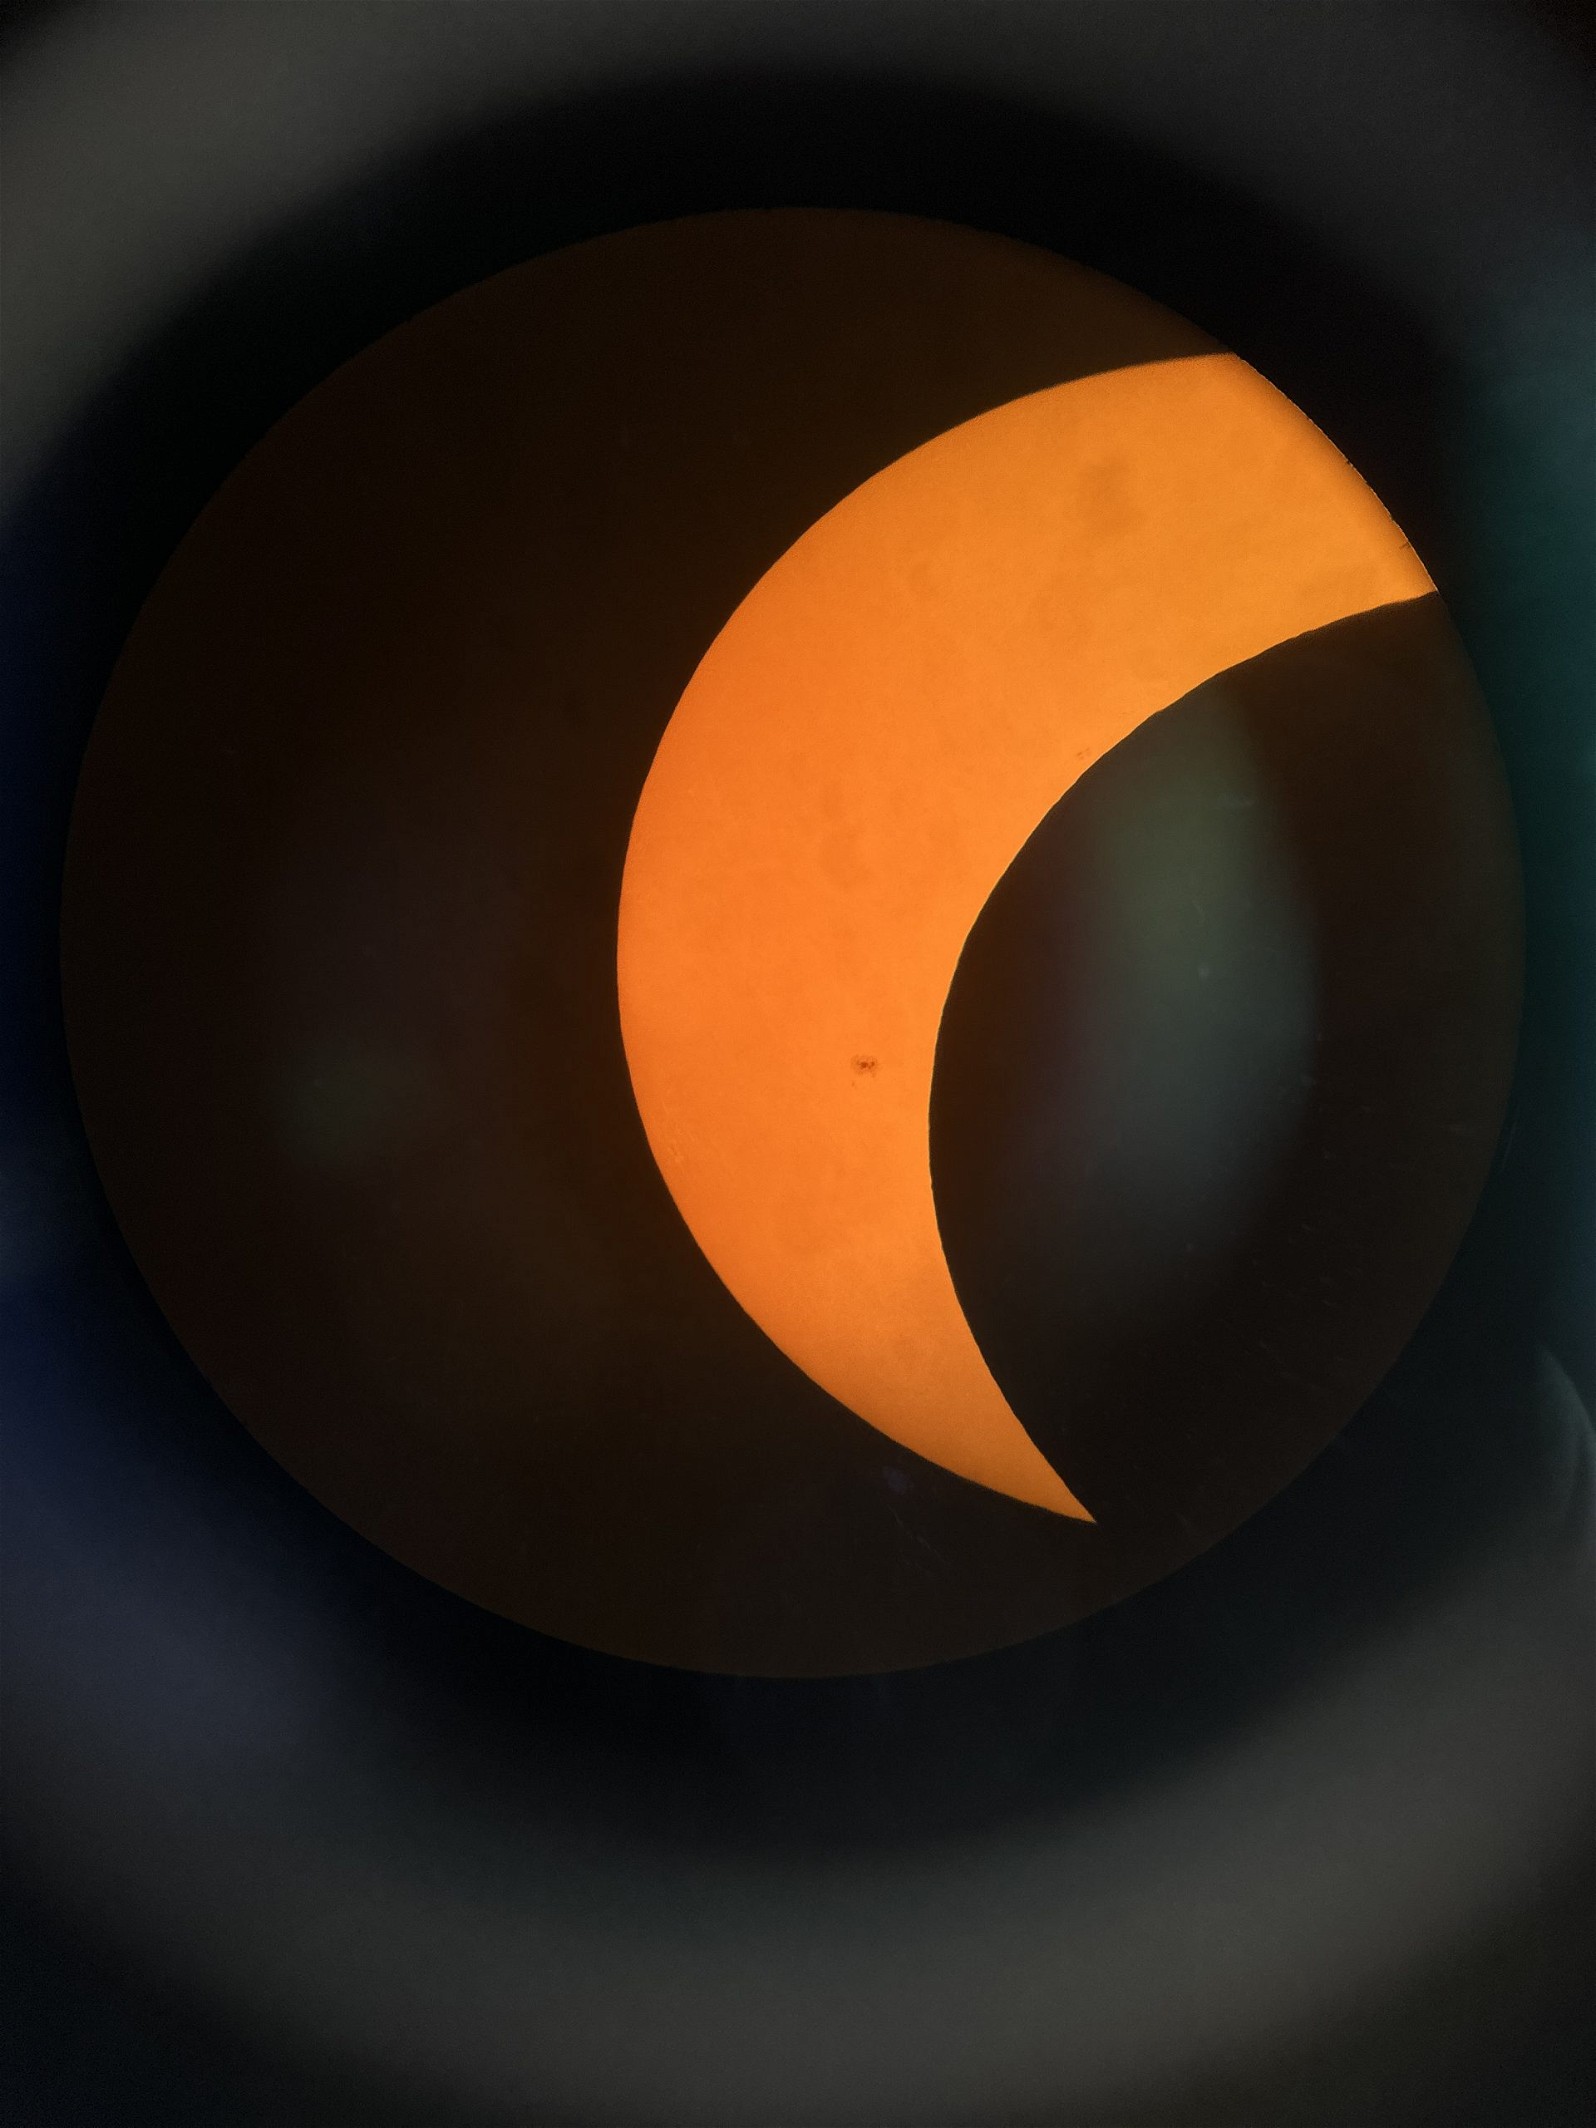
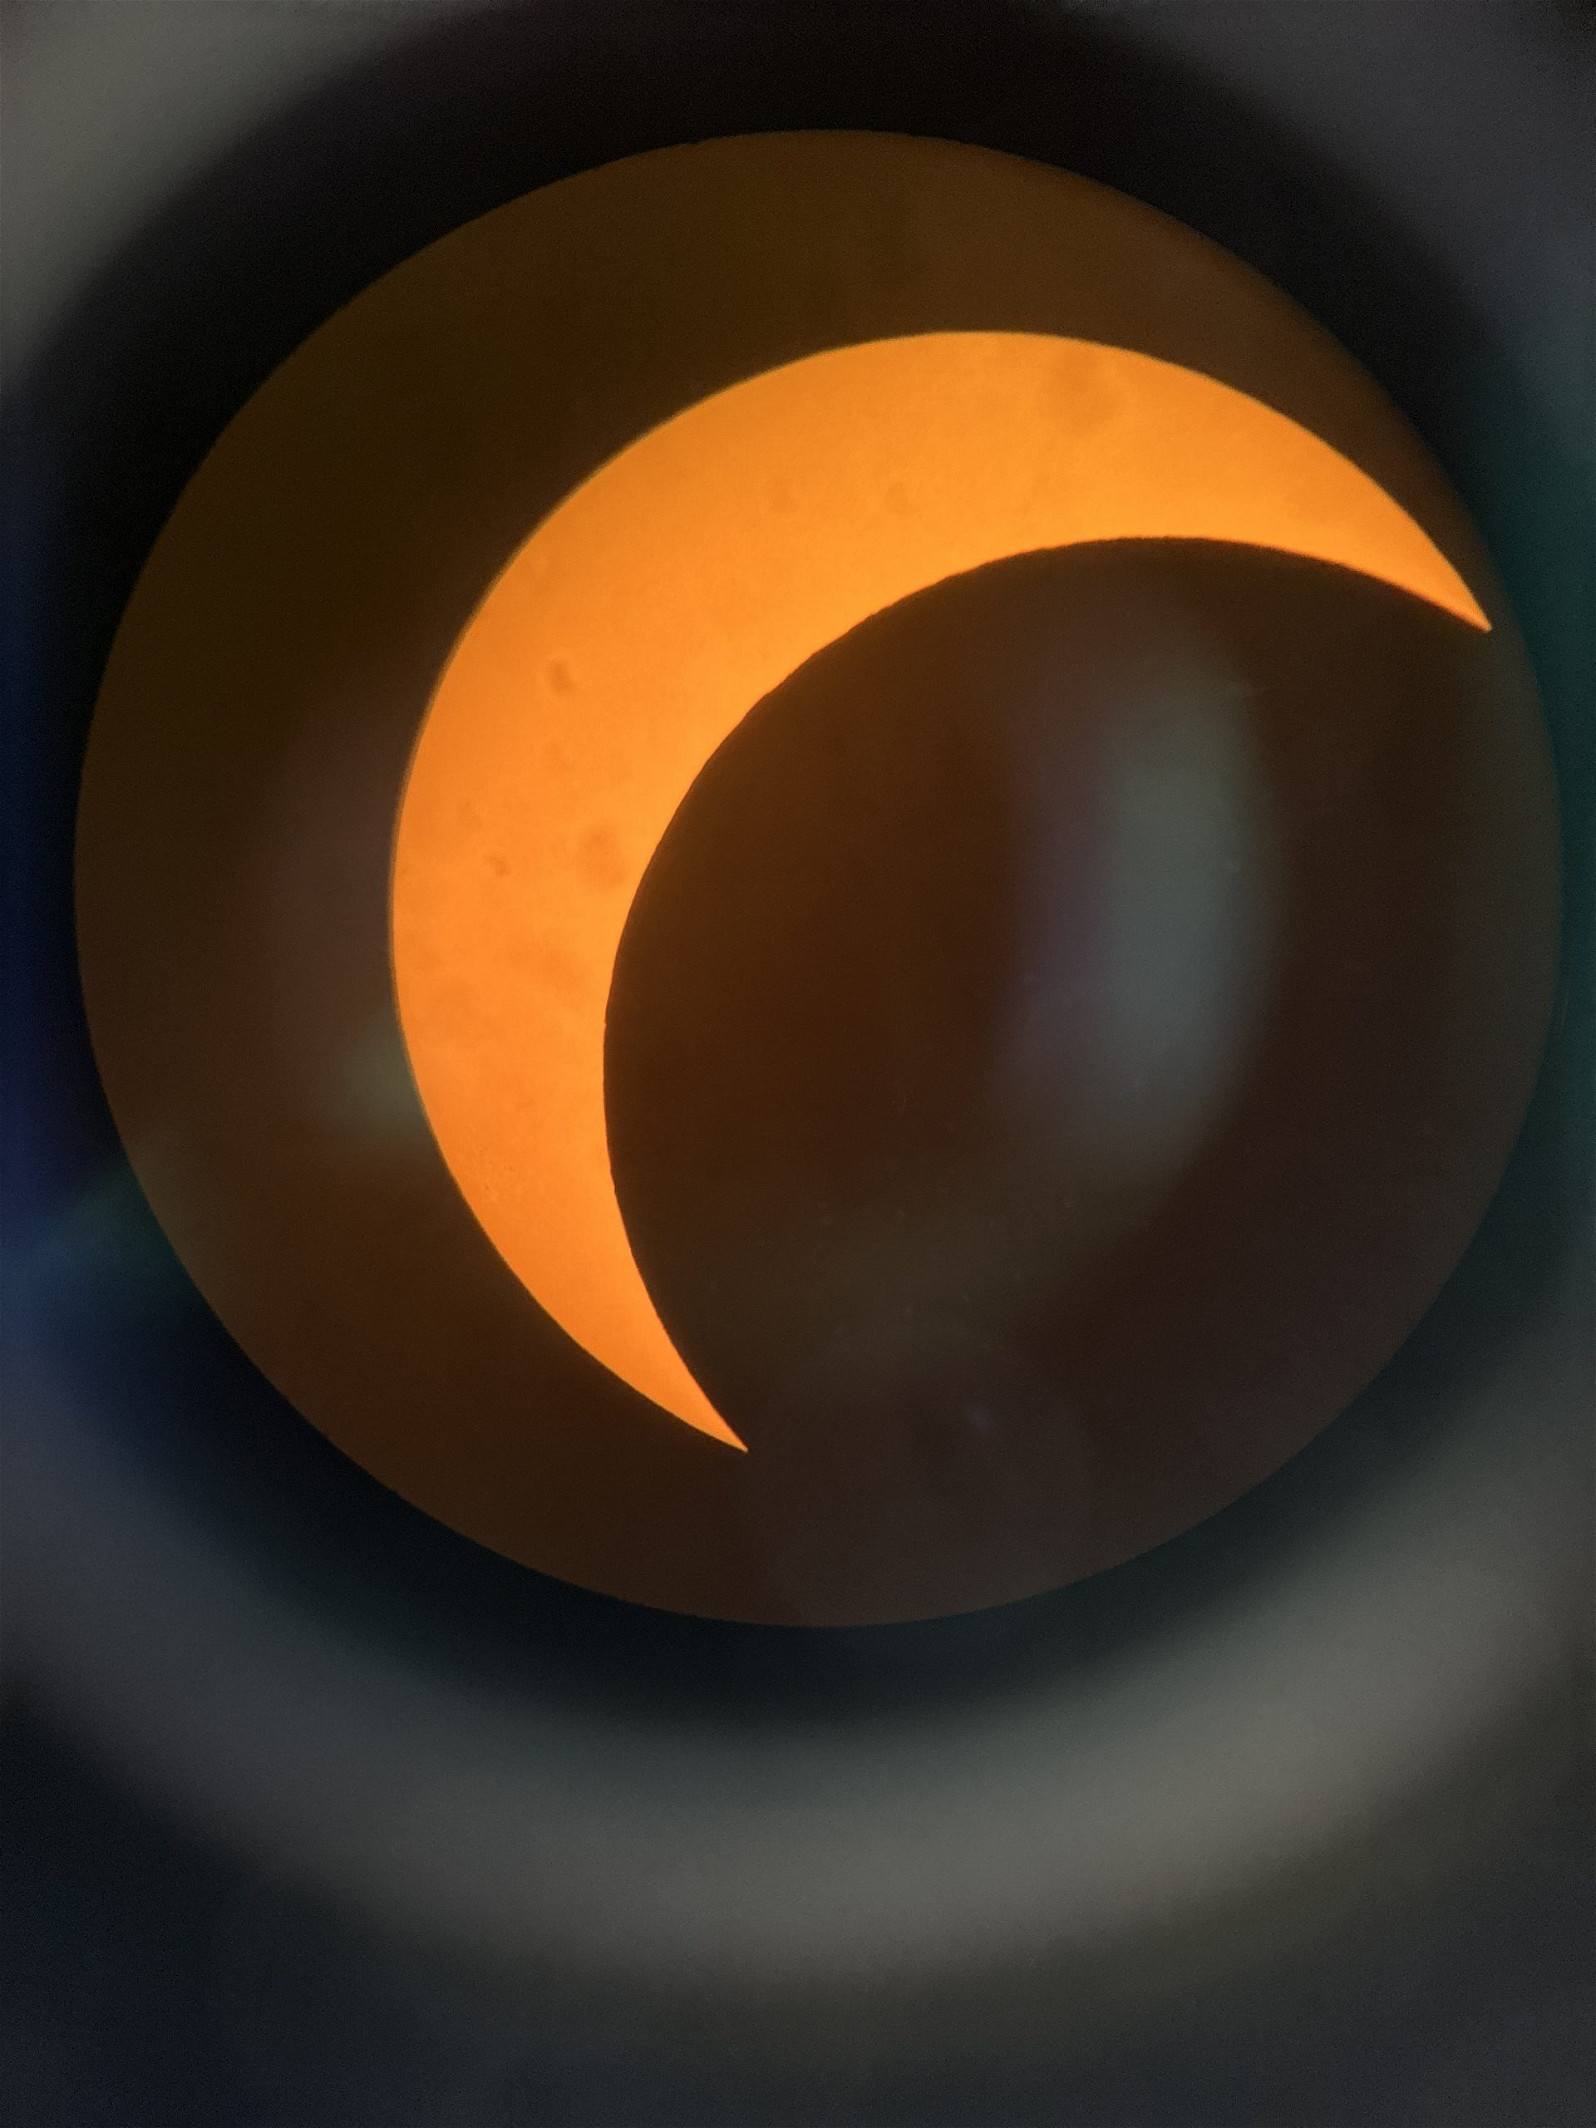
- Generally provide an orange, white, yellow, or green view of the Sun.
If the eclipse is a total one, we can safely look up and view the Sun with no protection during and moments before/after totality. We can see the “diamond ring” and “Baily’s Beads” effects caused by sunlight passing through craters and valleys on the limb of the Moon just before and after totality, as well as the beautiful solar corona.
Viewing Eclipses with Binoculars or a Telescope
Viewing an eclipse with a telescope or binoculars is basically the same as normally viewing the Sun.
However, just before totality, I usually take off my solar filter(s) if possible, which allows me to see prominences on the edge of the Moon’s disk that have not been eclipsed, again normally only visible to H-Alpha telescopes. I then make sure to put my filter(s) back on as soon as totality ends, though.
Solar Astrophotography
- DSLRs
You can buy a solar filter for your camera lens, but I think it’s probably best to connect your DSLR to a telescope if possible.
My suggestion from doing these myself would be to try to shoot video at the highest frame rate possible to counter atmospheric turbulence, which smears and blurs a single exposure.
- CCD/CMOS Cameras
A CCD/CMOS “webcam-style” camera that inserts directly into the eyepiece holder of our telescope and plugs into a computer via USB is the best I have used for solar imaging.
The extremely high frame rates of these cameras allow me to combat atmospheric turbulence for the best possible final image. Keep in mind that I sometimes have trouble reaching focus without a Barlow lens, particularly with some of the smaller H-Alpha solar scopes, which have limited focus travel. Otherwise, I think this process is basically the same as lunar/planetary imaging.
- Cell Phones
A cell phone camera really hates the brightness of the Sun through the eyepiece and just refuses to autofocus and adjust brightness whenever I use it, especially in H-alpha. I would not recommend attempting afocal solar photography.
Thanks for this informative article.
You’re welcome, glad to help.