
Regardless of what kind of finder you are using, after a finder is mounted on the optical tube of the telescope, you will need to fine-tune where it is pointing so that it aligns perfectly with the field of view of the telescope. This procedure is fairly simple.
The key thing is that you are aligning the finder with the telescope, not the other way around.
Deciding On The Alignment Target
You want to do this during the day using a fixed land object. At night, the things in the sky are moving, which makes it difficult to get the alignment correct.
Set up your telescope so it is level. Pick out a distant target, at least 100 yards away, and preferably ½ a mile, 1 KM, or farther. The farther, the better. This is your alignment target.
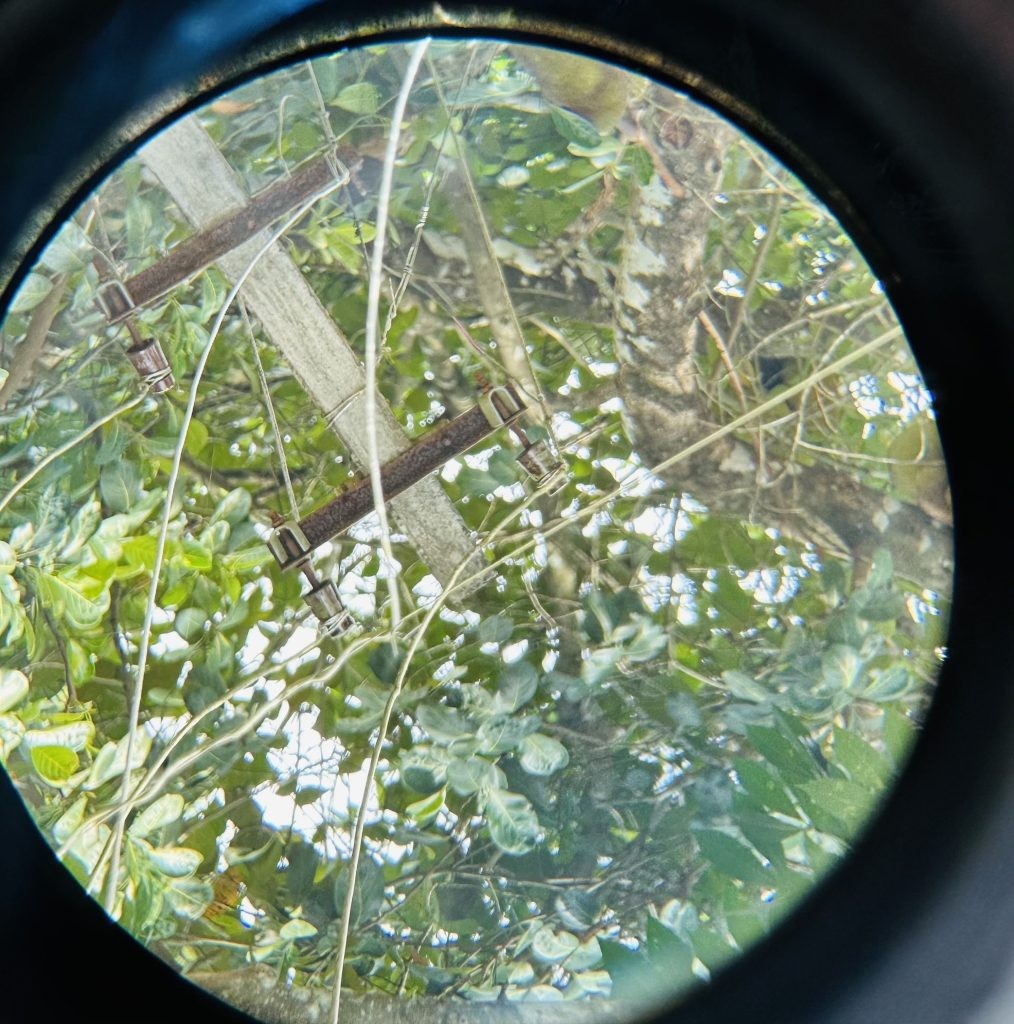
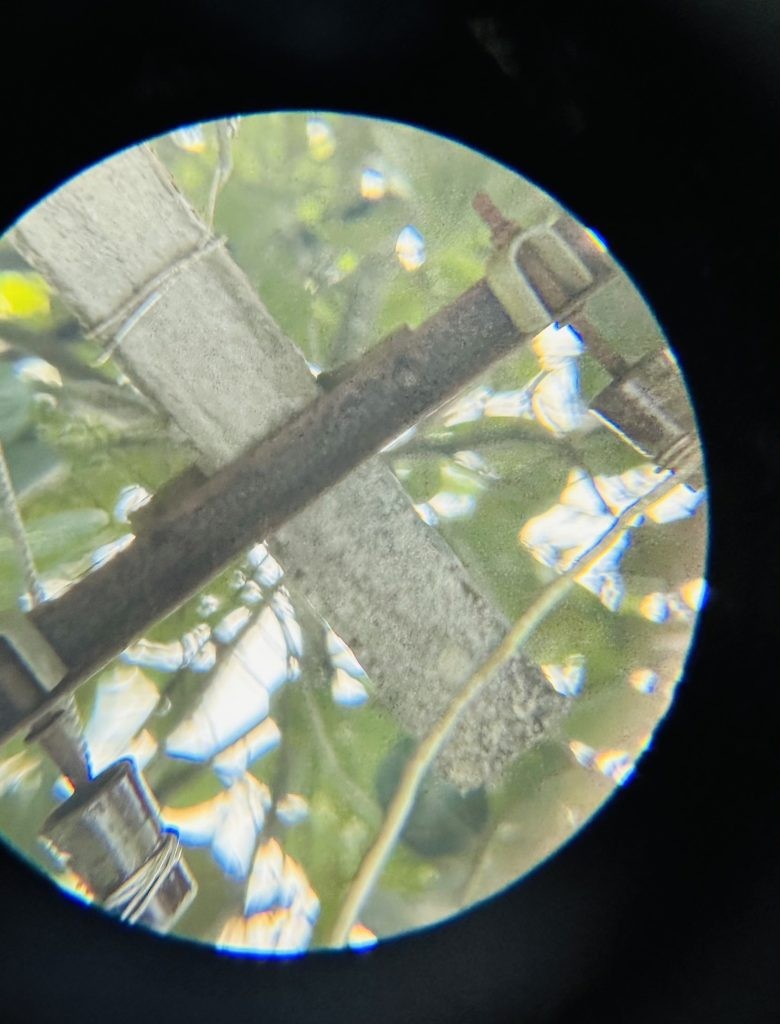
I prefer the cross arms on a telephone or power pole. That gives me a very well-defined target right where the cross arm meets the pole. But the top of a chimney, a letter on a distant sign, or something similar can work as well. Anything that will provide a precise, distant point to target.
Steps for Aligning The Finder With Telescope
Here are the steps to follow.
- Remove the lens caps and put your lowest-power eyepiece (the eyepiece with the highest number) in the diagonal or focuser. Now look along the tube of the telescope, not the finder, and point the optical tube in the direction of the target. Now look through your eyepiece and adjust the optical tube until you can see that pole, chimney, or whatever target you’ve chosen. Get your target centered in the field of view of the eyepiece. Remember, you haven’t used the finder scope at all until this point.
- Switch to a high-magnification eyepiece (the one with the lowest number) and again, get that target centered as best you can.
- Lock the scope into position in any way you can. You don’t want the telescope to move.
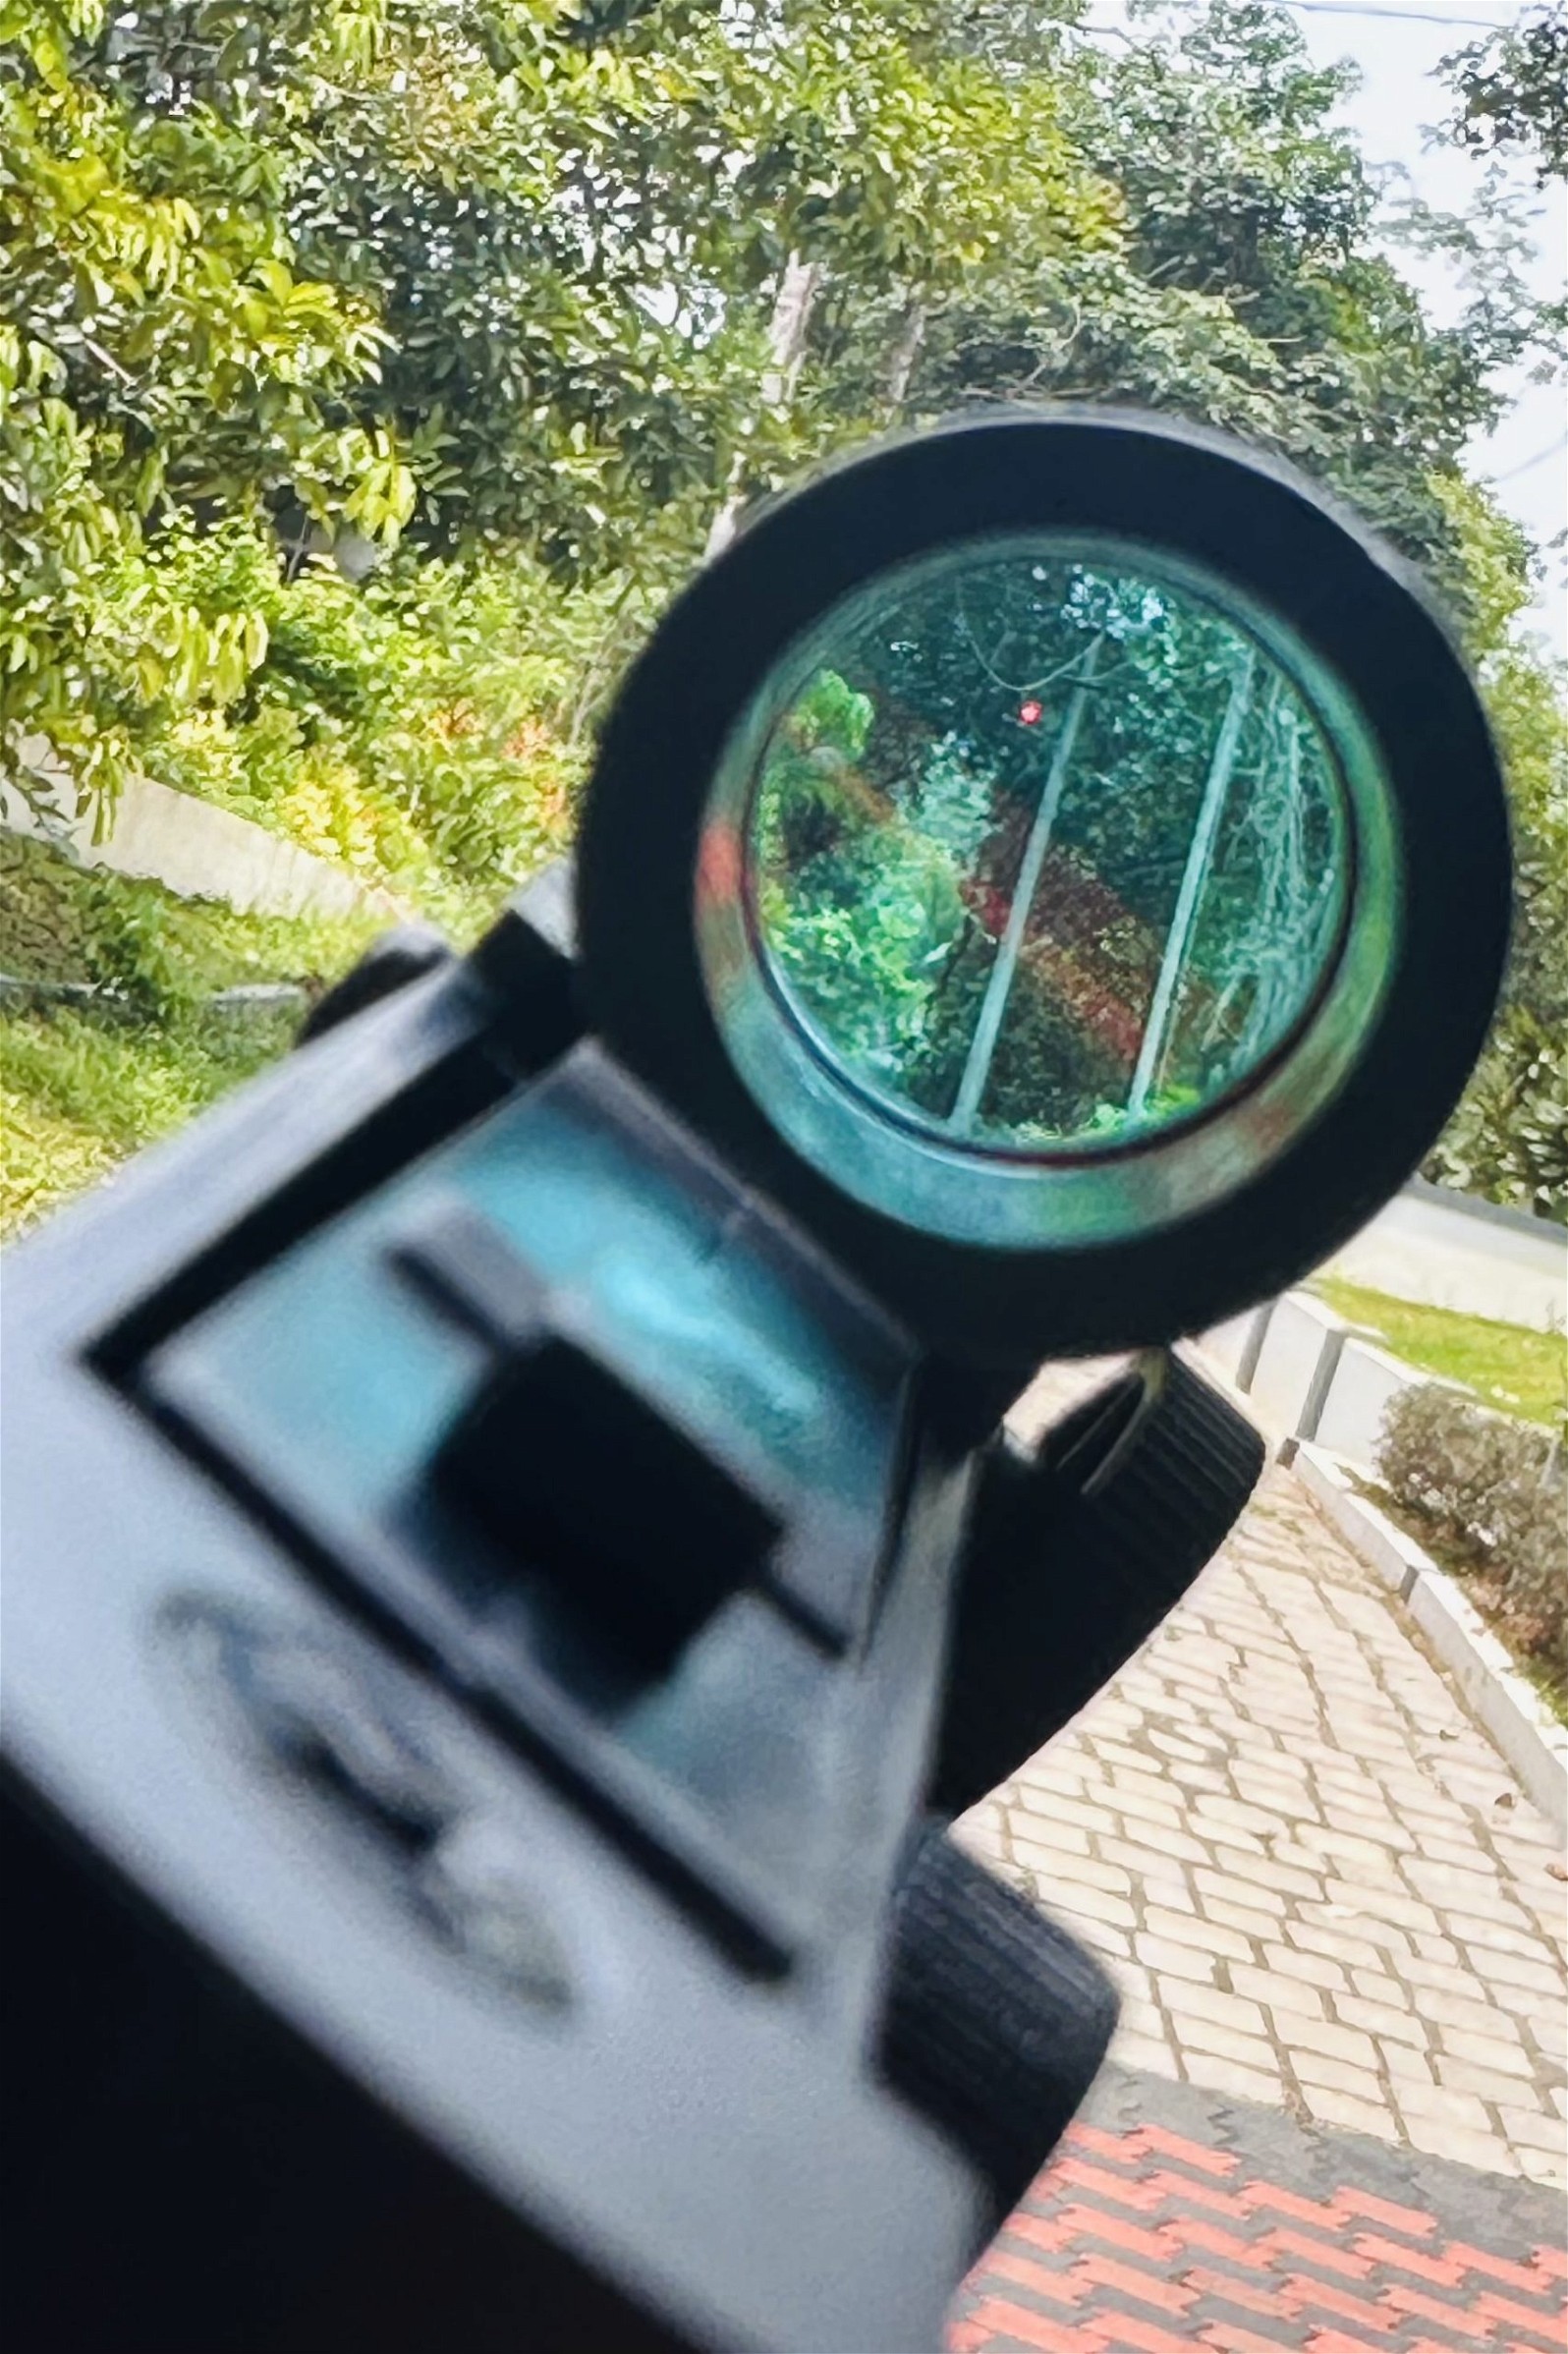
- Look through the finder and spot the target.
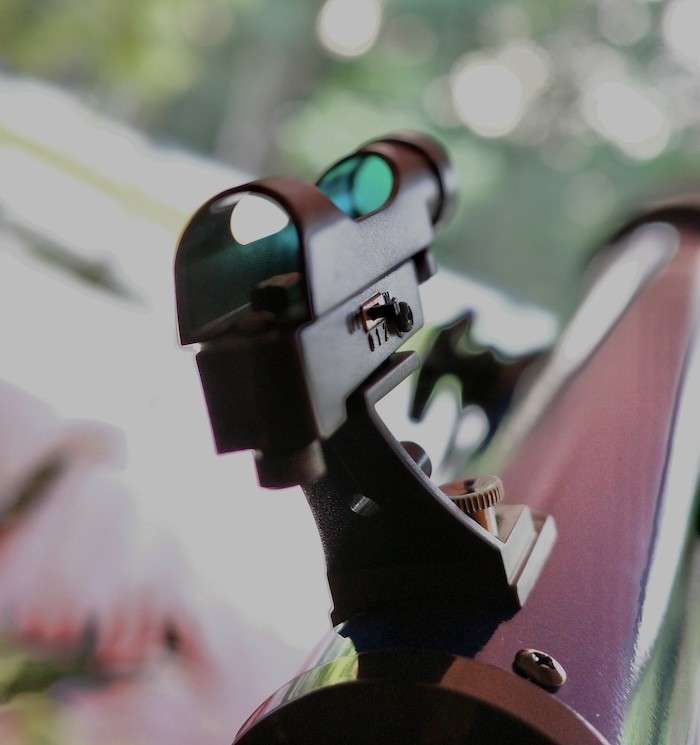
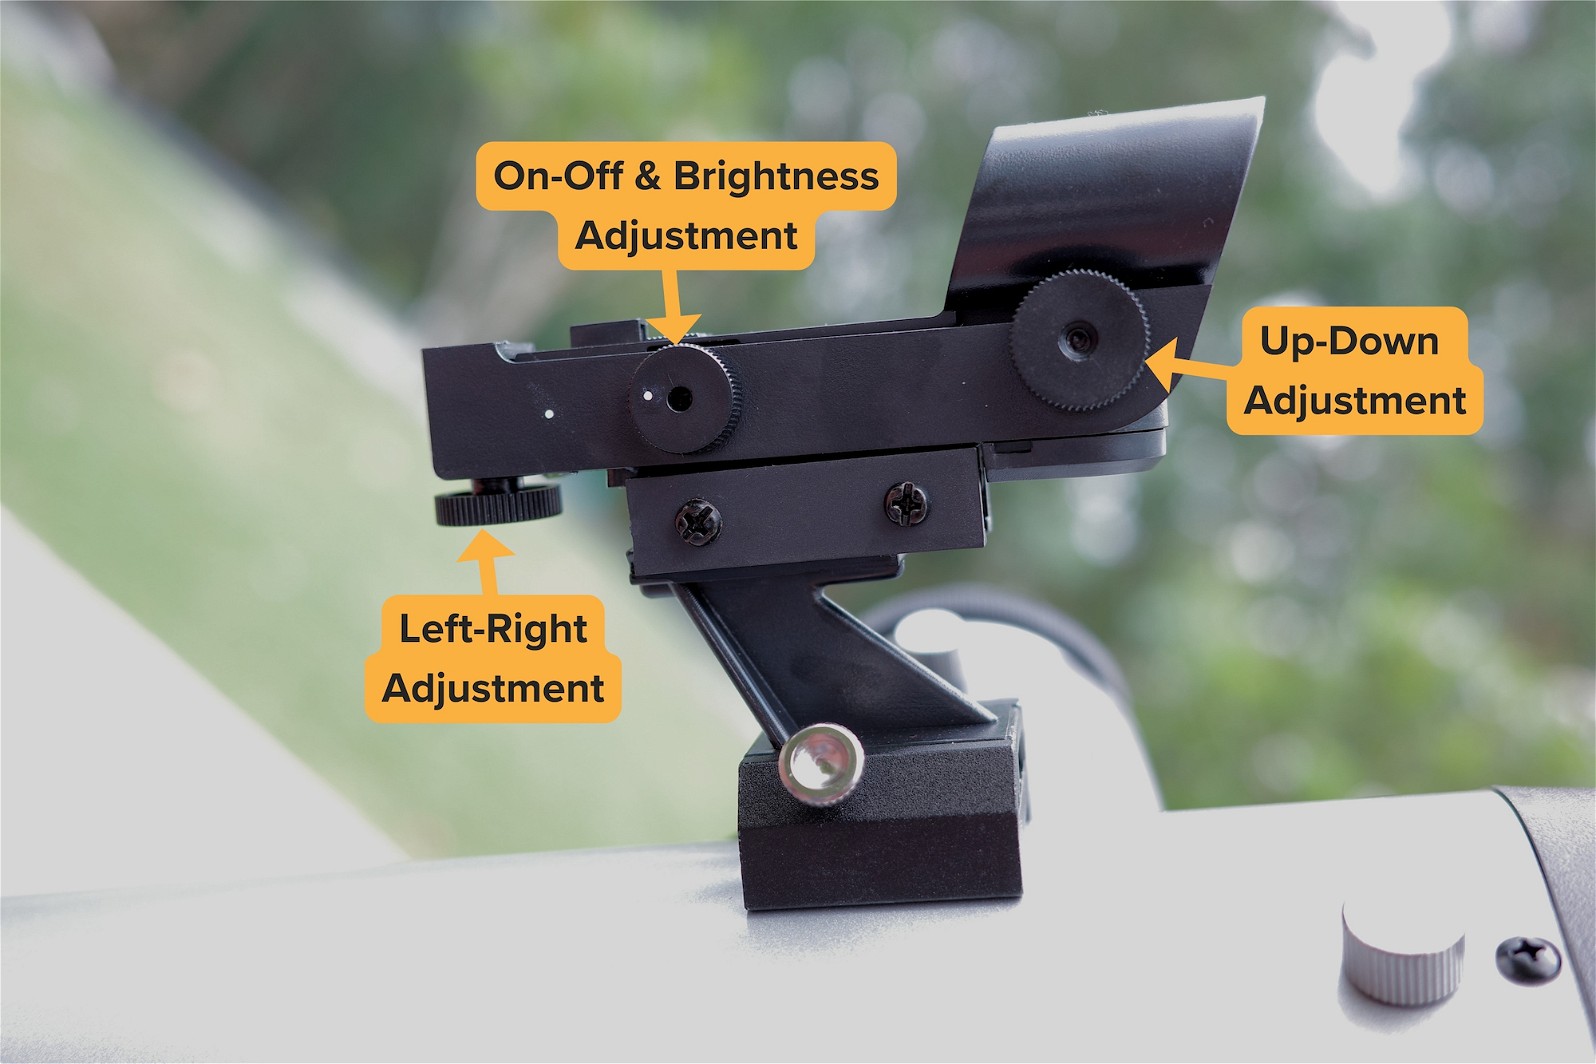
- Using the adjustments on the finder bracket, adjust the finder until the target is centered in the finderscope. Typically, there are screws on the side, top, or bottom that allow you to adjust the position of the finder.
- Go back to the eyepiece and make sure the scope has not moved. The target should still be centered.
- Check the finder again and make any final adjustments.

When the finder and the telescope are both lined up at the same point on your target, you are all set and ready to take your telescope out under the stars.
The Final Confirmation Before Observation
Finders have a tendency to get bumped or moved, especially if you take off at the end of your observing session when you put the telescope away. My first step during each observing session is to pick a bright star and use the finder to point the optical tube. You should be able to do this quickly, so the fact that the star is moving should not be a problem.
- Put the star in the center of the finder
- Look through the eyepiece and center the star in the eyepiece
- Go back to the finder and make any small adjustments that may be needed to center the star
- Compare the view in the eyepiece and the finder to be sure they agree
This quick tune-up at the start of your observing session only takes a few seconds, and will save a lot of effort throughout the evening, as your finder and your scope will be in the best alignment possible for the evening.