Technical Specs
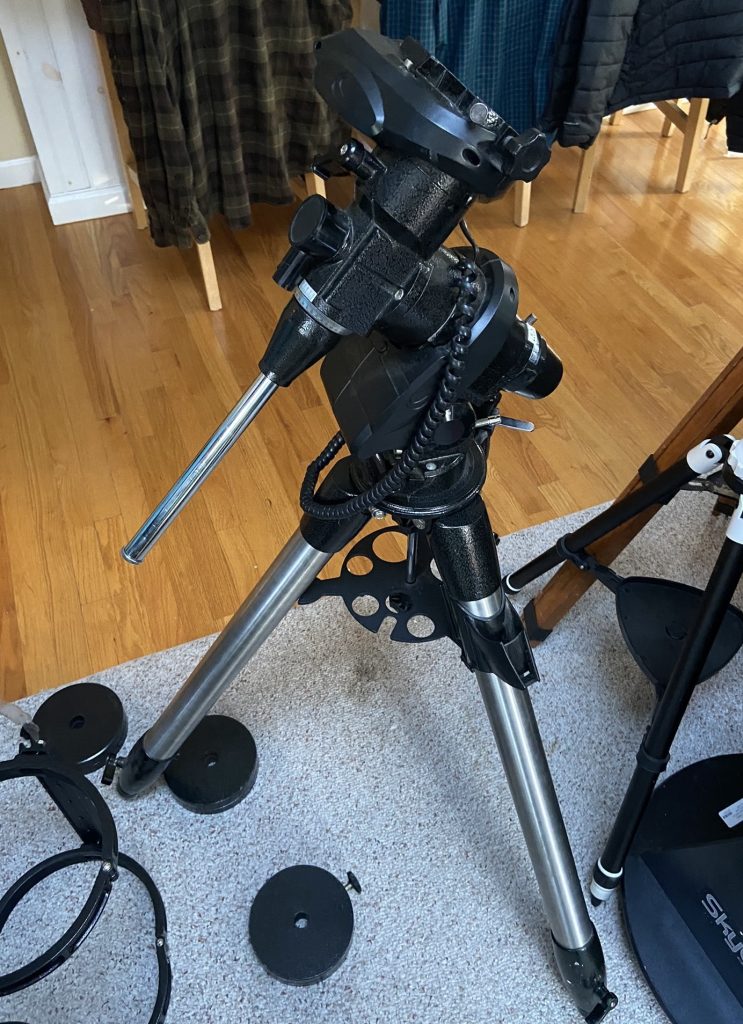
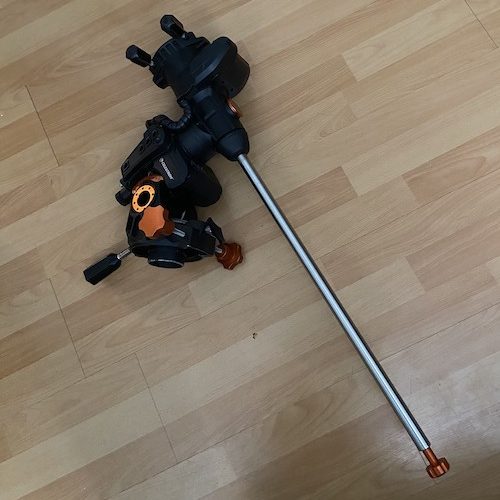
The Advanced VX mount is a fairly standard German equatorial mount designed for both visual observation and astrophotography.
The Advanced VX has a fairly strange history dating back to the 1980s. Celestron started importing telescopes from Japanese manufacturer Vixen to fill in for supply issues during an astronomy craze prompted by Halley’s Comet. The Vixen Super Polaris, and later the upgraded Great Polaris, mount was sold with a few different telescopes but eventually became a mainstay of Celestron’s product line, as they were able to offer it with the C8 optical tube at a lower price than any other C8 configuration.
After importing Vixen mounts became uneconomical in the 1990s, Celestron tried and failed to develop a new US-made mount in a short-lived partnership with Losmandy. Eventually, they gave up and found a manufacturer in China, Synta (which would grow up to buy Celestron outright later on), to manufacture a clone of the Great Polaris, the CG-5, originally sold as a manual or motorized-only mount.
The CG-5 was turned into the CG-5 ASGT by adding electronics to it. The Advanced VX is basically just an updated version of the CG-5 ASGT, with better motors and software.

This is why the Advanced VX has funny-looking plastic casings holding its motor and requires you to plug in the declination motor, which is completely detached from the rest of the mount. It is a Ship-of-Theseus evolution of a 40-year-old design, whereas competing mounts like the Sky-Watcher HEQ5, which is manufactured at the same plant by the same people but is vastly superior, are of a clean-sheet design and thus able to be considerably better performers.
While it has a stated weight capacity of 30 lbs, the Advanced VX can handle a little more than that for a visual-only telescope, such as a Celestron C11 optical tube, though I would recommend you just get a beefier mount for the job. It can also hold a 10” Newtonian reflector, but given that you can only do this for visual purposes and the eyepiece will frequently end up in uncomfortable positions, a 10” Dobsonian makes more sense.
Most manufacturers either make up the weight capacity for astrophotography or use the weight capacity for visual use. The general rule is to use no more than ½ to ⅔ of the stated weight capacity of a mount for imaging. In the case of the Advanced VX, 15 lbs. and a 1000 mm focal length are about as far as you can go before tracking and guiding errors become too pronounced to do long exposures. As such, a 90 mm or smaller refractor, a 6” Newtonian astrograph, a 6” SCT and reducer, or an 8” Hyperstar/RASA is as much as it can hold.
The newer incarnations of the Advanced VX ship with a dual Vixen/CGE-style dovetail saddle, though you’ll need an aftermarket saddle upgrade to use Losmandy-style dovetail plates, which are nearly identical to the CGE but won’t fit on the Advanced VX by default. Generally, wider dovetails are more stable and thus recommended for larger telescopes, especially for astrophotography.
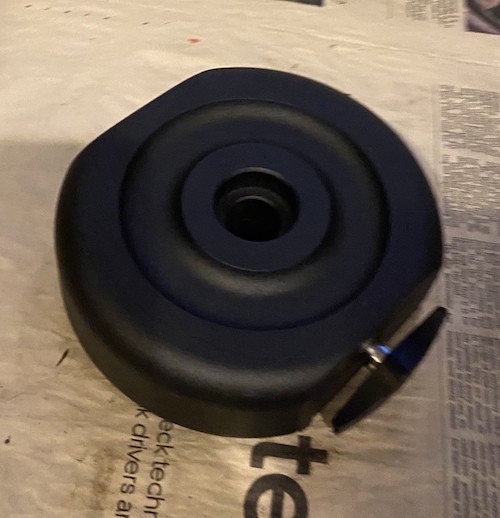
Two 11 lb counterweights come with the Advanced VX by default, which is enough for almost anything you can put on it. Smaller 7-lb and 17-lb counterweights that fit the shaft are good for lighter or heavier payloads; having a single lighter counterweight is more stable than using more weight further up the shaft. For instance, you’re better off with one 17 lb counterweight near the end of the shaft than two 11 lb units partway down; likewise, a 7 lb weight is better than having an 11 lb weight attached just below the bottom of the collet holding the declination shaft on.

The Advanced VX can run off either AC or DC power, though only a DC cord is provided by default. The mount is controlled with a standard Celestron NexStar+ push-button hand controller.
Mechanical Flaws
You might be wondering why I’m complaining about the Advanced VX’s astrophotography performance. Aside from problems with some kinds of software (see below), the Advanced VX is built in a way that is fundamentally wrong.
For starters, to drive the mount in both right ascension and declination, the Advanced VX uses cheap servo motors instead of stepper motors.
Servo motors allow the Advanced VX to quickly throw even a big C11 or C9.25 optical tube across the sky, and they cost less than steppers. The servos the Advanced VX uses are probably from an industrial application like a printer. Servos can also achieve better accuracy than steppers for GoTo, as they require a position encoder to be built in to tell the mount where it is. But servos can make too much torque, have a lot more moving parts that can fail, and can’t usually track nearly as well as a stepper motor.
Servos can also be damaged if they over-torque. Over-torque with the Advanced VX can occur when the mount is trying to carry a too-heavy or unbalanced telescope, if it swings far past the meridian in the sky, if the mount or telescope collides with something like its own pier or tripod, or if a software glitch occurs. This is part of why using a heavy instrument on the Advanced VX long-term is unwise, as the mount may be plenty stable but eventually die from over-torquing itself. Many older Advanced VX and ASGT mounts have died on account of servo motor burnout. Yes, the motors can be replaced, but there are stepper-driven mounts from the 1990s that still work great.
Stepper motors are “dumb”; they don’t have a position encoder to tell them where they are aimed, but they are able to tell where their gears are currently rotated, allowing them to do things like save the rough position of the mount when it is powered off. Steppers can also have belts added to improve drive accuracy, are more reliable, are quieter, and cannot over-torque themselves.
The accuracy of the Advanced VX’s tracking and guiding is limited by its servos, but the declination axis is also a big problem. It has problems that can affect the telescope’s pointing over time and mess up any autoguiding. The counterweight shaft of the Advanced VX is held on by a collet that threads onto the bottom of the declination axis. The collet can cause the declination axis to seize up (and risk over-torquing), though DIY fixes for this problem are easy. The biggest issues are that the declination axis bearing fundamentally does not support the weight of the telescope or shafts, nor does it keep the shaft parallel or centered in its housing, which is a recipe for wobbly and inconsistent movement. The antiquated phone jack cable required to allow the rest of the mount to power and communicate with the declination axis is a frequent cause for slight hiccups in guiding due to faulty power or data throughput.
You can get a nicer cable, you can clean the jacks, you can “hypertune” the mount, and you can grease it all you want, but you can’t fix poor workmanship. No matter what you do, the Advanced VX mount’s declination axis is going to be inconsistent due to its inadequate mechanical design and servo motors.
Doing those upgrades, along with making sure the gears mesh correctly, the polar alignment is accurate, etc., will help, but you shouldn’t expect consistently good deep-sky astrophotography results with anything more than 800mm focal length or 15 lbs on the Advanced VX with autoguiding, and you shouldn’t really use the mount for long exposures without guiding.
The Advanced VX and its earlier incarnations used to ship with a Vixen-style dovetail saddle. Newer ones have a dual Vixen/CGE-style saddle to hold either size dovetail plate. You have to remove the screws from one side of the saddle to switch to the other dovetail size, which is a bit annoying. However, the more serious issues are the thumbscrew grips and the fact that, for whatever reason, the saddle was not designed to take true Losmandy-style dovetails, which are identical to the CGE apart from being a hair wider.
The Advanced VX does not come with a polar scope, but Celestron does sell them. The All-Star Polar Align can be used for alignment without a polar scope or the ability to view Polaris, but a polar scope or PoleMaster is preferable and faster to use.
Software Compatibility
The Advanced VX has ST4 ports (basically more phone jacks) for autoguiding as well as accepting the provided hand controller and additional accessories such as Celestron’s StarSense AutoAlign, SkySync GPS, or SkyPortal WiFi adapter, all of which are mainly accessories for visual astronomers. For deep-sky imaging, you’ll want to connect to the mount via your PC. This is where the fun begins.
Many equatorial mounts today support plugging into your PC directly via a serial-to-USB EQDIRECT cable that attaches to the port on the side of the mount normally reserved for the hand controller. This allows your mount to directly talk to your PC, albeit through technology that was last relevant when only three Star Wars films existed. Newer, fancier mounts just have a USB port on the side.
The Advanced VX, however, requires that you connect the mount through its hand controller, which then plugs into your PC. Until recently, the hand controller itself had to be connected to a serial-to-USB port, making a daisy chain of PC → USB → serial —> hand controller → serial —> mount. However, seemingly to celebrate the 25th anniversary of the USB standard, Celestron recently decided to finally bother with a MicroUSB port on the bottom of the NexStar + controllers, reducing points of failure and also greatly simplifying connection—though MicroUSB is of course the least common USB cable available, so you will need to keep track of the cable you use to plug it in as a replacement isn’t trivial to obtain. You can easily add a USB controller to older Advanced VX and ASGT mounts if you want to.
The Advanced VX does support standard ASCOM drivers but does not receive them in the same way as most other mounts since Celestron has elected to use their own proprietary software with it. As such, you cannot control it with EQMOD, which would be a great tool to slightly improve guiding accuracy, because EQMOD allows your autoguider to talk to the mount through your PC. However, since this is not possible, guiding the Advanced VX must be done by connecting the guide camera directly to the mount via the ST4 port and another RJ-11 cable, which, as with the declination axis, is prone to having data errors, a bad connection, or simply not responding.
If you have a planetary camera that lacks a guide port, with any other mount you’d be able to use it anyway. For the Advanced VX and other Celestron mounts, it had better have a port, or you’re going to need to purchase a new camera. A guided astrophotography setup with a PC and Advanced VX uses no less than five cables, whereas any other mount will only require two.
Using the Advanced VX for Visual Astronomy & Planetary Imaging
Using the Advanced VX for visual astronomy is fairly simple, and it’s only slightly more complex to set up than an alt-azimuth mount. For solar, lunar, and planetary imaging, you’ll want to follow the same procedures and use an eyepiece in your telescope to conduct alignment and center your target object.
After assembling and leveling the tripod, polar aligning the mount, balancing the telescope on top, and powering it up, the Advanced VX will prompt you to do a GoTo alignment, which is as straightforward as with any other Celestron GoTo mount. You center your telescope on two or three bright stars, and the alignment is done. Quick setup functions like Solar System Align are also available, though they are less accurate. The NexStar+ hand controller has a database of over 40,000 objects and features like a “Sky Tour” and the ability to program in new objects like comets. You can also sync it periodically to fix tracking errors if you have imperfect polar alignment or balancing and adjust the slew speed when buttons are pushed—useful for making tiny corrections to center an object at high power or with a camera.
Using the Advanced VX for Deep-Sky Astrophotography
Technically, there’s nothing stopping you from just setting up the Advanced VX and running it with the hand controller for deep-sky imaging. You would center your target by taking short exposures or by simply looking through an eyepiece or DSLR. However, you can’t autoguide the mount, which is crucial to keeping it on target during long exposures, with such an arrangement, and it’s generally considered best practice to run everything with a PC of some kind.
After all of your cables are connected, the scope and mount are ready to go, and the mount is turned on, you’ll want to switch the hand controller to “PC Direct Mode” and take control with your computer using image sequencing and capture software like NINA or Sequence Generator Pro. You’ll simply have the computer and your camera take a blind guess at where to aim and then take short exposures to plate-solve until you are on target. This software can also run any motor focusers or filter wheels if you are using them, as well as conduct a “meridian flip” when needed, which is an extremely time-consuming and frustrating process to do manually.
Once you are on target and exposures start, autoguiding the Advanced VX can be done via PHD2 and a suitable guide scope, camera, and cables. If your mount is correctly aligned, the images are in focus, the guiding works, and the software can be trusted to do your meridian flip, you should be able to walk away from your telescope, Advanced VX, and computer and go to sleep, look through a telescope, or watch a movie.
Should I buy a Used Celestron Advanced VX?
If the price is right, a used Advanced VX offers even better value than a new one. You should always buy a used Advanced VX, or really any GoTo mount, from a reputable seller or someone who has actually used it to be sure you are not getting a dead mount. Electronics issues can range from simple fuse and solder repairs to a dead motor board, which is usually as expensive to replace as the mount itself. Replacing the tripod is fairly straightforward, however, as is replacing missing knobs or a broken dovetail saddle.
Alternative Recommendations
The Advanced VX is a good option if it’s what you can afford, but visual observers might want a heavier-duty mount, and imagers will benefit from a stepper-driven one.
Under $2000
- The Sky-Watcher HEQ5 Pro is slightly lighter and more compact than the Advanced VX but has stepper motors, EQmod compatibility, a better dovetail saddle, a retracting counterweight shaft, and a built-in polar scope.
- The Sky-Watcher EQ6R Pro has significantly more payload capacity than the Advanced VX as well as features similar to the HEQ5 with belt drives added to its stepper motors.
- The iOptron CEM26 is a high-quality, if low-capacity, option with unique features for imagers.
$2000+
- The Sky-Watcher AZ-EQ6 can be used as an alt-azimuth mount and also has the ability to be aimed manually, along with all of the features of the EQ6Ri.
- The Celestron CGX is a heavy-duty mount with slightly more payload capacity than the EQ6R for visual work but otherwise slightly inferior astrophotography capabilities.
Aftermarket Accessory Recommendations
A polar scope or Polemaster for the Advanced VX is a must for accurate polar alignment, crucial for good images and frustration-free visual observing.
You’ll also need some sort of power source. Celestron’s own PowerTank Lithium is one such option, but almost any rechargeable lithium battery with enough watt-hours and voltage will do. If you’re powering a laptop for long nights of imaging, a beefier power supply will be needed than for casual visual observation. By default, the Advanced VX ships with a cigarette lighter DC power cord; most power supplies will have a DC to DC cable, and Celestron sells an AC adapter for the Advanced VX as well.
A replacement dovetail saddle from ADM will allow you to use actual Losmandy-style dovetail plates as well as Vixen and CGE plates on the Advanced VX, as well as not marring your shiny dovetail with bites from set screws. And while sold for the CGEM, ADM’s counterweight shaft extension fits the Advanced VX as well, allowing you to achieve the same counterbalance with fewer counterweights.

If you use the Advanced VX with a long refractor, building your own tripod pier extension may be a good idea. There are also pier adapters sold for the Advanced VX to attach to a custom permanent or portable observatory pier.
Carry cases for the Advanced VX may also be a good investment. Apertura’s soft case combo includes a simple bag for the tripod and a soft case for the mount head, which reuses the packing foam that comes with the mount’s shipping box.


